A sample text widget
Etiam pulvinar consectetur dolor sed malesuada. Ut convallis
euismod dolor nec pretium. Nunc ut tristique massa.
Nam sodales mi vitae dolor ullamcorper et vulputate enim accumsan.
Morbi orci magna, tincidunt vitae molestie nec, molestie at mi. Nulla nulla lorem,
suscipit in posuere in, interdum non magna.
|
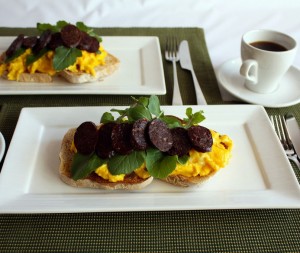
Breakfast is one of my favourite meals and I love trying to cook different things at home as well as we when eat out. We don’t tend to eat out too often (because we think we eat well at home :)) but when we do it is often for breakfast. We have tried a few places and one of our very favourites is Sayers Food in Leederville (Western Australia). I have written about another breakfast there that inspired me to attempt to recreate their Banana chocolate bread.
We recently had breakfast with our good friend, M, and the boys decided upon the scrambled eggs with spicy Italian sausage and spinach drizzled with a balsamic glaze. Sounds delicious, right? Well let me tell you, I think I was lucky to even be able to get a taste as it was wolfed down rather quickly with several muffled, mouthful comments of “this is really good” being expressed. And I could understand why. Firstly, I have always sincerely appreciated the scrambled eggs at Sayers, they just get them right every time and I tend to judge a cafe on their coffee and scramble. Secondly, the balance of the dish was spot on. Light and fluffy scramble with crunchy, spicy sausage, the heavy, iron flavour of the spinach and the sweetness of the balsamic glaze all worked in harmony to create a wonderful meal.
So I guess you can see why I was inspired to try and recreate this dish at home. Although nothing is ever quite the same at home for several reasons. I don’t have a commercial kitchen in my house, nor do I have a sous chef to assist me with the preparation, and the big one, I’m not a qualified chef! However, I knew that starting with the freshest, best quality ingredients that I possibly could would go a long way to helping me create something memorable. So here is a rundown of what I used in my breakfast. The eggs were free range and came from a friends family, the ‘sausage’ came from our recent trip to the Venison Farm in Margaret River, the rocket was grown in our garden and I made the sourdough bread myself.
So here is what I made with these wonderful ingredients.
‘sausage’ and scramble (recipe by Fiona at Food 4 Thought)
per person – serves 1
Ingredients
60g (2ozs) venison chorizo (or any other sausage you like)
2 slices sourdough bread
3 eggs
1 (scant) tablespoon thick (35%) cream
pinch sea salt
1 teaspoon butter
½ teaspoon olive oil
15g (0.5ozs) rocket/baby rocket leaves
Preparation
Preheat two medium frying pans over medium heat. Slice chorizo into thin slices on an angle. Place slices into a dry pan and cook until slightly crisp, turn and repeat on other side. Once cooked, remove from pan, drain on paper towel and keep warm.
In the meantime, cook bread as desired.
Place eggs into a large bowl and whisk to just break up the eggs and whites but not combine them completely. Add cream and salt then gently whisk to fold through the eggs. In the second frying pan, add butter and oil and allow to heat a little. Pour egg mixture in and leave if to set a little. When you can see it is just set on the bottom and the top is still liquid, drag a spatula or spoon from one side of the pan to the other, turning the eggs over as you do so. Continue this process until the eggs are cooked as you like them.*
Place the toast onto a serving plate, top with the eggs then the rocket and finish with slices of chorizo.
My tips/alterations: *I chose to use venison chorizo because I didn’t have any sausage. The venison is also lower in fat than other meats so this makes the breakfast slightly healthier. You can use whatever you prefer. *As you can see by the photos there is also a distinct lack of balsamic glaze. I did make it by reducing balsamic vinegar and a small amount of sugar but forgot to put it on the dish until we were halfway through eating it. When we did try it with the glaze we both agreed that because of the lack of the iron flavour from the spinach to balance out the sweetness of the glaze the dish was nicer without it. *You can bake the chorizo if you prefer by placing it on a lined oven tray and baking it in a 180°C (350°F/Gas 4) oven for about 7 – 10 minutes. *I like my eggs to be light and fluffy, and the cream certainly assists in making them that way. I also like the yolks and whites to be a little separate with a preference for my eggs to be a little under cooked rather than over cooked. Remember, when you cook eggs they will continue to cook even after you have removed them from the heat and even from the pan. Overcooked eggs equals rubbery scramble.
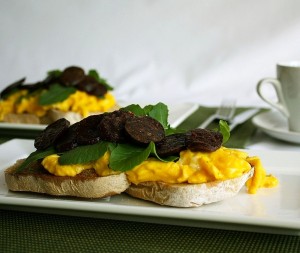 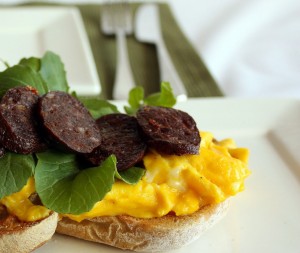
ease: 7.5/10. There is nothing too difficult about each element but getting the timing right can be challenging as can the eggs.
prep time: 10mins.
cooking time: 10mins.
total: 20mins.
taste: 8.5/10. We both really enjoyed this, although I did over cook the chorizo a little. The lack of glaze didn’t affect the flavour and I probable did us a favour by forgetting to put it on.
would I make it again: I already have. I make us a version of scrambled eggs most weekends. I think I will try different sausages next time just for fun.
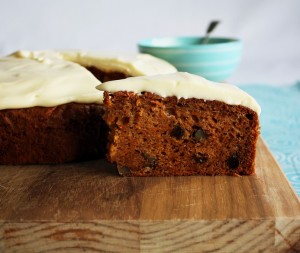
When we go over to friends for a casual dinner they will sometimes allow me to bring dessert. I love being able to make things that I know they love. Recently, Aunty J invited us for Friday night pizza so I insisted on providing the sweet treat to follow our main and she was happy for me to do so.
I knew that one of her favourite sweet treats is carrot cake. I have made one for her previously and she said it was the best she had tasted so I decided to use the same recipe. It comes from someone that many foodies around the world would recognise but I don’t tend to cook many of her recipes.
When I am teaching my classes some participants ask who my favourite celebrity chef is. My response is always the same. I don’t have a particular favourite, I think they all serve a purpose and have a following and that variety is always good. This answer is not because I am trying to be diplomatic but rather it is the truth. The chefs I admire tend to be those generally unheard of, those who achieve in their own city and write the odd cookbook or two but that is about it. I know there are some people out there who are religious followers of one or two chefs and only cook from their books/magazines and that is great if that is what they like to do. I just like to try and find things that others may not.
Back to this recipe. It is from Donna Hay, or at least from her recipe book, Classics 2.
carrot cake with cream cheese frosting (recipe from Donna Hay)
makes 22cm (8 – 9inches) round cake
Ingredients
Carrot cake
1¼ cups (220g/7 ¾ozs) brown sugar
¾ cup (185ml) vegetable oil*
3 eggs
1½ cups (225g) plain (all-purpose) flour
1½ teaspoons baking powder
1 teaspoon bicarbonate of soda (baking soda)
1 teaspoon ground cinnamon
½ teaspoon ground ginger
2 ½ cups (300g/10.5ozs) grated carrots (about 5)
½ cup (60g) chopped pecan nuts
½ cup (80g) sultanas
Cream cheese frosting
250g (8.8ozs) cream cheese, softened
⅓ cup (110g) icing (confectioner’s) sugar, sifted*
1 ½ tablespoons lemon juice
Preparation
Preheat oven to 180°C (350°F/Gas 4).
For the carrot cake, place the sugar and oil in the bowl of an electric mixer and beat for 2 – 3 minutes. Add the eggs gradually and beat well. Sift the flour, baking powder, bicarbonate of soda, cinnamon and ginger over the sugar mixture. Add the carrot, pecans and sultanas and mix until just combined. Pour into a greased 22cm (9inch) round cake tin lined with non-stick baking paper and bake for 55 – 60 minutes or until cooked when tested with a skewer. Cool in tin.
For the cream cheese frosting, process the cream cheese in a food processor until smooth. Add the icing sugar and lemon juice and process until smooth. Spread frosting on the cooled cake.
My tips/alterations: *I choose to use less sugar and oil in my cake to make it that little bit healthier. My measurements were 200g (1 cup) brown sugar and 167ml (2/3 cup) of oil. The cake came out less oily than a normal carrot cake but was still quite moist. I would make it this way again. *When I made the icing I put the icing sugar in the food processor first and pulsed it to break up the lumps, that way it does not need sieving. *I cooked the cake in a 21cm pan at 170°C for 55 minutes in a fan-forced oven.
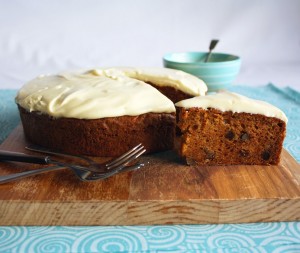 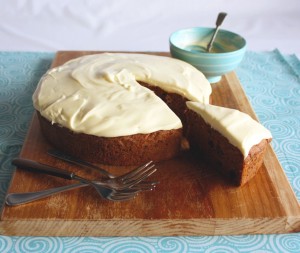
ease: 9/10. Basic cake method and a food processor makes light work of the icing.
prep time: 30mins.
cooking time: 55mins.
total: 1 hour 15mins.
taste: 9/10. I love this carrot cake. The pecan nuts and sultanas give it a textural and flavour difference and the carrots that I used were extremely sweet so the flavour that came from them was delicious. The cream cheese frosting is divine and the little bit that was let in the bowl disappeared very quickly.
If you make this to take to friends I am sure you won’t have any to bring home :).
would I make it again: Yes. It is Aunty J’s favourite, so I am sure it will be made again and again. Besides, it is so easy, why wouldn’t I.
As you may already know I never seem to need an excuse to bake something as it is one of my favourite hobbies. However, when there is a good reason for doing so it makes it that little bit more exciting. Last Monday was National RSPCA cupcake day here in OZ. So what is cupcake day all about I hear you ask. Cupcake Day for the RSPCA (Royal Society for the Prevention of Cruelty to Animals) is the biggest bakeoff in the Southern Hemisphere and involves Cupcake Cooks around Australia baking cupcakes and hosting a Cupcake Party to raise vital funds for the non-profit community organisation.
My workplace was fully supportive of the project with several groups holding morning teas to sell their wares and donate funds raised. I spent about 8 hours on Sunday making over 120 cupcakes, icing my last one at 10.30pm. While many people made some amazing, decorative and elaborate designs (which gave me cupcake envy) I decided to make three different flavours each with their own special icing.
G & I packed everything up on Monday morning and did our best for this fabulous cause, eventually raising over $150.00.
To digress slightly, I must admit that I am not a big cupcake maker so when it came to finding some recipes to bake I went hunting far and wide. The internet came up trumps with so many good recipes to choose from. In the end I settled on vanilla with coloured glace icing, chocolate with chocolate butter cream and banana pecan with maple syrup butter cream. I can’t tell you which flavour was favourite as they were all devoured by the end of the day.
We must thank all those who purchased and/or donated to the cause, our little girl is very proud of you all!
 High 5 for a job well done!
vanilla cupcakes with glace icing – (recipe from Exclusively Food)
makes 12 cupcakes.
Ingredients
125g (4ozs) unsalted butter, softened
2/3 cup (150g/5.3ozs) caster sugar
1 teaspoon (5ml) vanilla extract
2 large eggs
1 1/4 cups (188g/6.6ozs) self-raising flour
125ml (1/2 cup) milk
Icing
1 1/4 cups (175g/6.2ozs) pure icing sugar, sifted
1 teaspoon (5g) butter, softened
1 tablespoon plus 1/2 teaspoon (22ml) boiling water
Preparation
For the cupcakes, preheat oven to 180°C (350°F/Gas 4) or 160°C (325°F/Gas 3) if using fan-forced oven. If you are not using a fan-forced oven, adjust the oven rack to the middle of the oven.
Line twelve 1/2-cup capacity muffin pan holes with cases. I used paper-lined foil cases.
Using an electric mixer or electric hand-held beaters, beat the butter, sugar and vanilla together in a large bowl, starting on low speed and increasing to high once the sugar is incorporated. Beat until the mixture is pale and creamy, stopping the machine once or twice during beating to scrape down the side and base of the bowl with a spatula.
Add one egg to the butter mixture and beat for about a minute. Stop the machine and scrape down the side and base of the bowl. Repeat with remaining egg. Sift about one third of the flour over the butter mixture. Stir with a spoon or beat with the electric mixer/beaters on very low speed until the flour is just incorporated. Add about half the milk (about 1/4 cup) and stir or beat on very low speed until just combined. The mixture will probably look curdled at this stage. Repeat the process with the remaining flour and milk, making sure that you finish with flour and do not over mix the batter.
Divide the mixture evenly among the cases (about 1/4 cup batter per case). Bake for about 20 minutes, until the cupcakes are light golden. When they are ready, a skewer or thin-bladed knife inserted into the centre of a cupcake will come out without any batter attached, and the cupcakes should spring back when lightly pressed in the centre. Allow the cupcakes to cool in the pan for about five minutes, and then place them on a wire rack to cool completely.
When cupcakes have cooled, make glace icing (see instructions below). Use a knife or offset spatula to spread the cupcakes with the icing. If you wish to attach decorations, do so before the icing sets.
Store the cupcakes in an airtight container at room temperature. The cupcakes can be made up to two days before serving. If sprinkles are used, the colour may bleed into the icing over time.
For the icing, stir icing sugar, butter and boiling water together in a small bowl until smooth. Use the icing immediately. If it starts to set before you have finished the cupcakes, stir in a few drops of hot water. Add colouring as you wish.
My tips/alterations: *To make sure that your cupcakes are light and fluffy always making sure you alternate the flour and milk when mixing the batter. You should also always start and finish with the flour. *If the batter looks curdled at any stage don’t worry just keep going. Once you add a little of the flour it should start to come together. *To ensure that all cupcakes have the same measure I like to use an ice-cream scope to put the mixture into the cupcake cases. *If you want your cupcakes to come out flat on top make sure that you don’t fill them above halfway up the cases but remember you will get more cupcakes from the recipe, but I don’t see that as a bad thing :).
chocolate cupcakes with chocolate butter cream – (recipe from Cadbury Chocolate Cupcakes)
makes 12 cupcakes
Ingredients
100g (3.5ozs) unsalted butter, softened
2/3 cup (150g/5.3ozs) caster sugar
1 teaspoon (5ml) vanilla extract
2 eggs, lightly beaten
1 cup (150g/5.3ozs) self-raising flour
1/3 cup cocoa
½ teaspoon bicarbonate of soda
125ml (1/2 cup) milk
Chocolate butter cream
60g unsalted butter, softened to room temperature
1¼ cups icing sugar, sifted
1 tablespoons cocoa
1 tablespoons milk
Preparation
For the cupcakes, use exactly the same preparation as above. The only difference being when you sieve the flour, sieve the cocoa and bicarbonate of soda with it.
For the chocolate butter cream, combine all ingredients in a food processor and process until smooth.
My tips/alterations: *These cupcakes are very similar to the vanilla recipe with just a little less butter and the addition of cocoa. Therefore the same tips/alterations will apply as they did to the previous recipe. *The bicarbonate of soda gave them a crunchy topping but the middle was still light and fluffy. *The chocolate butter cream asks you to sieve the icing sugar and cocoa. I skipped this step and just put these two ingredients in the food processor first and pulsed them to break up any lumps then added the butter and milk and blended to make it smooth.
banana pecan cupcakes with maple butter cream – (recipe by Fiona at Food 4 Thought)
makes 12 cupcakes
Ingredients
A.
125g (4ozs) unsalted butter, softened
1/2 cup (110g/3.8ozs) caster sugar
1 large egg
B. (dry ingredients)
1 1/4 cups (188g/6.6ozs) self-raising flour
1 cup (120g) pecan nuts, finely chopped
C. (wet ingredients)
550g (approx 3 medium/5.3ozs) very ripe bananas, peeled and mashed
1/2 cup milk
Maple butter cream
60g unsalted butter, softened to room temperature
1¼ cups icing sugar, sifted
1 tablespoons maple syrup
Preparation
For the cupcakes, use exactly the same preparation as for the vanilla cupcakes. The only difference being the dry ingredients will be the flour and the nuts while the wet ingredients are the banana and milk mixed together. So when alternating wet and dry ingredients all these will be included. Remember to always start and finish with dry ingredients.
For the maple butter cream, combine all ingredients in a food processor and process until smooth.
My tips/alterations: *These cupcakes are similar to the Banana bran muffins that I have made previously but with a few adjustments the mixture becomes lighter and smoother. I mix the nuts in with the flour so that the flour slightly coats the nuts and this prevents them from all sinking to the bottom of the mixture. *The butter cream recipe asks you to sieve the icing sugar. I skipped this step and just put it into the food processor first and pulsed it to break up any lumps then added the butter and maple syrup and blended to make it smooth.
 
ease: 9/10. Basic cupcake recipes. The more you do the quicker you get, trust me 🙂
prep time: 30mins.
cooking time: 20-25mins.
total: 55mins.
taste: 9/10. These all came out light and fluffy and were exactly what they said on the box. That is, the vanilla tasted like exactly vanilla cake and the chocolate ones exactly like chocolate, and although they were not as rich as some cupcakes I have eaten in the past I really liked them for exactly that reason. They weren’t too sweet or too rich, they were just lovely. My favourite were the banana pecan and the maple syrup butter cream complimented them perfectly.
would I make it again: Yes. Anytime for a good cause.
 Can I have a cupcake......please?!
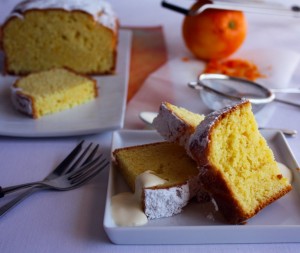
Whenever we have visitors I always like to have something in the cupboard to offer them to have with a cup of tea or coffee. So when G told me that he was going to catch up with a couple of mates and then invite them over for a cuppa my first reaction was one of complete panic. Why? Because the cupboard was completely bare and if there are ever any packet biscuits in the house they are for making into cheesecake cases only.
I had wanted to make an orange cake over the past few days because I had a couple of oranges that were looking a little sad and lonely in the fruit bowl. I just hadn’t got around to it because as we all know, life can get busy sometimes.
I have a little bit of a reputation with G’s friends for being a “good cook” so I wanted to make something delicious. With limited time before three hungry men descending on our house I went scouring for a cake recipe that would fit the bill.
I searched my trusty Women’s Weekly “Cakes and Slices Cookbook” and came up with nothing. I wanted something plain and simple and while all of the recipes sounded delicious I either didn’t have the time or the necessary ingredients to create them. Next on my list was Stephanie Alexander’s “The Cook’s Companion” because (due to its enormity) it appears to have everything. Disappointingly, the recipe I found wasn’t one that would suit this occasion. The clock was ticking and while my eyes were flicking from one shelf to the other trying to find something that would inspire me, my brain was doing cartwheels because I knew there had to be a recipe somewhere in amongst my vast cookbook collection that would be exactly what I needed. Then it hit me, of course, who was one of Australia’s original, old-school cooks whose cookbook would no doubt have a simple orange cake recipe? It was Margaret Fulton to the rescue.
I remember watching tv programs as a child and listening to Margaret being interviewed, I loved her style of cooking even back then. When I read her orange cake recipe I loved its simplicity but also the fact that it was a little different to a melt and mix method so I was excited to see how it would turn out. Although making a new recipe is possibly not an ideal thing to do when you about to have guests I was ready and headed for my kitchen with my enthusiasm in toe.
orange cake – (recipe from Margaret Fulton’s Encyclopaedia of Food & Cookery)
makes one 20cm round or square tin or one 21 x 11cm loaf tin.
Ingredients
125g (4ozs) unsalted butter or soft margarine
grated rind and juice of 1 medium orange
3/4 cup (170g/6ozs) caster sugar
2 eggs, separated
2 cups self-raising flour
pinch salt
2 – 3 tablespoons milk (I used 3 tablespoons)
icing sugar, to sift over top
Preparation
Preheat oven to 180°C (350°F/Gas 4). Prepare either a 20cm (8 inch) round or square tin or 21 x 11 cm (8 1/2 x 4 1/2 inch) loaf tin by greasing with melted butter, lining the bottom with buttered greaseproof paper and dusting the sides with flour.
Cream together butter, orange rind and sugar until light and fluffy. Add egg yolks one at a time and beat well after each. Sift flour with salt and fold into creamed mixture alternately with strained orange juice and milk, beginning and ending with flour.
Beat egg whites until stiff peaks form and gently fold in. Spoon mixture into prepared tin of your choice, and bake for 35 – 40 minutes or until a skewer is inserted in the centre and comes out clean.
Turn out onto a wire rack and when cool dust with icing sugar.
My tips/alterations: *I use unsalted butter in all f my cooking as I prefer to be able to control the amount of salt that goes into my dishes. *I found this mixture quite dense and heavy until I added the egg whites. It was lightened considerably after their addition. I cooked this in a 170°C fan-forced oven and it took about 37 minutes *If you would like this to have a more intense orange flavour you could add a teaspoon of orange blossom water to the batter.
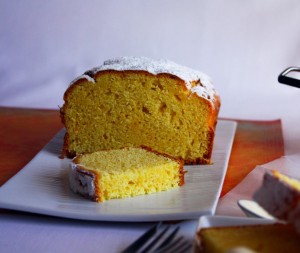 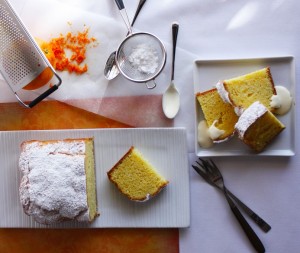
ease: 9/10.
prep time: 30mins.
cooking time: 40mins.
total: 1 hour 10mins.
taste: 9/10. When I removed this cake from the oven I was astounded with the weight of the cake. It was one of the lightest cakes I have ever made. The smell of it baking was almost driving three grown men to distraction and when we all tasted it the flavour didn’t disappoint us. I didn’t wait for this to cool (naughty I know) which meant I had to cut it into thick pieces (how sad 🙂 ) and serve it warm, sprinkled with icing sugar and accompanied by a dollop of cream. G and his friends really enjoyed it. They all commented on the texture contrast of the crunchy outside and feather light inside. The orange flavour came through well without being overpowering.
It was also delicious cold and I didn’t have to worry about how long it would keep because I couldn’t find it in the cupboard a few days after baking it. Between G & I we devoured it all rather promptly.
would I make it again: Yes, yes, yes. For me, this was my perfect orange cake. Thanks Margaret!
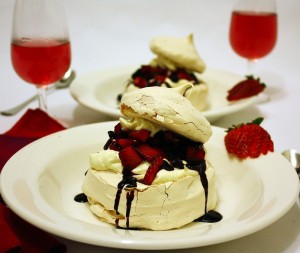
I have always loved having friends over for dinner parties more than going out to a restaurant. Don’t get me wrong, I don’t mind paying someone to create delicious food and to do the washing up for me. I just like to try and create things that I think my friends enjoy eating. I used to be a really bad dinner party hostess, trying to do too many dishes, spending way too much time in the kitchen and never enough time with my guests. Over the years I have learnt that it isn’t just about the food but the whole experience. These days I try to balance things a little better, still creating good food but many of the things I do are made ahead of time and just assembled close to serving.
One of the desserts that fits in this category is meringue. I love the fact that with only two main ingredients (egg whites and sugar) a delicious, delicate shell can be created and set aside until it is time for the adornment. Meringue can also travel well as mentioned in my meringue stack post, so it is a great thing to make if you are asked to take a dessert to a party. I also like that making this kind of dish means using an ingredient (egg whites) that may otherwise be thrown away. Waste not want not is definitely one of my philosophies.
G’s good friend, M returned from a trip overseas a few days ago so we were eager to have him over for dinner to hear how much fun he had. I decided to cook a roast lamb with duck fat potatoes and other vegetables along with my prepare-ahead dessert. The recipe I chose to use came from Stephanie Alexander’s “The Cook’s Companion” and while her recipe for orange cake I made recently didn’t suit my purpose, the recipe for “Sue’s Meringues” was perfect. The clincher that made me use this recipe was part of the comment prior to the recipe “……..you can turn leftover egg whites into a wonderful treat that stores well and turns simple berries into a special dessert.”
meringue nests with berry and cream topping – (recipe from The Cook’s Companion adapted by Fiona at Food 4 Thought)
makes three large nests with little tops
Ingredients
meringue nests
2 eggs whites (70g/2.5ozs)
1/2 cup (100g/3.5ozs) caster sugar
1/2 teaspoon vanilla extract
topping
250g/8ozs frozen blueberries, thawed
1 tablespoon lemon juice
1 1/2 tablespoons (30g/1oz) castor sugar
250g strawberries
200ml whipping cream
to serve, sliced strawberries
Preparation
Preheat oven to 150°C (300°F/Gas 2) and line a baking tray with non-stick baking paper.
For meringues, place egg whites into large bowl of an electric mixer, beat until stiff peaks form and then add sugar, a little at a time, still beating. Beat in vanilla and continue beating until all sugar has dissolved. Test by dipping your finger into the mixture and rubbing fingers together, if it feels smooth the sugar is dissolved. Place large spoonfuls of mixture onto baking tray approximately 10 cm/4 inches in diameter. Hollow out the centre and smooth edges to create a nest like shape. Repeat to make three nests. With remaining mixture, place spoonfuls onto tray and using the back of a spoon swirl on top to create a tip. These will become the lids. Bake for 45 minutes. When cooked, leave the oven door slightly ajar and allow meringues to cool completely in oven.
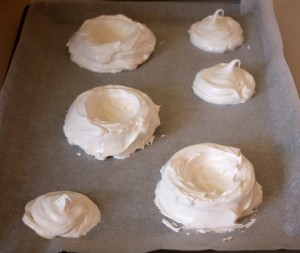 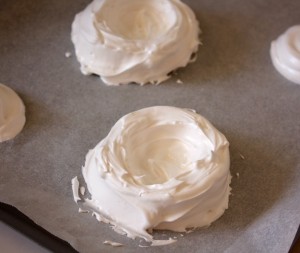
When ready to assemble make topping by placing blueberries, lemon juice and sugar into a small saucepan and heating until simmered for 3 – 5 minutes or until the berries begin to soften. Pour into a sieve over a bowl and allow to drain well. Return the reserved liquid to the saucepan and simmer for a further 5 minutes or until it is reduced to a thick syrup. In the meantime, place blueberries into a bowl, hull strawberries and cut into similar size pieces to match blueberries. Add to bowl and mix to combine, set aside.
Whip cream until soft peaks form.
To serve, place meringue nest into serving bowls, add 1 tablespoon of berries to each nest, cover with cream then divide remaining berries between nests. Top with a little more cream then place meringue lid on top. Drizzle with blueberry and lemon syrup and decorate with a sliced strawberry.
My tips/alterations: *To increase or decrease the quantities for the meringue recipe the general rule of thumb is to allow 60g/2.1ozs of sugar per egg white. I like to allow about 50g/1.75ozs which means that the centre has a more chewy texture rather than being like marshmallow. *You may need to experiment with your oven and how it cooks meringues as that will affect the outcome and ever oven is different. *If syrupy droplets form on the surface of the meringues after cooking, you will know that you have overcooked them; liquid oozing from the meringues means that they are undercooked. *You can store the meringues in an airtight container lined with greaseproof paper.
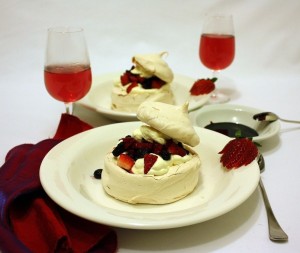 
ease: 7/10. Meringue can be tricky at first but once you get it right it is simple from then on.
prep time: 20mins for meringues + 10mins for topping, sauce and assembly.
cooking time: 50mins.
total: 1 hour 20mins.
taste: 9/10. Talk about impressive! There was immediate silence when these were consumed aside from the undertones of pleasurable moans and groans coming from all corners of the table. To say that we all loved these seems like such an understatement.
The meringue was crunchy on the outside but sticky on the inside, just the way we like it. The soft cream provided the little bit of richness to carry the berries which provided a textural and flavour contrast to the meringue. The syrup was a perfect balance of sweetness with that little but very important zing of the lemon.
This would have to be on my top 10 dessert list.
would I make it again: Without hesitation. Make ahead, delicious and impressive, that’s my kind of dish.

Winter time in Perth is generally milder than most other Australian cities but this year it has been exceptionally so. Last weekend temperatures were in the mid 20’s (70°F) with no rain in sight for at least another five days. While the lack of rain causes its own issues I was grateful for the sun when G mentioned one of his mates was coming to visit with his two girls. I love having children over to visit and Amy & Charlotte are both gorgeous, well mannered girls who are a pleasure to have around. They were most excited to be able to play with our little girl (the dog) outside in the sunshine.
Whenever we have guest I always like to have something to offer them, however because G & I have been eating healthy lately our cupboard was bare. Being given just over half an hour warning of their imminent arrival meant that I needed to bake something that was quick, easy and kid friendly. I pulled out one of my trusted recipe books and went hunting. My decision was guided by the difficulty and cooking time involved because I wanted them to be able to enjoy something while they were visiting.
As soon as I read this recipe I remembered that I had made them once before and knew that they would suit my requirements perfectly, so I set to work on creating something delicious.
peanut butter crinkles – (recipe from The Australian Women’s Weekly Big Book of Beautiful Biscuits)
makes about 25
Ingredients
125g (4ozs) unsalted butter
1/3 cup (70g/2.5ozs) sugar
1/3 cup (70g/2.5ozs) brown sugar, lightly packed
1/2 teaspoon vanilla extract
1/2 teaspoon grated lemon rind
1/3 cup (100g/3.5ozs) peanut butter
1 1/4 cups plain (all-purpose) flour
1 teaspoon bicarbonate of soda (baking soda)
pinch salt
Preparation
Preheat oven to 180°C (350°F/Gas 4).
Cream together butter, sugars, vanilla, lemon rind and peanut butter until light and fluffy. Add sifted flour, soda and salt and mix until a stiff dough forms.
Shape heaped teaspoonfuls of mixture into small balls with floured hands, place on a lined oven tray allowing room to spread slightly. Press biscuits down lightly with a fork, first crosswise then lengthwise, for a crinkled effect. Bake in oven for 15 minutes, until golden brown. Remove from oven and cool on tray.
My tips/alterations: *I use crunchy peanut butter because I like the texture but any ki9nd will do. *I use a mini ice-cream scoop to measure out the mixture for each cookie, that way they are all even and cook the same. *When pressing the cookies down with a fork I dip it in flour before each time which stops the fork sticking to the mixture. *Cooling these on the tray allows them to set properly before moving them.
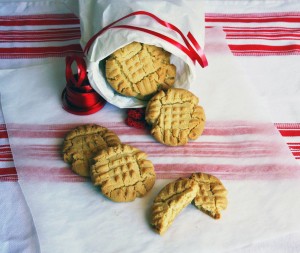 
ease: 9/10.
prep time: 30mins. Rolling the mixture into balls takes most of this.
cooking time: 15mins.
total: 45mins.
taste: 9/10. These were delicious! They have the perfect balance of saltiness and sweetness, they melt in your mouth while also having a slight crunch to them. The brown sugar even makes the centre just a little bit chewy. G & I had to make sure that these left the house otherwise our healthy eating would have gone out the window.
Amy and Charlotte loved them as did those in G’s office who were lucky enough to get one.
I did keep a few hidden at home to nibble when we are desperate for a cookie fix.
would I make it again: Absolutely. One of the easiest cookies I’ve made and they tasted great.
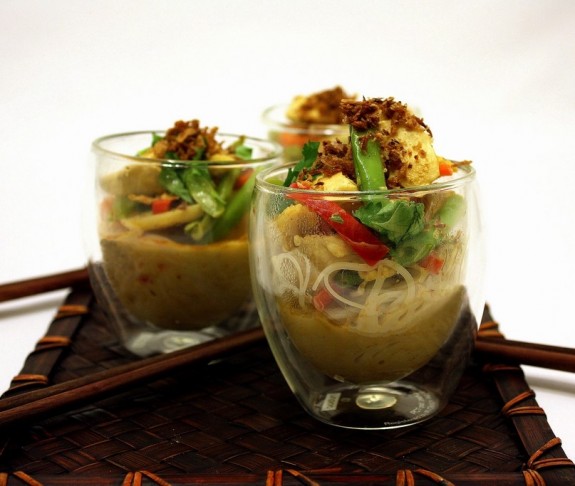
Going back to work after 12 months leave (I know, lucky me) has meant a few changes in our house. Little Miss (our gorgeous puppy) has lost her automatic door opener (me) throughout the day, G has to help with the housework a little bit more and I have to think of meals that are not only tasty but quick and easy to prepare after work. While I was on leave I could ponder over dinner for most of the day before deciding what we would eat, now it is definitely a plan ahead decision process which can be challenging.
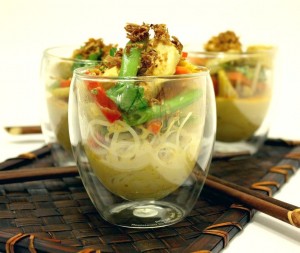
I am fortunate that we both love Asian flavours because a lot of the dishes that come from Asian cuisine are quick cooking and this recipe is no exception. We both enjoy Laksa, so I decided to make a chicken version for one of our mid-week meals. I wanted to be able use ingredients that I had in the fridge or cupboard so designed my recipe around what I could find. After getting home from work, walking and feeding the dog I got stuck in and within an hour dinner was on the table. Oh how I love quick and easy mid-week meals.
healthy chicken laksa– (recipe by Fiona at Food 4 Thought)
serves 2 hungry people
Ingredients
250g (8ozs) skinless chicken breast
vegetable oil, for shallow frying
2 teaspoons laksa paste
1 teaspoon garlic paste or 2 cloves, crushed
1 teaspoon ginger paste or 2.5cm (1 inch) piece of fresh ginger, grated
250ml (1 cup) chicken stock
70g (2.5ozs) carrots, peeled
70g (2.5ozs) red capsicum
70g (2.5ozs) beans
100g (3.5ozs) baby sweet corn
70g (2.5ozs) sliced water chestnuts
200ml (3/4 cup) coconut milk
4 x spring onions (green shallots)
100g (3.5ozs) rice vermicelli noodles
1 handful of coriander leaves, roughly chopped
100g (3.5ozs) bean sprouts
to serve, lime juice and fried shallots
Preparation
Place a large, deep frying pan or a large, heavy-based saucepan over medium heat. Cut chicken breast into bit size pieces. Add 1 tablespoon of oil to pan and add chicken pieces. Cook for 2 – 3 minutes each side or until chicken is lightly golden but not cooked through. Remove from pan and set aside. Chop carrots, red capsicum, beans and corn into 2.5cm (1 inch) batons.
Add laksa paste, garlic and ginger to pan and heat for 1 – 2 minutes, stirring so that it does not stick to the base. Add 60ml (1/4 cup) chicken stock, stir and simmer for a couple of minutes, until sauce thickens. Add chicken back to pan, stir to coat and cook for 2 – 3 minutes before adding the remaining stock. Bring to boil, add all vegetables except bean sprouts, stir and reduce heat slightly. Simmer for 6 – 10 minutes until vegetables are cooked as desired. In the meantime, place noodles into a large bowl and cover with boiling water. Using a fork, separate the noodles and set aside.
Once vegetables are cooked, add coconut milk and shallots and turn heat off. Taste for seasoning and adjust as desired.
To serve, place noodles in the base of bowls, add beans sprouts, top with chicken and vegetables then pour over broth. Sprinkle with chopped coriander, spritz with lime juice and top with fried shallots.
My tips/alterations: *The brand of laksa paste that I use is Hogan’s Chilli Sauces because they are Australian made. I use 1 teaspoon each of Thai Laksa Paste and Laksa Paste because they have their own individual flavours and I like the blend of the two. If you like a more intense flavour, add more paste. *I cook my vegetables so that they are still a little crunchy as I like the textural differences throughout the dish. *Substitute the vegetables with anything that you like and use seafood in place or chicken if preferred. * I like to use the fine vermicelli noodles but you can use any that you like and cool them as directed. *Fried shallots can be purchased from Asian supermarkets and some supermarkets. *If you would like to make this a vegetarian dish, substitute the chicken with tofu.
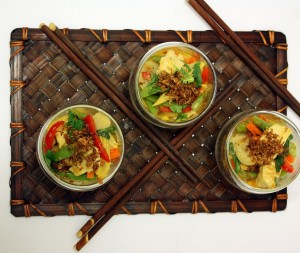
ease: 8/10. This is not difficult and it is best to get all the ingredients prepared before beginning.
prep time: 30mins. Rolling the mixture into balls takes most of this.
cooking time: 20mins.
total: 50mins.
taste: 8/10. This is one of those dishes that will make you feel healthy when you eat it.
We loved the blend of flavours and textures that made us want to have another mouthful, then another and another until disappointingly we realised that we had devoured it all.
would I make it again: Definitely. This was satisfying, delicious and healthy all in one bowl.
In my previous few posts about pasta I mentioned that it is something that G and I don’t normally eat a lot of but it seems that in the past few weeks we have been devouring it a little more regularly. This is possibly due to a couple of reasons. The first being that my commitment to try and find recipes from my cookbook collection has meant that I have started at one end of my bookshelf and am slowly working through. Because I am the type of person who is completely (over the top) organised my books are filed into cuisine categories and I have started with Italian. The second reason is that I purchased the pasta attachment for my Kitchen Aid a few months ago and aside from one disaster I seem to have mastered the art of homemade pasta, and G is certainly appreciating my efforts.
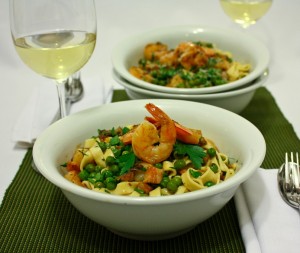
I decided upon this recipe because of the prime ingredient, the prawns. After flipping through a couple of my cookbooks for some inspiration I decided on the ingredients that I wanted to utilise. I have used smoked pancetta previously and love the salty smokiness that it brings to a dish; I added the peas for sweetness and parsley for freshness. This mix of ingredients also meant that I could give this a slightly funky name :).
I hope you enjoy my idea of a delicious dinner.
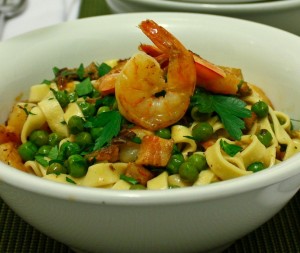
fettuccini with the four P’s (recipe by Fiona at Food 4 Thought)
makes 2 servings
Ingredients
olive oil
1/2 red onion, diced
100g smoked pancetta
16 x raw large prawns, peeled, deveined, with or without tails
2 cloves garlic, crushed
125ml (1/2 cup) white wine
125ml (1/2 cup) double (heavy) cream
200g (7osz) frozen peas
1/2 cup flat-leaf parsley leaves, roughly chopped
sea salt and ground black pepper
grated parmesan cheese, to serve
Preparation
Bring a large port of water to the boil then add a tablespoon of salt. When boiling cook fettuccini according to directions.
Meanwhile, place a heavy base pan over medium heat and add 1 tablespoon of olive oil. Add onion and cook for 5 minutes or until slightly softened and lightly golden. Remove rind from pancetta and dice into 1/2cm (0.2inches) pieces, add to pan and fry for 8 – 10 minutes, stirring regularly, until pancetta is crisp. Remove both onion and pancetta from pan and set aside.
Add another tablespoon of olive oil to pan and fry the prawns for 2 minutes each side or until they turn slightly pink. Remove from pan and add to onions and pancetta. Add garlic to pan and cook for a minute or two until golden then add wine and deglaze pan, simmer for 1 minute before adding cream and stir to combine. Add peas and cook for 3 – 4 minutes then add onion, pancetta and prawns back to pan. Sprinkle with two-thirds of parsley and stir to combine. Simmer for 2 – 3 minutes to allow flavours to combine. Taste and season as desired.
Remove pasta from water and reserve cooking liquid. Add pasta to pan and tumble to allow sauce to coat the pasta. If the sauce is too thick add a little of the pasta water, this will help loosen it.
Divide between two bowls, top with a sprinkle of remaining parsley and grated parmesan.
My tips/alterations: *If you like a lot of sauce with your pasta then you may wish to add a little extra cream to this recipe, I think 1/4 cup extra would be enough. *You could use any other pasta that you prefer and also substitute basil for parsley if you like. *For ease, you can purchase prepared prawns rather than shelling and cleaning them yourself. *Substitute the smoked pancetta with normal pancetta or even bacon if you prefer.
ease: 8/10.
prep time: 10mins.
cooking time: 30mins.
total: 40mins.
taste: 8/10. I loved this meal. The flavours and textures of the ingredients went really well together and I loved the cream sauce. G rated this 7/10, he loved the flavour but wanted a little more sauce. So I guess I’ll just have to make it again to try and improve on it.
would I make it again: Yes
I’ve never considered myself a technical genius or one to share the intimacies of my life with the rest of the world. Don’t get me wrong, I love sharing my food blog and cooking journey with anyone who is happy to read about it, I am just challenged by the many and varied methods of communication these days. Trying to get more efficient at updating my facebook page is enough for me right now. I don’t even have a twitter account. I know what you’re thinking, sacriledge in this day and age but it is not my thing.
I do find facebook great for keeping up with friends and for sharing links to my pages. One of my friends recently posted on my wall that she would like a good pumpkin scone recipe and wondered if I had one. To be honest, I have never made pumpkin scones in my life. But never being one to let a challenge go by I invested some time into researching the humble pumpkin scone. I found out that they were cemented into Australia’s culinary fare by Florence Bjelke-Petersen (or Lady Flo as she’s known), a Queensland senator during the late 80s and early 90s and wife of former Queensland premier Sir Joh. During her time as a senator she became well-known for her pumpkin scones, her reputation for them rivalling that of her political career. “I hope they remember me first for being a senator, who just happened to make pumpkin scones,” commented Florence.
I also found that there are several different methods to make these little morsels. My childhood memories of creating scones were about standing over a big bowl, rubbing the butter into the flour with my hands and I remember that they always seemed to turn out great. So when some of the recipes I viewed told me to cream the butter and sugar I felt it was the wrong thing to do even if I loved the ingredients that they had used. I finally decided that the only way to get what I wanted was to make it up myself by taking the pieces from each recipe that I liked.
I hope you like these as much as my family did.
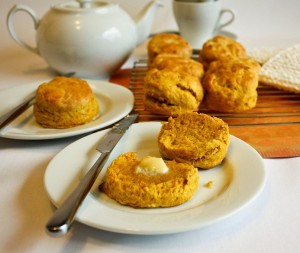
pumpkin scones (recipe by Fiona at Food 4 Thought)
makes 12 scones
Ingredients
250g (8ozs) peeled jarradale or queensland blue pumpkin, cut into 2cm pieces
300g (2 cups) self-raising flour
2 tablespoons caster (superfine) sugar
1/2 teaspoon cinnamon
1/2 teaspoon nutmeg
good pinch of salt
70g (5 tablespoons) cold butter, cut into 1 cm cubes
60ml (1/4cup/3 tablespoons) milk
1 egg
for brushing, extra milk
to serve, butter
Preparation
Preheat the oven to 200°C (400°F/Gas 6).
Place pumpkin in a steamer over a saucepan of boiling water, cover and steam until tender (about 10 minutes), then transfer to an oven tray and bake for 10 minutes to dry out. Cool, then mash with a fork. You should have approximately 3/4 cup of mashed pumpkin. Set aside.
Into a large bowl, sift flour, sugar, salt and spices. Add cubes of butter and use a fork or your hands to break/rub the butter into the flour to create a fine crumbly mixture. In a small bowl, whisk the milk and egg together, add this to the cold pumpkin and mix to combine. Make a well in the centre of the flour and pour the pumpkin mixture into it. With a flat blade knife cut through the pumpkin and flour to combine. Do not over work the mixture. Once it is just combine, tip this onto a floured workbench and sprinkle with additional flour. Using your hands, knead gently until the mixture comes together but is still a little sticky. Flatten or roll out until approximately 2cm thick, using a 5.5cm-diameter cutter dipped in flour, cut rounds (without twisting cutter) from dough and transfer to a lightly greased or lined oven tray. Collect scraps and press together, repeat the process. Brush tops with milk and bake until golden and sound hollow when tapped (10-15 minutes). Serve hot or at room temperature with butter.
My tips/alterations: *You can prepare the pumpkin the night before, cover and refrigerate until you make the scones. *My Nanna and my Mum always told me the key to making light and soft scones was to rub the butter into the flour with your hands; don’t overwork the mixture and cut the wet and dry ingredients together with a flat blade knife. *When you tip the mixture onto the bench you will need to have a bit of flour on hand as this is a sticky batter. Just keep adding and kneading in the flour until you can just handle it.
ease: 9/10. Get the kids to help with rubbing the butter into the flour.
prep time: 15mins
cooking time: 30mins. Including the cooking of the pumpkin
total: 45mins
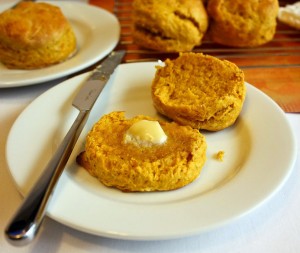
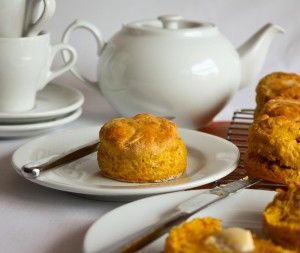
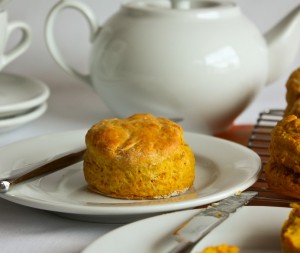
taste: 8/10. We served these exactly as suggested, warm with butter. They had a crunchy outside, soft, light and fluffy inside and great flavour. The cinnamon and nutmeg work well with the pumpkin and there is just a hint of the pumpkin flavour but not enough to turn the kids off eating them. An afternoon tea saw almost the whole batch demolished.
I want to thank Maryam for asking for a good pumpkin scone recipe. I think this is it. 🙂
would I make it again: Definitely.
Some of the recipes that inspired me:
Pumpkin scones – Gourmet Traveller
Pumpkin scone recipe – scones.org.uk
Starbucks pumpkin scones – Meemos Kitchen
Having good friends over for dinner gives me an excellent excuse to create something that I would not normally make. So when one of my girlfriends said she could join us one evening I put my thinking cap on.
My dear friend Cherie came for dinner last night and brought me some of her Mum’s wonderful free range chicken eggs that I absolutely adore. They have gorgeous deep yellow yolks and I am fortunate enough to be able get them as fresh as possible. I wanted to make sure that I was able to use these in a dessert but didn’t want to make custard or anything similar. I also had some bananas to use and really wanted to incorporate them.
I remembered a recipe that I had cooked some time ago that used both egg yolks and bananas in the filling so went hunting for it. After finding and reading it I reminisced about the delicious flavour of the rich brown butter filling and couldn’t wait to get to work.
I hope you enjoy making this to share with your friends.
brown butter banana tart
makes one 23cm tart
Ingredients
pastry
125g (4ozs) cold unsalted butter
200g (1 2/3 cups) plain (all-purpose) flour
pinch of salt
65g (1/2 cup) caster (superfine) sugar
1 small egg, lightly beaten
filling
125g (4ozs) unsalted butter
4 egg yolks
100g (1/2 cups) caster (superfine) sugar
1 teaspoon vanilla extract
pinch of cinnamon
pinch of salt
50g (1/3 cup) plain (all-purpose) flour
150g (2 small) bananas
to serve, sliced bananas, double cream or vanilla ice-cream
Preparation
Preheat the oven to 180°C (350°F/Gas 4). Lightly oil a loose base 23cm (9inch) tart tin.
To make the pastry, place the flour, salt and sugar in large bowl of a food processor and pulse to combine. Cut butter into cubes and add to processor. Process until mixture resembles fine breadcrumbs. Add egg and process until the mixture starts to come together into a dough. Tip onto a lightly floured workbench and press together with your hands, kneading briefly until smooth.
Roll out on lightly floured bench to a disk about 4mm thick. Line the prepared tart tin with pastry being sure to press into tin and neaten the edges. Set leftover pastry aside. Chill tart case in the freezer for 15 – 20 minutes, until well chilled.
Once chilled, line pastry case with non-stick baking paper and fill with weights, rice or beans, blind bake for 15 minutes or until sides are lightly golden. Remove paper and weights, return case to oven and cook for further 5 minutes, until base is cooked through.
While pastry is cooking prepare filling. In a small saucepan, melt butter over medium heat and cook for about 5 – 10 minutes, stirring frequently until butter turns light brown and smells ‘nutty’. Meanwhile, using an electric mixer, whisk egg yolks, sugar and vanilla on high speed for about 4 minutes, until pale and fluffy. Gradually add butter by pouring slowly down the side of bowl, whisking constantly to combine. Add cinnamon, salt and flour, briefly whisk until smooth.
Slice bananas and fill the base of pastry case with a single layer. Spoon filling mixture over bananas and smooth out. Bake for 25 – 30 minutes, until filling is golden and just set. Remove from oven and cool for 20 – 30 minutes (or completely). Remove from tin and serve with your choice of accompaniments.
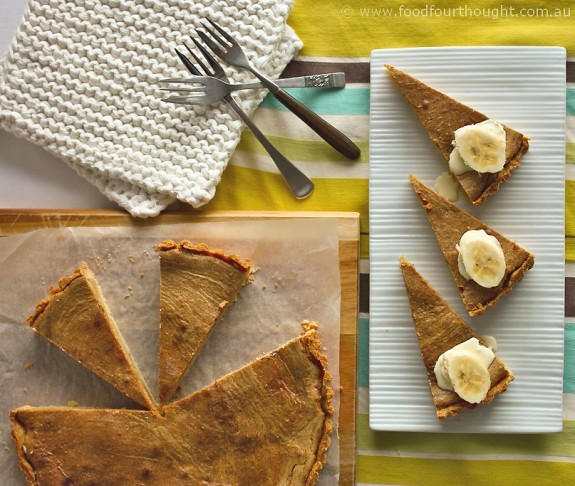
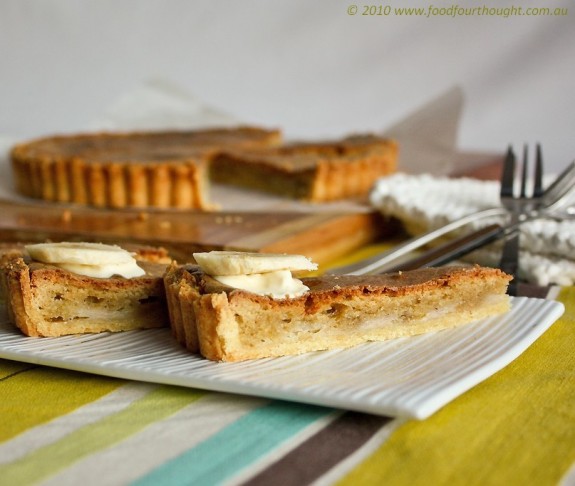
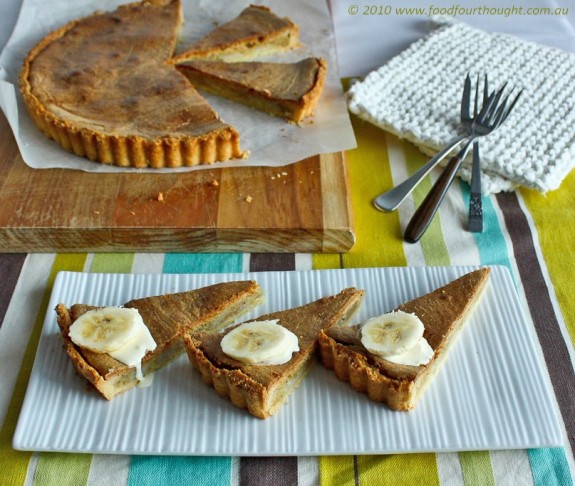
My tips/alterations: *You may find that you have some pastry left over. You can wither freeze it or make an additional small pastry case and bake it off to use at a later date. *When browning the butter you will know when it is about to go nut brown because the bubbles on top of the butter become very small and it becomes very quiet (after making a lot of noise when it was bubbling). Keep an eye on it at this stage as it turns quite quickly. *When trying to smooth out the filling mixture I used a lightly oiled spatula to avoid it sticking. *My photos show this slice to have a dense filling, which is because I left it to cool completely. If you prefer a softer centre then serve the tart warm.
ease: 7/10.
prep time: 15mins + 20 mins chilling
cooking time: 55mins.
total: 1 hour 10 mins + 20 mins chilling + 30 mins cooling
taste: 8/10. We enjoyed this at room temperature with a little double cream and sliced banana. The flavour of the banana with the brown butter filling is delicious and the pastry is sweet with just enough crunch.
We all agreed that it would also be great served warm with vanilla bean ice-cream. I guess I will need to make it again to try it served that way. What a hard life I have :).
would I make it again: Absolutely
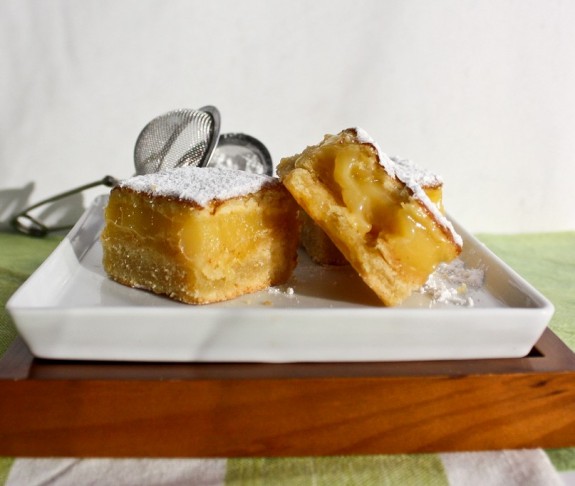
I am fortunate enough to have some wonderful friends who not only recognise my passion for cooking but also foster it in many ways. Their generosity is, at times, somewhat overwhelming although sincerely appreciated. I am often lucky enough to be given ingredients, especially home grown items such as fruit and vegetables, and who could say no to that. My dear friend, Alex, provided me with some slightly over-ripe limes recently. They were juicier, a little sweeter than normal and had a yellowish skin rather than the typical green that one would expect of a lime. Because of this I knew they wouldn’t have the sourness that they normally do and that I would need to consider that when choosing a recipe to use them in.
I have made a lime tart previously so wanted to do something similar but simpler, that would be easy for G to take to work and share around because if it is in the house I will eat it :).
Continuing my commitment to try and find recipes in my vast collection of cookbooks before searching the internet I began my research. It didn’t take long for me to discover something that I could whip up. If you have excess limes you might like to give this a try.
lime slice (from “bills food” by Bill Granger)
makes 12 large slices or 36 small pieces
Ingredients
base
200g (7ozs) unsalted butter, softened and chopped
250g (2 cups) plain (all-purpose) flour
30g (1/4 cup) icing (confectioners’) sugar
1 egg, lightly beaten
filling
6 eggs
375g (1 1/2 cups) caster (superfine) sugar
60g (1/2 cup) plain (all-purpose) flour
125ml (1/2 cup) lime juice
finely grated zest from 4 limes
icing (confectioners’) sugar, for dusting
Preparation
Grease and line the base and sides of a 23cm (9inch) square tin with baking paper. To make the base, mix the butter, flour, icing sugar and egg together in a food processor until a dough forms. Press the dough into the tin. Refrigerate the dough in the tin for 30 minutes. Preheat the oven to 180°C (350°F/Gas 4), then bake the base for 20 to 25 minutes, until pale golden.
While the base is cooking, make the filling. Whisk the eggs in a bowl, then add the sugar, flour, lime juice and zest, and whisk until well combined.
Pour the filling onto the cooked base and bake for another 20 minutes, or until the filling is set and lightly golden on top. Remove from the oven and allow to cool in the tin.
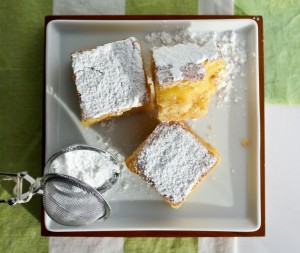
Cut into pieces and dust with icing sugar.
My tips/alterations: *I used a fan-force oven and found that the top began to brown quite quickly so I covered it loosely with foil halfway through cooking which prevented it from being over cooked. I also found that the slice took 25 minutes to cook to ensure the filling was set in the middle.
 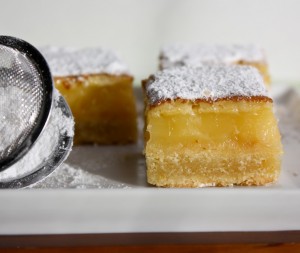
ease: 8/10. This is an easy base and filling slice method.
prep time: 15mins + 30 mins chilling
cooking time: 45mins.
total: 1 hour + 30 mins chilling
taste: 8/10. G loved the tanginess of the lime in the filling and the base had just enough crunch and a sweetness that balanced well with the filling. We both liked it best when it was slightly chilled. The remainder went to work this morning with G so we will see what his colleagues think of it :).
I would rate this a 7/10 because I found that the filling tasted a little bit too much like egg for me, kind of like when a custard is not quite cooked. G said it was fine so it might be just me. If you find it the same I think cooking the slice for an additional 5 minutes would solve this issue but it would also make the filling firmer.
It evidently went down very well with G’s workmates with several people wanting the recipe and some requests for more slice in the future.
would I make it again: Yes – whenever I have some excess limes and want something to share.
In cooking, there are certain things that are just better made at home, even if they are a little time consuming. Stock is one of those things that, whenever I have the time, I like to make myself. There are some very good chicken and beef stocks on the market so I tend not to make those varieties very often but I have not been able to find a lamb stock that suits my needs, so I make my own.
Over the weekend I had some time to do so and I had too many lamb bones in my freezer. Whenever I debone a leg of lamb I will keep the bone for making stock, unless the dog is lucky enough to get it first. If you’re not comfortable taking the bone out of the leg of lamb you could ask your butcher to do it for you or your butcher may even have some bones that he doesn’t want to give to his dog!
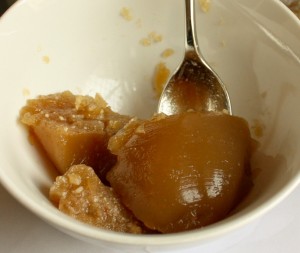
This is not a difficult recipe, it just takes a little dedication as it requires skimming every hour and needs to cook for around 6 hours. If you do all of this you are rewarded with a wonderful lamb flavoured jelly like mixture that will make any stew or sauce taste so much better you will want to make it again and again.
lamb stock (from “Cooks Companion” by Stephanie Alexander)
makes approx 1.5 litres (0.4 US gallons or 3.2pints)
Ingredients
1kg (2.2lb) lamb bones or lamb neck, chopped
1 large onion, unpeeled and halved
1 tablespoon of olive oil
1 carrot, chopped
1 leek, chopped
1 stick celery, chopped
100g (3.5ozs) mushrooms or mushroom trimmings or 50g (1.25ozs) dried mushrooms
1 cup dry red or white wine
3 stalks parsley
1 bay leaf
1 sprig thyme
a few black peppercorns
3 cloves garlic, crushed
Preparation
To make the lamb stock, roast the bones and onion halves at 200°C (390°F) in a lightly oiled baking dish until well browned. Transfer to a stockpot. Tip off all the fat from the baking dish. Put vegetable into dish and roast until well coloured. Transfer vegetables to stockpot, tip off any fat remaining and place baking dish over a high heat. Deglaze the pan with wine, stirring and scraping well. Tip deglazing juices into stock pot. Add herbs, peppercorns, garlic and generously cover with cold water. Bring to simmering point, simmer well then reduce the heat and simmer for 6 hours, skimming every hour and replacing the volume of skimmings with cold water.
Strain, pressing well on vegetables and refrigerate stock overnight for all the fat to rise. Next day remove fat. Store in air tight containers and freeze until required.
My tips/alterations: *I left the mushrooms out of my recipe because I want a pure lamb flavour. *I didn’t replace my skimmings with cold water. This meant that I had less volume of stock at the end but that it was also very gelatinous and had a great lamb flavour.
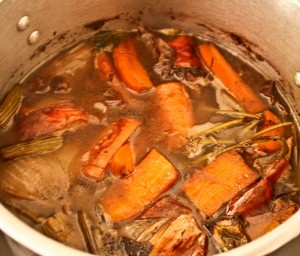 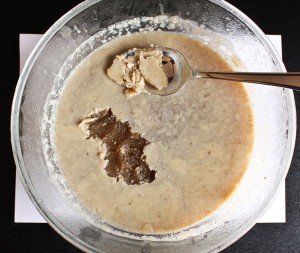
What starts as a huge pot of bubbling ingredients then separates into a gorgeous lamb flavourd jelly with the fat as a solid covering over the top.
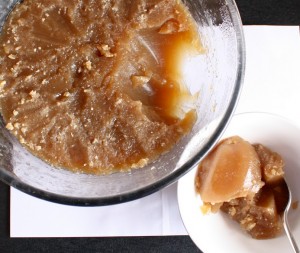 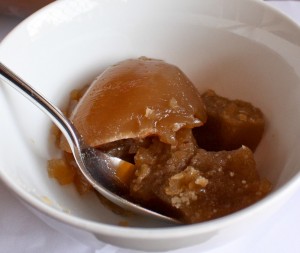
Once the fat layer has been removed you are left with a lovely mixture that could even be mistaken for caramel ice-cream at first glance.
ease: 8/10. Check out how to debone a leg of lamb and what skimming is on the internet.
prep time: 15mins
cooking time: 7.5hours.
total: 7 hour 45 minutes.
taste: 9/10. I love the consistency and intensity of this stock and that it was not too dark in colour. It will be the base for all my delicious lamb dishes for the next few months.
would I make it again: Absolutely – Whenever I can snaffle the lamb bones before the dog gets them.

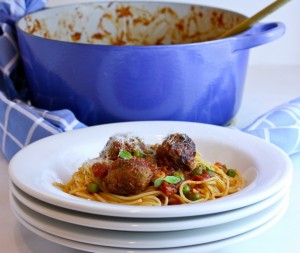
Throughout my childhood and many of my teenage years I was a competitive swimmer. This meant that I consumed large quantities of complex carbohydrates to fuel my body for the long training hours. One of the most frequent things that I used to eat was pasta. I think that was because it was something the whole family could enjoy which made it easy for Mum to prepare. Spaghetti bolognaise was a regular meal and Mum used to make a delicious version.
These days G & I tend not to eat a lot of pasta, not for any particular reason, it’s just something that I don’t tend to cook very often. Recently I decided to expand my repertaire a little and explore other cuisines beside my comfort zone of Indian and Thai. I had also promised myself that I would create something from a different cookbook at least once a week from now on because I have a huge collection that I hardly utilise, so the most logical place for inspiration was my bookshelf.
It was the wonderful chef, Karen Martini, who inspired our delicious meal. Karen is a Chef, restaurateur, writer and now TV presenter, whose food is unmistakably that of the Mediterranean, but is also undeniably individual. I particularly love her passion, authenticity and relaxed attitude when presenting new recipes. She describes this recipe as “Comfort food at its best”, and she is very, very correct.
spaghettini and meatballs (from “Cooking at home” by Karen Martini)
serves 8-10
Ingredients
800g (1lb 12ozs), spaghettini
1/2 cup frozen peas
grated parmesan, to serve
Meatballs
2 tablespoons olive oil, plus extra for frying
2 brown onions, chopped
6 cloves garlic, finely sliced
1 handful chopped oregano
sea salt and freshly ground black pepper
450g (1lb) pork and veal sausages, skins removed
350g (12.3ozs) beef mince
200g (7ozs) grated parmesan
2 free-range eggs
1 handful chopped oregano
1/2 fresh nutmeg, grated
handful of flat-leaf parsley, chopped
Tomato Sauce
100ml (1/3 cup) olive oil *
2 cloves garlic, finely sliced
1 bay leaf
1 handful chopped oregano
2 x 400g cans (1lb 12ozs) chopped tomatoes
2 3/4 cups tomato passata
2 tablespoons caster (superfine) sugar
500ml (2 cups) chicken stock
Preparation
To make the tomato sauce, heat the olive oil in a very large saucepan over medium heat. Cook the garlic until golden, then add the bay leaf and oregano and cook for 1 minute. Add the tomatoes and passata and simmer for 10 minutes, then stir in the sugar and chicken stock and season to taste. Simmer over low heat for 20 minutes.
To make the meatballs, heat the olive oil in a large frying pan over medium heat. Add the onion, garlic and oregano and season with salt and pepper. Cook for 3 – 5 minutes or until onion is soft.
Place the remaining ingredients (except the extra olive oil) in a food processor, add the onion mixture and pulse until well combined. Form the mixture into small balls, about the size of a walnut.
Heat the extra oil in a large frying pan over medium heat. Brown the meatballs in batches, then add to the tomato sauce and simmer over low heat for 15 – 20 minutes.
Meanwhile, cook the spaghettini in a very large saucepan of lightly salted water until al dente. Drain. Stir the pasta and peas through the sauce and serve hot with grated parmesan.
My tips/alterations: *We are eating healthy at the moment so I used half the amount of oil that was suggested for the sauce. *I added the frozen peas into the sauce about 5 minutes before it was finished cooking. They were perfect. *You can use normal spaghetti, just cook it for the time applicable.
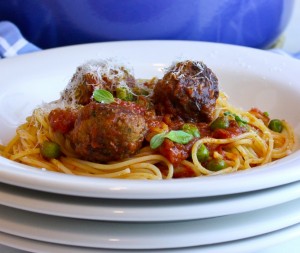
ease: 7/10. These may not be the simplest meatballs ever made but the effort is worth it.
prep time: 15mins
cooking time: 60mins. There are multiple elements cooking at the same time.
total: 1 hour 15 minutes.
taste: 9/10. G loved this meal partially because, in his words, “we never have food like this”. He also enjoyed the flavour of the meatballs and the sauce, however, he would have liked the meatballs to be a little crisper. I loved everything about it. The sauce had reduced so that it just coated the pasta with its richness and allowed the succulent meatballs to shine through. The meatballs themselves were tender little flavour bombs that released their layers of delicious ingredients as you ate them. I would go as far to say that this was the best spaghettini and meatballs that I have ever had.
would I make it again: Absolutely – I’d make the meatball mixture ahead of time then cook them when needed.
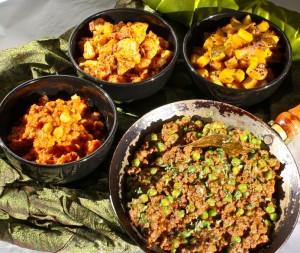
I have mentioned my love for cooking with spices in many posts and have included both Thai and Indian categories in my list because they are two of the cuisines I cook whenever I have the opportunity. I sometimes find that making spice mixes and curry pastes can be quite time consuming and I have been told in the past that this is one of the reasons may people but pastes etc rather than make them. I’m not sure if I’m just obsessed or crazy but I always make my own. I find that what I can create at home has so much more depth than what comes out of a jar but I also have a trick. Whenever I am making a spice blend or a paste I double the recipe. I use one portion for what I what to make on that day then put the remainder in the fridge or freezer until I need it. That way if I want to make something but don’t have the extra time to grind the paste, it is already done. My pastes usually keep for about three weeks in the fridge and a few months or so in the freezer.
Recently both G & I were desperate for a feed of Indian. I wanted to make a main dish with several side vegetarian dishes and rice but didn’t want a curry or anything too heavy. Besides I am a true believer that a curry is always best made a day ahead of when it is needed as the flavours just marry together so much better if it is left to sit for a little while. I was looking for something a little different that would taste great on the day it was made. Although I didn’t plan it, I ended up creating four different dishes. No I’m not crazy. While the main dish was cooking I created the side dishes. The worst thing about it all was having four separate pots to wash but the delicious food made up for any hardship. 🙂
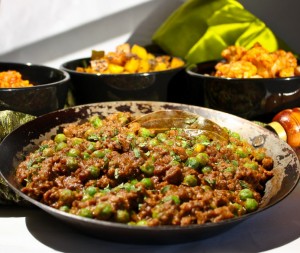
kheema matar (mince lamb curry with peas) – (recipe from “a little taste of India” by Murdoch Books)
serves 4
Ingredients
2 onions
4 garlic cloves, roughly chopped
5cm (2in) piece of ginger, roughly chopped
4 green chillies
160ml (2/3 cup) oil (I used about half this amount)
2 Indian bay leaves (cassia leaves)
500g (1lb 2oz) minced lamb
pinch of asafoetida
2 tablespoons tomato puree (I used tomato paste)
1/4 teaspoon ground turmeric
1/2 teaspoon chilli powder
2 tablespoons ground coriander
2 tablespoons ground cumin
2 tablespoons thick plain yoghurt
3 teaspoons salt
1 teaspoon ground black pepper
225g (1 1/2 cups) fresh or frozen peas
1/4 teaspoon garam marsala
5 tablespoons finely chopped coriander (cilantro)
Preparation
Put the onion, garlic, ginger and two of the chillies in a food processor and process until very finely chopped. If you don’t have a food processor, finely chop the ingredients or grind them together in a mortar and pestle.
Heat the oil in a heavy-based frying pan over medium heat, add the onion mixture and bay leaves and fry for 5 – 6 minutes, or until golden brown. Add the lamb mince and fry for 15 minutes, stirring occasionally to prevent the meat from sticking and break up any lumps of mince. During this time the flavours of the onion mixture will infuse into the meat. Add the asafoetida and tomato puree, stir and lower the hear to a simmer.
Add the turmeric, chilli powder, coriander and cumin and stir for 1 minute. Add the yoghurt, salt and pepper and continue frying for 5 minutes. Add 200ml (3/4 cup) water, a little at a time, stirring after each addition until it is well absorbed. Add the peas and the two remaining whole chillies. Stir well, then cover and simmer for 20 minutes, or until the peas are cooked through. If using frozen peas, cook the mince and chillies for 20 minutes then add the peas 5 minutes before the end of cooking. Add the garam marsala and chopped coriander and stir for 1 minute before serving.
My tips/alterations: *I used the same volume of oil but used ghee instead because I really like the flavour of it. I also used about half the oil that the recipe listed. This meant that I needed to stir the onion mix a little more to ensure it didn’t stick to the pan. *Indian bay leaves are not the same flavour as European bay leaves therefore they can not be substituted. If you do not have them just leave them out.
ease: 8/10.
prep time: 15mins
cooking time: 55mins. There are multiple elements cooking at the same time.
total: 1 hour 10 minutes.
taste: 9/10. We both wanted a good Indian meal and this recipe did not disappoint. G said that this had the depth of an Indian meal that had been made a day ahead, the best way to have it. I loved the combination of flavours and thought that the sweetness of the lamb and the peas was balanced well with the earthiness of the spices.
would I make it again: Yes – This is definitely a winner!
I have made this dish again using beef mince. It was nice but we both agreed that the lamb was spectacular.
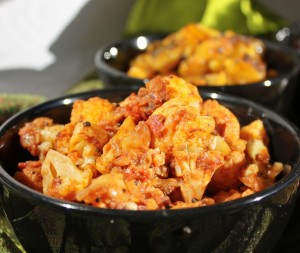
aloo gobi (spiced cauliflower and potato) – (recipe from “a little taste of India” by Murdoch Books, adapted by Fiona at Food 4 Thought)
serves 4
Ingredients
1 tablespoon ghee or 3 tablespoons oil
1/2 teaspoon black mustard seeds
1/2 onion, finely chopped
200g (7oz) potatoes, cut into cubes (I left these out) *
1/4 teaspoon ground turmeric
1 teaspoon ground cumin
1 teaspoon ground coriander
1 1/2 teaspoons garam marsala
4 ripe tomatoes, chopped *
1 large cauliflower, about 1.25kg (2lb 12oz), cut into florets
2cm (3/4in) piece of ginger
1 teaspoon sugar
Preparation
Heat the ghee or oil in a heavy-based frying pan over low heat. Add the mustard seeds, cover the pan and wait for the seeds to pop. Add the onion and potato and fry until lightly browned.
Add the turmeric, cumin, coriander and garam marsala to the pan and fry for a couple of seconds. Add the tomato and stir until the spices are well mixed. Add the cauliflower florets and stir until well mixed. Stir the ginger, sugar and 125ml (1/2 cup) water, increase the heat to medium and bring to the boil. Reduce the heat, cover and simmer for 15 minutes, or until the vegetables are tender. Stir occasionally during cooking. Season with salt, to taste.
Uncover the pan and if the sauce is too runny, simmer it for 1 – 2 minutes before serving.
My tips/alterations: *I prefer to use ghee rather than oil therefore I have provided you with the measurement that I used which is not in the original recipe. *I left the potatoes out of this dish as I made a separate dish using them. This meant that I also reduced the water content to 100ml. *I used tinned tomatoes as I didn’t have fresh ones. The quantity that I used was 400g.
ease: 10/10. This is not difficult, there a just a few elements to co-ordinate timing for.
prep time: 5mins
cooking time: 20mins. There are multiple elements cooking at the same time.
total: 25mins.
taste: 8/10. This is a great way to serve cauliflower, whether it be as an accompaniment to an Indian meal or any other meal. The spices just seem to work with this vegetable.
would I make it again: Yes – Healthy and delicious, you can’t beat that.
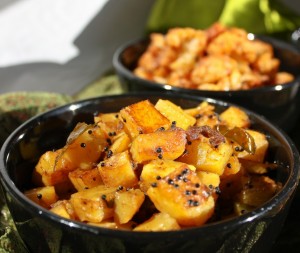
potato masala – (recipe from “a little taste of India” by Murdoch Books, adapted by Fiona at Food 4 Thought)
serves 4
Ingredients
10 tablespoon of ghee or 2 tablespoons of oil
1 teaspoon black mustard seeds
10 curry leaves *
1/4 teaspoon ground turmeric
1cm (1/4in) piece of ginger, grated
2 green chillies, finely chopped
2 onions, chopped
500g (1lb 2oz) waxy potatoes, cut into 2cm (3/4 in) cubes
1 tablespoon tamarind puree *
Preparation
Heat the ghee or oil in a heavy-base frying pan, add the mustard seed, cover, and when they start to pop add the curry leaves, turmeric, ginger, chilli and onion and cook, uncovered, until the onion is soft.
Add the potato cubes and 250ml (1 cup) water to the pan, bring to the boil, cover and cook until the potato is tender and almost breaking up. If there is any liquid left in the pan, simmer, uncovered, until it evaporates. If the potato isn’t cooked and there is no liquid left, add a little more and continue to cook. Add the tamarind puree and season with salt, to taste.
My tips/alterations: *I am fortunate enough to have a curry tree. You can purchase curry leaves from most Asian supermarkets. *I left the onions out of this dish (because I ran out) and just added the potatoes to the spices. * I like to cook my potatoes a little longer after the water has evaporated, that way they get a little crisp on the outside. I add the tamarind puree just before serving. *Tamarind puree is used to give the dish a little sour flavour. It can be purchased at most Asian supermarkets.
ease: 9/10. This is not difficult, there a just a few elements to co-ordinate timing for.
prep time: 5mins
cooking time: 25mins.
total: 30mins.
taste: 9/10. Both G & I loved this dish. I let this cook for a little after the water had evaporated and that made the potato a little crunchy. The tamarind gave this a touch of sourness that made this different to any of the other dishes we enjoyed in our feast.
would I make it again: Yes – A new way with potatoes is always good.
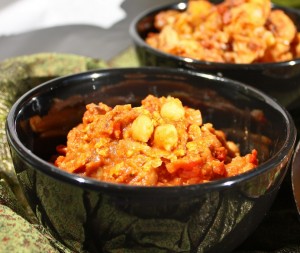
chole chaat (spicy chickpeas) – (recipe from “a little taste of India” by Murdoch Books, adapted by Fiona at Food 4 Thought)
serves 4
Ingredients
225g (8oz) chickpeas (garbanzo beans) *
1 tablespoon of ghee or 2 tablespoons of oil
1/2 onion, finely chopped
1/4 teaspoon ground turmeric
1 teaspoon ground cumin
1 teaspoon ground coriander
1 teaspoon garam marsala
2cm (3/4in) piece of ginger, grated
2 red chillies, finely chopped *
200g (7oz) tin chopped tomatoes, drained
Preparation
(This first step is from the original recipe, however I didn’t do this. See my tips/alterations.) Soak the chickpeas overnight in 2 litres (8 cups) of water. Drain, then put the chickpeas in a large saucepan with another 2 litres (8 cups) of water. Bring to the boil, spooning off any scum from the surface. Then simmer over low heat for 1 – 1 1/2 hours, until soft. It is important the chickpeas are soft at this stage as they won’t soften any more once the sauce has been added. Drain the chickpeas, reserving the cooking liquid. Remove 1/2 cup of the chickpeas and thoroughly mash with a fork.
Heat the ghee or oil in a heavy-based saucepan over low heat and cook the onion until golden. Add the turmeric, cumin, coriander and garam marsala and fry for 1 minute. Add the ginger, chilli, tomato and salt, to taste and stir until mixed. Add the chickpeas and their cooking liquid, and the mashed chickpeas. Bring to the boil, reduce the heat and simmer, uncovered, for 5 minutes.
My tips/alterations: *I know it is possibly considered a sin but I didn’t use dried chickpeas and soak them overnight. I opted for the tinned variety, rinsing them well before use. To substitute the chickpea cooking liquid I rinsed the tomato tin and used 1/2 cup of that liquid. *I prefer to use ghee rather than oil therefore I have provided you with the measurement that I used which is not in the original recipe. *When using chillies if you want to reduce the heat, remove the seeds and inner membrane of the chilli. Also, reduce the amount until you reach the desired level of heat. Remember, you can always add more but it is difficult to take it out.
ease: 7/10. This is not difficult, there a just a few elements to co-ordinate timing for.
prep time: 5mins. My version – See tips above.
cooking time: 15mins. My version – See tips above.
total: 20mins.
taste: 9/10. This is so easy and equally as delicious. The combination of crushed chickpeas and whole ones is really good. The spices work really well and like the other dishes I think this was a great accompaniment to the rest of the meal.
would I make it again: Yes – Easy, delicious and healthy.
Continuing to support our commitment to eating healthy throughout the winter months I have been searching for recipes that will serve our purpose. The problem I often find with low-fat, dairy free, wheat free meals is that while they might be a healthier alternative they can often lack in flavour. However, this is not the case with the recipe that I have chosen to write about today. It uses some classic flavour combinations such as lamb with hummus and spinach with roast pumpkin (known as butternut squash in the USA and UK). It also includes a few things that you might not think of putting with those components.
One of the ingredients that some of us have either never heard of or have just started to use is Quinoa (pronounced ‘keen-wa’ or ‘kin-wah’) which is native to the upper Andes of Bolivia, Peru, and Ecuador. Some people think it is a grain but it is in fact the seed of a grain-like crop that grows on free-draining soil in high altitudes of up to 4000 metres.
The most surprising feature of quinoa is its high protein content of 12-18% which is higher than meat. The proteins quinoa produces are a well-balanced mix that is superior to any other grain. It’s also a good source of calcium, phosphorus, magnesium and iron. It has a low glycaemic index (GI), is gluten free and high in dietary fibre.
With all these wonderful features I have been searching for some recipes that would integrate it into our diet a little more often and this is one that I discovered.
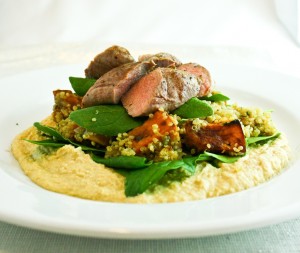
rack of lamb with quinoa and roasted pumpkin (from “The detox cookbook” by Jan Purser & Kathy Snowball adapted by Fiona from Food 4 Thought)
serves 4
Ingredients
1/2 butternut pumpkin (approx 800g), peeled and cut into 2cm pieces
olive oil
2 x 6-cutlet racks of lamb, French trimmed *
1 onion, diced
1 baby fennel bulb (approx 300g), trimmed and diced *
2 garlic cloves, finely chopped
500ml (2 cups) chicken stock
190g (1 cup) quinoa
1/4 cup chopped herbs including basil, mint, flat leaf parsley
1 cup hummus
100g baby spinach leaves, to serve
Preparation
Place pumpkin on an oven tray, brush with a little olive oil and roast at 200°C (390°F) about 20 – 30 minutes, turning once, or until pumpkin is golden and tender.
Brush lamb with a little oil and cook in a hot non-stick frying pan until browned. Transfer to an oven tray and roast at 200°C (390°F) for 15 minutes for pink lamb. Remove from oven, cover loosely with foil and rest in a warm place for 10 minutes before slicing into cutlets.
Meanwhile, heat 1 tablespoon olive oil in a saucepan, add onion, fennel and garlic, cook over low heat for 5 minutes. Add 60ml (1/4 cup) of stock, cover and cook over low heat for about 20 minutes or until the fennel is soft. Add quinoa and remaining stock, bring to a simmer, cover and cook for 15 minutes or until quinoa is tender. Remove from heat, season to taste and gently stir in pumpkin and chopped herbs. Set aside.
Serve 1/4 cup hummus per person topped with quinoa and pumpkin mixture, baby spinach leaves and sliced lamb cutlets.
My tips/alterations: *I used lamb loin rather than cutlets and cooked them in the same way as the cutlets would have been cooked. It was a little shorter time in the oven. *If you would prefer to use cutlets, your butcher can French trim them for you. *I used normal fennel as I couldn’t buy baby fennel. I simply removed the hard outer leaves and diced what I needed from the centre. *I made my own hummus but you could purchase your favourite brand.
ease: 7/10. This is not difficult, there a just a few elements to co-ordinate timing for.
prep time: 20mins
cooking time: 40mins. There are multiple elements cooking at the same time.
total: 1 hour.
taste: 8/10. I loved the combination of flavours and textures in this dish and the taste sensation of hummus with the quinoa mixture surprised and delighted me. I could eat this without the lamb and feel like I was in vegetarian heaven (if I used vegetable stock :)). G rated this 7.5/10 because he is not sure about the quinoa and would have preferred if the spinach was blanched or replaced with something such as rocket. I think rocket would go great in this dish.
Why not play with it and make it your own!
would I make it again: Yes – Healthy and delicious, you can’t beat that.
One of the things that I love most about cooking is passing on all the information that I have learnt over the years. I am fortunate to have the opportunity to do that in several ways. My blog allows me to share my cooking ‘journey’ and thoughts with you all while my classes permit me to pass on information in a hands-on environment.
Designing new classes is always challenging although it is something that I enjoy immensely. I usually start with a general concept and a few ideas for different things that I would like to teach, then comes the research. When I am designing a recipe I find as many options for that particular dish, or similar dishes, as I possibly can. I also try to find out the history and cultural impacts of the meal and with all that knowledge to hand I then develop what I think will work. The next step is the kitchen.
Testing a recipe is exciting because you’re never really sure if it will actually work. Most times I have an idea of what to expect and can then tweak things as I go. I usually need to repeat a dish to get it exactly the way I want it which means we have to taste test two delicious meals. It’s a hard job but both G & I are committed to the process :).
Indian is one of my favourite cuisines because it involves the use of spices and has such exciting flavours. When I was designing this class I knew I wanted to teach some classic recipes that had the depth of flavour that Indian food is known for. I finally came up with Spiced potato cakes, Chicken skewers, Lamb rogan josh and Ground rice pudding.
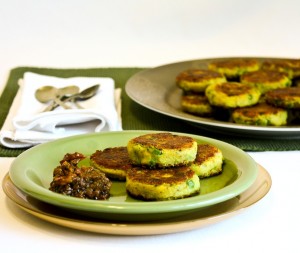 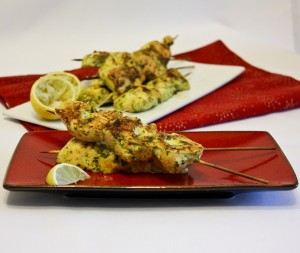
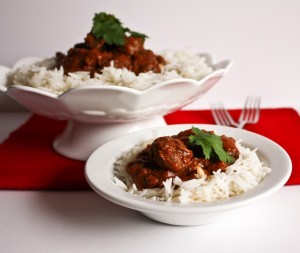 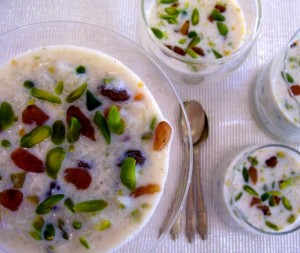
If you would like to take a look at this or any other class details take a look at the class page on my website.
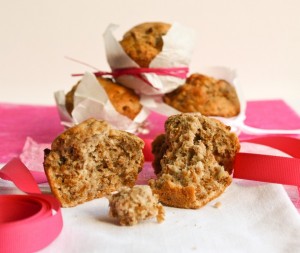
Having fruit that is a little past its prime seems like an endless reoccurrence in our house, especially when it comes to bananas. I’m not sure if I buy too many or whether neither of us eat enough but there always seems to be some left by the end of the week.
My upbringing was that of a typical country girl where I always ate everything on my plate because the family had worked hard to put it there and it was a case of ‘waste not want not’. So when it came to cooking, those who inspired me always found a way to use up ingredients and only threw things out when it was absolutely necessary. I think that has rubbed off on me because G is always teasing me about making a dish or creating something new because ‘something had to be used up’. A good example of this throughout my blog are the recipes for yoghurt banana cake, zucchini slice, meringue stack and choc chip banana bread just to name a few. I have even made up categories called ‘Need to use’ because I find I am always wanting to finish off different things without wasting them.
So once again I find I have some bananas to try and find a home for but because G & I are trying to eat a little healthier at the moment and I didn’t want to repeat any of my recipes I had to put my thinking cap on. I remembered a recipe for banana bran muffins that a friend had given me years ago and I used to make all the time, so often in fact I used to remember it off by heart. Unfortunately that was not the case anymore and while I thought I could put my hand on it within a few minutes my search turning into more like an hour and to no avail. So onto the trusty internet I went to try and find something similar.
I hope you enjoy this healthy snack as much as we did. 🙂
banana bran muffins (original recipe adapted by Fiona from Food 4 Thought)
makes 12 muffins
Ingredients
A.
1 cup bran breakfast cereal (eg All bran)
1 cup low-fat milk
2 medium, very ripe bananas, mashed
B.
1 egg, lightly beaten
50g butter, softened
2 – 3 tablespoons brown sugar (depending on how sweet you like them)
C.
1 1/4 cup self-raising flour
1/2 cup (60g) roughly chopped walnuts
1/2 teaspoon cinnamon
1/2 teaspoon baking powder
Preparation
Preheat the oven to 180°C (350°F). Grease a 12 hole (1 cup) muffin tray with light spray.
In a bowl of jug, combine the ingredients in group A. Stir well and set aside for 5 minutes.
In a separate bowl, combine all the ingredients in group B and whisk to combine slightly. Add this to the first mixture (A) and stir to incorporate.
In a large bowl, place all the ingredients in group C and stir to combine. Add the combined banana and egg mixture and mix until mixture is smooth. Divide equally between muffin holes.
Bake for 20 minutes or until golden brown. Once cooked remove from oven and allow to stand for a couple of minutes before removing the muffins from the tray and cooling on a wire rack.
Store in a small airtight container for up to a week.
My tips/alterations: *The original recipe didn’t have nuts, the walnuts are my addition. You could also use pecans or slivered almonds. *Don’t over mix the batter as it will make the muffins tough. Just mix it until the ingredients are combined.

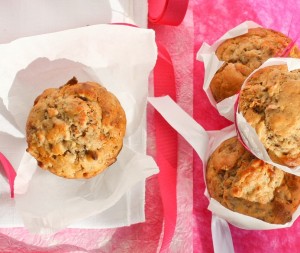
ease: 10/10. The hardest part about making this recipe is washing the dishes.
prep time: 15mins
cooking time: 20mins.
total: 35mins.
taste: 10/10. You would never know these were a low-fat, healthy snack. They are moist, but firm and have that little bit of crunch from the nuts. I like to serve them slightly warm.
They will keep in an airtight container for up to a week but are best eaten in the first few days. Alternatively you can freeze them and take one out when you want a healthy snack.
would I make it again: Yes – Healthy and delicious, you can’t beat that.
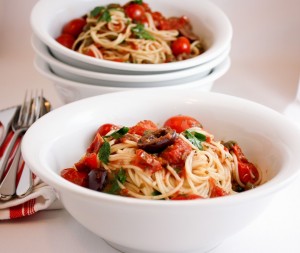
Winter is a time when I find it extremely easy to stay at home, eat comfort food and invariable put on weight. By the time summer comes around I have to work really hard to try and reverse things. Recently I made a decision to try and avoid that cycle this year and eat a little healthier throughout the colder months. G is on board also, so we can keep each other on track. 🙂
To achieve this, food must be satisfying in addition to tasting good. It must also be fairly quick and easy so that it is something we can prepare after work. Over the past few days I’ve trawled through a couple of my cookbooks and marked a few recipes that may be possibilities.
Generally speaking, many years of previously being a vegetarian means that I can take or leave a meal that includes meat whereas G is a meat lover. So normally if I suggest we have something that doesn’t include his beloved ingredient G is none too happy, however, when I described this dish he said “Yum, when are we having it?” So you can imagine my excitement and desire to make this very soon.
spaghetti alla puttanesca – (recipe by Jill Dupleix – adapted by Fiona at Food 4 Thought)
serves 4 for lunch
My tips/alterations: *I added an extra 2 anchovy fillets because we love them. *I didn’t have a can of cherry tomatoes so I used 300g of fresh cherry tomatoes and 200ml of tomato passata (crushed tomatoes) that I had made some time ago. *I also didn’t have any oregano so I used its cousin, marjoram.
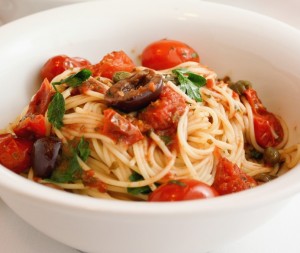
ease: 9/10.
prep time: 15mins. Rolling the mixture into balls takes most of this.
cooking time: 10mins.
total: 25mins.
taste: 8/10. Some simple dishes are just as good as those with complex flavours and this dish is a good example of that. It was clean on the palate yet flavoursome and allowed us to taste each ingredient within it. G rated this 7/10, not too bad coming from my little carnivore. 🙂
would I make it again: Yes. Something that tastes as good as this did in less than 30 minutes is definitely to be repeated.
Spaghetti alla puttanesca – Recipe from Cuisine.com.au
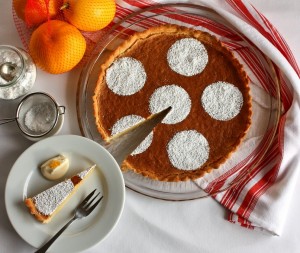
I had a dear friend coming around for coffee and a chat today and I didn’t have a thing in the cupboard to nibble on while we nattered. It was 7am and I decided to try a new recipe that another friend had given me recently (as you do at 7am!). Actually, it was the same friend who gave me the lemon yoghurt cake recipe that I have posted previously.
I had pre-read the recipe, something I encourage my students to do, to ensure I had all the ingredients and enough time. I knew that I only had a very small window of opportunity to bake the tart as I had an appointment prior to J’s arrival at 10.30am, so I threw myself into the task and began by preparing the pastry. My favourite kind of pastry is the type that can be thrown into the food processor because the machine does all the work and it just needs finishing by hand. I popped it into the refrigerator to rest and cleaned up a little. By the time I finished my cleaning it was time to roll out the pastry. Just as I had floured the board and pastry the telephone rang. So with my hands covered in flour I strategically answered the call. Fifteen minutes later I was back in the kitchen.
The slight delay meant that I had to cook my tart for a shorter period of time. Knowing that it would not be set in the time I had, I decided to cook it for as long as I could then turn the oven off and leave the tart in there with the door slightly ajar. Hopefully this meant that it would not be overcooked but would be cooked through. So I left the house for my appointment not really knowing how things were going to turn out.
Fortunately I returned home to a perfectly cooked tart.
lemon and almond tart (adapted by Fiona from Food 4 Thought)
makes 1 x 23cm tart – serves 8-10
Ingredients
Pastry
1 1/2 cups plain flour
150g (5ozs) unsalted butter
pinch of salt
1/4 cup icing sugar
1 egg yolk
Filling
3 eggs
200g (7ozs) icing sugar
3 teaspoons lemon zest
120ml (1/2 cup) lemon juice
125g (4ozs) unsalted butter, melted
100g (3 1/2ozs) ground almonds
Preparation
Preheat the oven to 180°C (350°F).
For pastry, place the flour, butter, salt, icing sugar and egg yolk in a food processor and pulse until the ingredients start to for a ball. Tip the mixture onto a floured workbench and bring into a ball, flatten and place in the fridge for half an hour.
Once chilled, roll the pastry out until it is 3mm thick and line a 23cm removable-bottom tart tin. Prick the pastry with a fork, line with baking paper and fill with weights or rice. Bake for 15 minutes.
While the pastry is baking, make the filling by placing the eggs and sugar into a large bowl. Beat the mixture until thick and pale in colour. Add the lemon zest, juice, butter and ground almonds and fold through the egg mixture. Pour into the par-baked shell and bake for 30-35 minutes until golden brown.
My tips/alterations: *The original recipe included 2 tablespoons of limoncello as an option in the filling. I didn’t have any so left it out. *I found the pastry a little crumbly when it was fresh out of the fridge but managed to push it together then roll it out easily. I also found there was quite a bit of pastry and filling left over so I made an additional mini tart. *I used meyer lemons because I find them a little weeter than other varieties.

ease: 7/10. The pastry was a little tricky. The filling is simple.
prep time: 15mins for pastry, plus 30mins for chilling, 10mins for filling.
cooking time: 15mins + 30mins.
total: 1hour 10mins + 30mins chilling.
taste: 8/10. My friend J and I enjoyed this with some double cream. We both appreciated the texture of the filling and also the tang from the lemon. The pastry was sweet and balanced well with the filling. G took the remainder of the tart to work where his colleagues enjoyed it immensely. He returned an empty container and passed on many comments of praise.
would I make it again: Yes – This is a lovely tart to serve to guests.
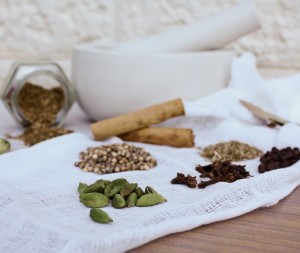
Some people find cooking with spices confusing but for me it is one of my favourite things. I love being able to create such depth and layers of flavours while also keeping things light and bright on the palate and this is something that I consider exciting and challenging. Therefore, it should come as no surprise that my favourite cuisines are Thai and Indian.
I have created many Thai dishes throughout the years and am extremely comfortable with that style of cooking and although I have also cooked many Indian dishes I am still discovering the idiosyncrasies of the cuisine (and enjoying myself immensely). Along the way I have found certain things that I seem to use all the time and have found my favourite way of doing things. One of the spice blends that I use regularly in my Indian cooking is garam marsala. There are many and varied recipes in existence for this blend and this is my favourite.
garam marsala (recipe from “a little taste of india” by Murdoch Books)
makes 3 tablespoons
Ingredients
8 cardamom pods
2 Indian bay leaves (cassia leaves)
2 teaspoons cumin seeds
2 teaspoons coriander seeds
5cm (2in) piece of cinnamon stick
1 teaspoon cloves
Preparation
Remove the seeds from the cardamom pods. Break the bay leaves into small pieces. Put the seeds, bay leaves and remaining ingredients in a spice grinder or use a mortar and pestle to grind to a fine powder.
Store in a small airtight container until needed.
My tips/alterations: *You cannot substitute the Indian bay leaves with normal bay leaves as the flavour profile is completely different. *3 tablespoons doesn’t sound like a lot as a final portion but when you use this spice blend you only tend to need a small amount at a time. I prefer to make it fresh when I need it as it tastes better.
ease: 10/10. If you are using a mortar and pestle you will also get a great workout.
prep time: 5-10mins
cooking time: none.
total: 5-10mins.
taste: 10/10. I think the reason I like this particular one is because it has quite a strong cinnamon flavour to it.
would I make it again: Yes – Whenever I need a fresh batch
|


