A sample text widget
Etiam pulvinar consectetur dolor sed malesuada. Ut convallis
euismod dolor nec pretium. Nunc ut tristique massa.
Nam sodales mi vitae dolor ullamcorper et vulputate enim accumsan.
Morbi orci magna, tincidunt vitae molestie nec, molestie at mi. Nulla nulla lorem,
suscipit in posuere in, interdum non magna.
|

Valentine’s Day has never been something that I have celebrated. I prefer to show my special man that I love him whenever I feel like it throughout the year rather than on one particular day. I’m also very fortunate that G feels exactly the same. We both buy each other gifts for no particular reason other than to say “I love you”, so we feel that valentine’s gifts are not a necessity.
However, they say that the way to a man’s heart is through his stomach, and being a true believer of that saying I often make special things for G if I want to spoil him. I have wanted to make marshmallows for some time and originally chose an espresso variety because G is a lover of anything coffee. But given it is Valentine’s Day next week I also decided to make a raspberry flavoured batch, hoping that I could create little pink heart shapes to foster the feeling of love in the air.
Of course, these can be made anytime throughout the year and cut into any shape that you like.
raspberry marshmallows (original recipe from Not So Humble Pie adapted by Fiona at Food 4 Thought)
makes approximately 40 pieces
Ingredients
flavourless oil such as vegetable or canola
300g (2/3lb) fresh or frozen raspberries
500g (1lb) caster (granulated) sugar
20g powdered gelatine or 8 (gold-strength) gelatine leaves
60g (2 large) egg whites
½ cup each of icing sugar (powdered sugar) and rice flour
Preparation
Lightly grease a 33cm x 22cm (13″ x 9″) pan with oil.
In a small saucepan over medium heat, cook the raspberries until soft and juicy. Mash them with a fork to help release the juices. Once soft, press the raspberries through a sieve to remove the seeds and reserve the liquid (approximately 1 cup) in a large bowl. If the raspberry liquid seems very thin and watery, consider reducing it over medium low heat until it thickens slightly. Set the mixture aside to cool and start the sugar syrup.
In a small saucepan over medium heat, cook the sugar with one cup of water. Stir frequently until it comes to a boil and the sugar has dissolved. Then clip on your candy thermometer and allow to simmer without stirring until it reaches 125°C (255°F).
While waiting on the syrup, sprinkle the powdered gelatine over the cooled raspberry mixture and whisk. (See my alterations for leaf gelatine method). When the syrup is getting close to ready, drop the egg whites into your mixer with a pinch of salt and beat them on medium speed until foamy.
Once the syrup comes up to temperature, pour the syrup into the large bowl with the raspberry and gelatin. This could bubble up, which is why it is wise to use a large bowl. Whisk the mixture to dissolve the gelatine then pour into your mixer with the eggs. Beat on medium-high speed for several minutes, until the mixture has cooled a bit and tripled in volume. Pour the gooey marshmallow mass into your prepared pan, smooth with an offset spatula and allow to stand and cure for several hours.
My tips/alterations: *When the syrup is getting close to temperature, place the gelatine leaves into a bowl of cold water for a minute or so until they have softened. Remove from water and place into a small bowl of jug with one tablespoon of water, microwave for 10 – 15 seconds on high to melt gelatine to a runny liquid. Stir well then add to cooled raspberries and whisk to combine. Add the syrup as per original method. *All gelatine will vary in how much it will take to set a set quantity of liquid. Make sure you read the instructions of the packet. I usually use the general rule of one teaspoon = one gelatine leaf. This time I added an extra one just to make sure. *If you don’t have rice flour for dusting you can substitute corn flour however you may find that the marshmallows become a little sticky.
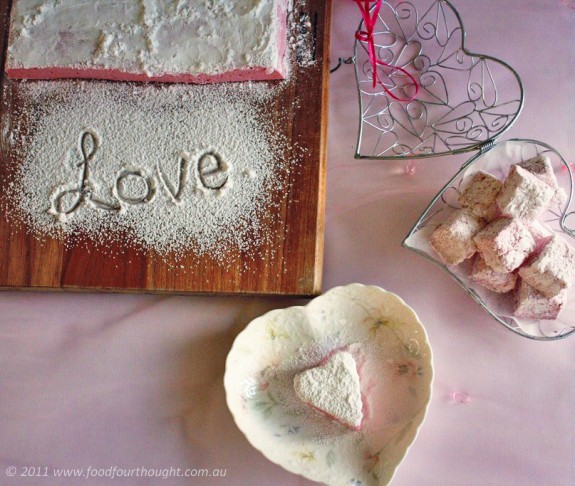
ease: 7/10. Not that difficult but I think (like anything) it would be easier the second time around.
prep time: 30mins.
cooking time: No cooking required just curing and coating
total: 30 mins plus curing and coating (which took me about an hour)
taste: 9/10. These were so good. I never usually eat marshmallows because they are just too sweet for me but these had a balance of sharpness from the raspberries that offset the sweetness beautifully. They were so light and fluffy, like little pillows of flavour bomb. The more I chewed them the more raspberry flavour filled my mouth.
Because this made quite a few marshmllows, G & I took some into our respective workplaces. The containers came home empty and much praise was passed on. Thanks everyone!
would I make it again: Yes especially as gifts for friends.
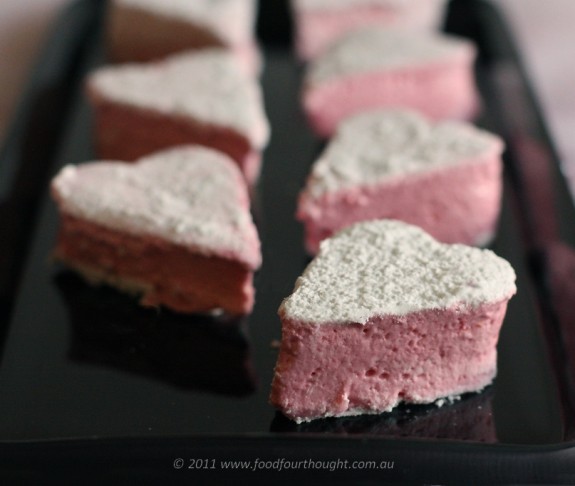
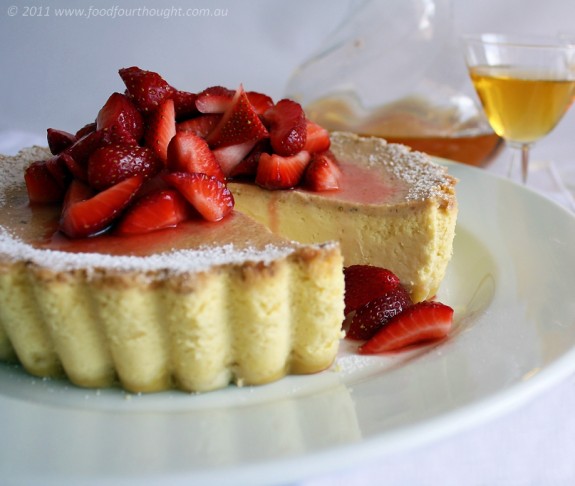
There are times that I can take one look at a photo of a dish and know that I want to cook it. That is exactly what happened when I saw this cake of the cover of the October 2010 issue of Australian Gourmet Traveller. It took me a little while to find the time (and purpose) to make it. You see there is only one problem with my cooking obsession, I also tend to enjoy eating and if there is something delicious in our house my self-discipline goes out the window. A great solution to this is having friends for dinner, it means that there is never as much left over.
Baked cheesecakes have never really been part of my repertoire in the kitchen. Not that I dislike them, I think it is more because our family recipe was always the uncooked variety. I was looking forward to trying this recipe.
strawberry cheesecake with strawberries in rose syrup (original recipe from Gourmet Traveller adapted by Fiona at Food 4 Thought)
makes one 27cm (10½ inch) cake
Ingredients
melted butter, for greasing
750g (1½lbs) softened cream cheese
500g (1lb) mascarpone
190g (0.4lb) raw caster sugar
finely grated rind of 2 limes and juice of 1
4 eggs
250g (½lb) sour cream
140g (0.3lb) strawberries, coarsely chopped
sweet ginger pastry
125g (¼lb) softened butter
30g (3 tablespoons) pure icing sugar, sieved
125g (1 cup) plain (all-purpose) flour
2 tsp ground ginger
Preparation
Preheat the oven to 150°C (300°F/Gas 2). For sweet ginger pastry, beat butter and icing sugar in an electric mixer until light and fluffy (2-3 minutes), sieve over flour and ground ginger, stir to combine. Turn onto a work surface, bring together with the heel of your hand, roll out to 4mm (0.15 inch) thick and line the base of a 27cm (10½ inch)-diameter, 5cm (2 inch)-deep fluted tart tin, trimming edges. Refrigerate to rest (30 minutes), prick with a fork, blind bake until light golden (15-20 minutes), remove weights, bake until crisp (4-5 minutes), cool.
Lightly brush sides of tart tin with melted butter. Process cream cheese, mascarpone, 165g (0.3lb) raw caster sugar, lime rind and juice in a food processor until smooth, scrape down sides then add 3 eggs, one at a time, processing to combine. Pour over pastry, bake until just set (40-45 minutes).
Process sour cream, strawberries and remaining raw caster sugar in a food processor until smooth, add remaining egg and process to combine. Ladle over cheesecake and bake until just set (8-10 minutes). Cool, then refrigerate until completely chilled (4-5 hours).
Serve with remaining strawberries and syrup.
My tips/alterations: *I found this pastry very soft and difficult to roll out. In the end I decided to press it into the tin rather than roll it, this worked much better for me. *I also forgot to bake the base after removing the weights so the base wasn’t are dark in colour or as crunchy as it was supposed to be, but it held together and tasted fine. *I used the syrup recipe from my parfait because G is not a ginger lover. The adapted syrup worked well with the cheesecake. *I halved the original recipe and used an 18cm (7 inch) fluted dish that was 4cm (1½ inch) deep. This was perfect for 6-8 serves.
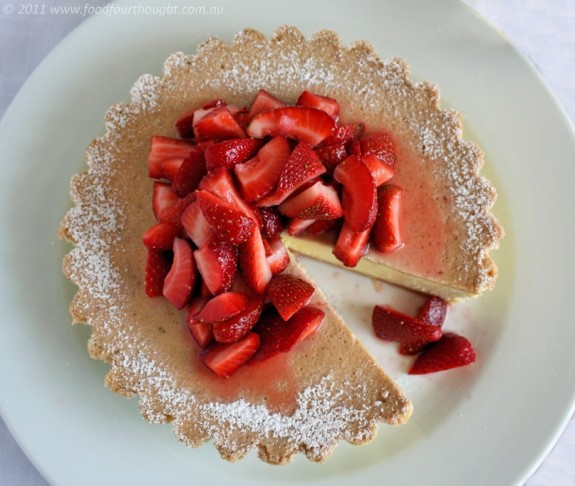
ease: 6.5/10. There were several elements to this dish.
prep time: 40mins.
cooking time: 1hour 20mins plus resting, cooling and chilling time
total: 2 hours plus resting, cooling and chilling time
taste: 8/10. This was very smooth and rich. There was a great balance between the smooth lime filling, buttery pastry and strawberry top layer. The fresh strawberries and syrup were also a lovely addition. Our guests loved it, as did others who were fortunate enough to benefit from the left-overs.
would I make it again: Maybe but only for a special occasion. I prefer to make the easy (uncooked) version of cheesecake.
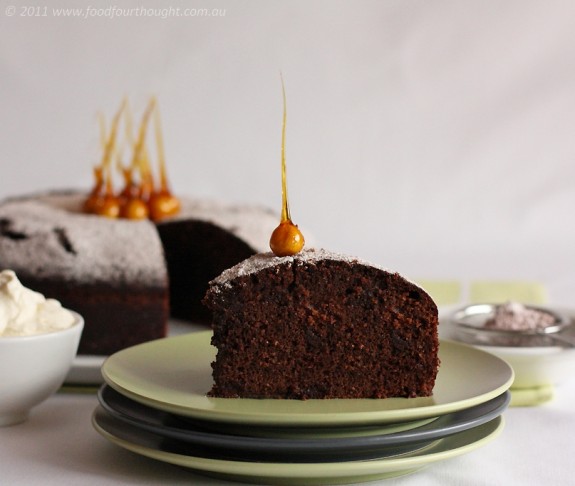
Time flies when you’re having fun! I recently realised that a very important date had passed without my acknowledgement. Just over one year ago I decided to give Food 4 Thought an online presence including my blog. The reason I started blogging was to not only share my cooking experiences but also in the hopes of inspiring others to spend more time in their kitchen. From the feedback I have received I am beginning to achieve my goal as more readers use my recipes, ask questions and send great comments.
Acknowledging such an auspicious occasion called for something decadent, delicious and completely celebratory. I knew that I wanted to use dark chocolate and Frangelico and to make some kind of cake. So on went my thinking cap and my research hands went to work.
What evolved was a deliciously moist, rich cake that is fit for any celebration.
I’ve loved every minute of sharing my cooking, eating and travel experiences and have learnt so much from some incredible people. Thank you all!
chocolate and hazelnut celebration cake (recipe by Fiona from Food 4 Thought)
serves 10
Ingredients
295g (10½ozs) peeled and toasted hazelnuts
365g (13ozs) plain flour
2½ teaspoons baking powder
50g (1¾ozs) Dutch cocoa powder
6 large eggs, at room temperature
450g (1lb) caster (superfine) sugar
295g (10½ozs) unsalted butter, melted and cooled
120ml (4flozs) milk
75ml (3flozs) Frangelico
95g (3½ozs) dark chocolate, minimum 70% cocoa solids, finely chopped
syrup
110g (½ cup or ¼lb) caster (superfine) sugar
100ml (3½floz) Frangelico
25ml (1floz) hot water
topping
1 level teaspoon cocoa powder
1 level teaspoon icing sugar
Preparation
Preheat the oven to 180°C (350°F/Gas Mark 4). Butter and lightly flour the sides of a 25.5cm (10 inch) round loose-bottomed springform cake tin, line the base of the tin with parchment paper.
Using an electric mixer beat the eggs and sugar for about 10 minutes until very thick and mousse-like. Meanwhile, put the hazelnuts, flour, baking powder and cocoa in the large bowl of a food processor and blitz until finely grind. In a separate bowl or jug whisk together the butter, milk and 25ml (1floz) of the Frangelico.
Once the eggs and sugar are ready lightly fold in the whisked butter mixture using a large metal spoon. Then repeat with the nut-flour mixture. Finally, fold in the chocolate.
Pour the mixture into the prepared tin, smooth the top and bake on the middle shelf of the oven for 50-60 minutes, or when a fine skewer pushed into the centre of the cake comes out clean. Remove from oven and leave in the tin while preparing syrup.
For syrup, place all ingredients into a small saucepan over medium heat and stir until sugar dissolves. Bring to boil, reduce heat slightly and rapidly simmer for 5 minutes. Meanwhile, using a fine skewer, spike the cake all over the top to create holes so that the syrup can be absorbed into the whole cake. When syrup is ready, remove cake from the tin and place (right way up) on a cooling rake. Place a plate or tray underneath the rack to catch any excess liquid. Slowly pout the syrup all over the cake making sure that you cover the edges also. Allow the liquid to absorb into the cake before serving.
If there is any excess syrup on the tray you can pour it over the cake when serving. For topping, combine the ingredients and sprinkle over the cake. Serve with whipped cream and caramel dipped hazelnuts (recipe below) if you desire.
My tips/alterations: *When processing any nuts you need to be careful that you don’t over process them or they will become oily and clump together. By blitzing the nuts with the other ingredients this helps prevents that. *Folding is a technique used to keep air into a mixture which keeps the cake light. *This cake can “soufflé” a little during cooking then sink back once cooled. This means that the top of the cake will be cracked. If you want to prevent this from happening, lower your oven temperature by 10 or 20 degrees and cook the cake for longer. Because this is a slightly dense cake you need to make sure it is cooked in the centre by using the skewer test. *The syrup is optional but it does make the cake really moist and it will also keep for longer.
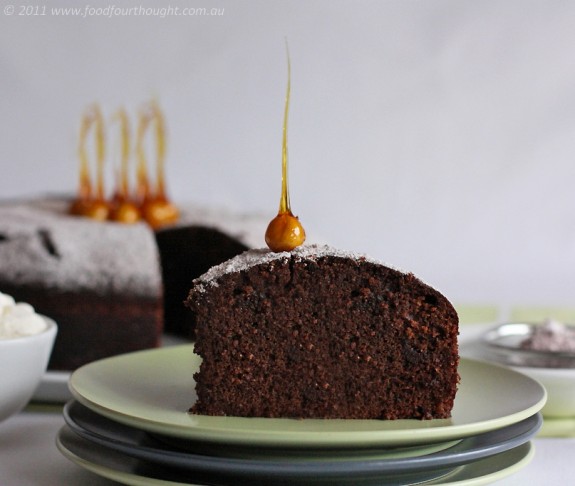
ease: 7.5-8/10. Not that difficult, just a few different elements.
prep time: 15mins.
cooking time: 60mins plus cooling
total: 1 hour 15 mins plus cooling
taste: 10/10. This was a winner. It was lusciously moist, rich with dark chocolate and laced with Frangelico. We served it with a generous dollop of cream and a cup of coffee. It was just as delicious the next day.
would I make it again: Yes it is perfect for any celebration.
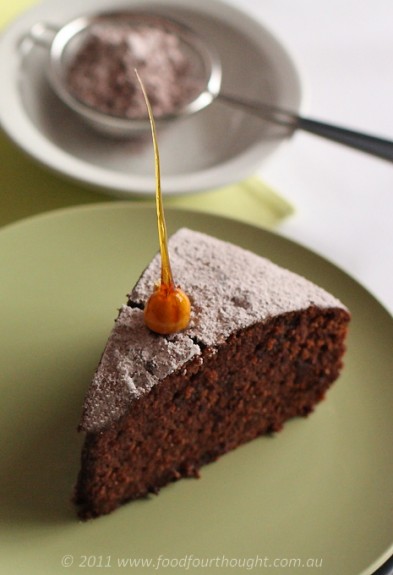
caramel dipped hazelnuts (recipe by Martha Stewart adapted by Fiona from Food 4 Thought)
makes 20
Ingredients
20 hazelnuts, toasted and skinned
2 cups sugar
½ cup water
bamboo skewers
Preparation
Gently insert pointed end of a skewer into the side of each hazelnut. Place a chopping board along the edge of a bench; place newspaper on the floor, directly below the board.
Prepare an ice-water bath. Heat sugar and the water in a heavy saucepan over medium heat, stirring occasionally, until sugar is dissolved and syrup is clear. Stop stirring; cook until syrup comes to a boil, brushing down sides of pan with a wet pastry brush to prevent crystals from forming. Continue to boil, gently swirling occasionally, until medium amber in colour. Plunge pan into the ice bath to stop the cooking; let stand until thickened, 5 – 10 minutes. (To test: Dip a skewer in caramel and lift a few inches; if a thick drip slowly forms and holds a string, the caramel is ready.)
Dip a skewered hazelnut into caramel, letting excess drip back into pan. When dripping syrup becomes a thin string, secure opposite end of skewer under the board. Repeat with remaining hazelnuts. (If caramel hardens before all hazelnuts have been dipped, rewarm it over low heat.) Let stand until caramel string has hardened, about 5 minutes; break each string to desired length. Carefully remove skewers. Candied hazelnuts should be used the same day; store, uncovered, at room temperature.
My tips/alterations: *Make sure that the caramel is a medium amber before removing it from the heat. If it is not cooked enough it will not harden preperly. *The ice-water bath is important to stop the cooking as quickly as possibly otherwise the caramel is likely to burn and taste bitter.
ease: 7/10.
prep time: 15mins.
cooking time: 15mins plus cooling
total: 30 mins plus cooling
taste: 7/10. These had a great flavour and went really well with the cake but I found that my caramel didn’t harden enough and they went soft quite quickly.
would I make it again: Maybe but they were a bit fiddly. I would probably just roll them in caramel and not make the tail.
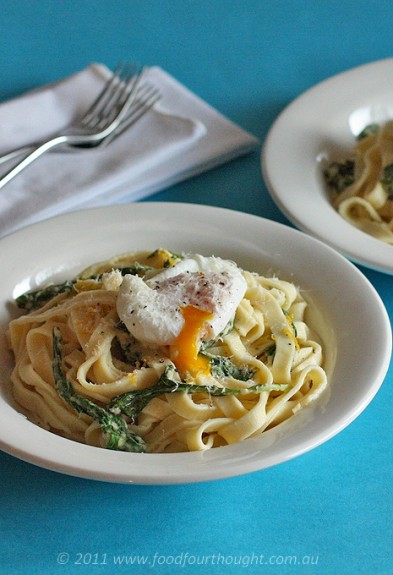
Sunday evenings are when we usually like to relax at home, especially if we’ve had a busy weekend working on projects or out socialising. This weekend I’ve been working around the house partially completing my annual spring clean (which I should have done months ago) and G has been dedicated to his cars. So we both felt like we need something easy, nourishing and tasty for dinner.
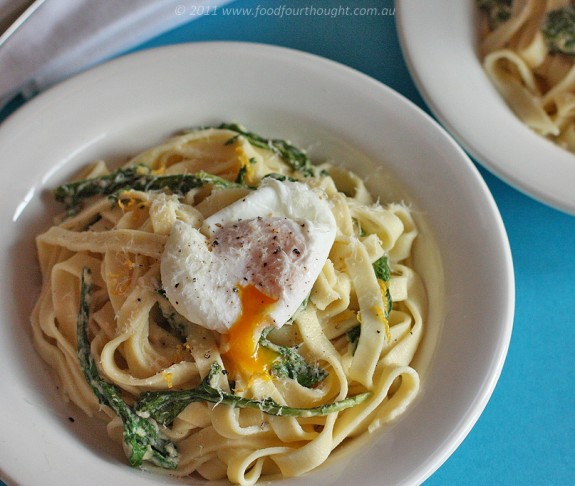
I had seen this recipe in the “Easy Everyday” section of one of my favourite magazines and tagged it for exactly this kind of occasion. I have been making my own pasta for some time now and know how much G enjoys it so I decided to make some fettuccini.
I was intrigued to taste this dish as I expected the flavours to work well together. I also loved the idea of breaking open a freshly poached egg to allow the soft yolk to coat the pasta.
linguine with lemon, parmesan and soft poached eggs (recipe from dish magazine adapted by Fiona from Food 4 Thought)
serves 2 (the original recipe served 4)
Ingredients
200g linguine (or fettuccini) pasta
knob of butter
40g (1½ozs/1 handful) of rocket or baby spinach (or arugula)
1 teaspoon lemon zest
50ml (2½ tablespoons) lemon juice
75g (½ cup/2½ozs) freshly grated parmesan cheese
2 free-range eggs, poached
sea salt and freshly ground black pepper
Preparation
Cook the pasta in a large saucepan of well salted boiling water until al dente. Drain, reserving 1/4 cup of the cooking water. Tip the pasta back into the saucepan with the water, a good knob of butter, the rocket or spinach, the lemon zest and juice and the parmesan.
Place back over a medium heat and stir until the ingredients combine to form a sauce and coat the pasta.
Season and divide the pasta between warm serving dishes. Top with a poached egg, a grind of pepper and a little parmesan cheese if desired.
My tips/alterations: *I altered the method when adding the ingredients and pasta together in the pot. I placed the water, lemon juice and rind, and the parmesan into the pot and stirred it until it formed a slightly smooth sauce. Then I added the pasta and finally the rocket. This meant that the cheese didn’t clump together as soon as it hit hot pasta. *I pre-cooked the poached egg and then just heated it before serving. I also added crispy batons of pan fried pancetta, because everything is better with bacon. 🙂
ease: 8/10.
prep time: 15mins.
cooking time: 15mins.
total: 30 mins.
taste: 6/10. This was G’s rating.
The dish itself was quite contentious because G felt that it didn’t really work because of the lemon whereas even though I thought it was quite lemony and I enjoyed that. I also loved breaking into the poached egg and letting the yolk become part of the sauce. This meal was light and strangely, somewhat refreshing. It also made me feel healthier for eating it.
G said that without the lemon it would have been ok although found it very different to anything else we had eaten before. He felt the pancetta added a dimension that the dish needed.
would I make it again: Yes but as I enjoyed it more than G, maybe I’d cook it for a girls lunch rather than for my man.
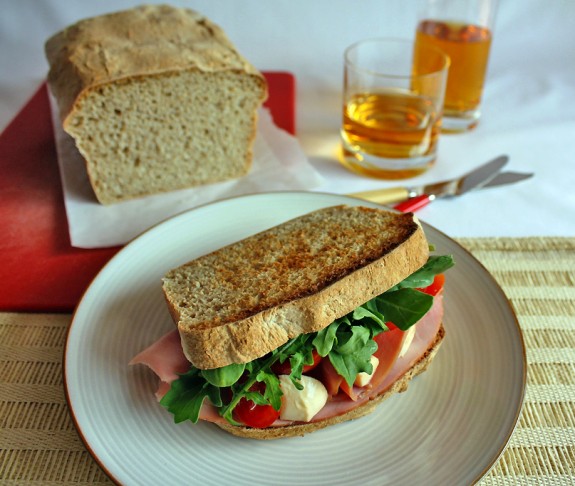
I’ve been making my own bread for many years. My Dad inspired me to start baking it because whenever I used to go and visit my parents he would bake a fresh loaf (something he normally did on a weekly basis) because he knew how much I loved it. Initially I used a bread maker with the standard flour, dried yeast and water recipe. That was until I recently developed an aversion to brewers yeast. I’m not sure why, it just started one day. This meant that I needed to cut things out of my diet that made my symptoms worse. Items such as bread or pastries that contained yeast, mushrooms, beer and worst of all, champagne were no longer on my agenda.
I’ve never really eaten a lot of bread but I did enjoy the occasional piece and became extremely envious when I could smell a piece of freshly cooked toast. Then I attended a demonstration talk from Yoke Mardewi of Wild Sourdough. Yoke has been conducting sourdough classes for many years now and her product knowledge is extraordinary. The class I attended was an information session about her journey into the culinary world, sourdough itself and the classes she runs. I found it inspiring and was most excited when she gave us a tiny sample of her 20 + year-old starter culture and explained how we could take it home, feed it and watch it grow. This could then be used to create sourdough bread.
The benefits of sourdough (made the traditional way) are numerous and includes the simple fact that it is much easier for your body to digest and because of its density is more filling that some other breads. Two things I saw as immediate positives. Besides the health related benefits (which have meant that I don’t need to cut things out of my diet anymore!), I love the fact that a small amount of ancient starter culture is passed onto someone that they can then nurture and make it their own. I was once devastated when I thought I had killed my culture. Not appreciating the tradition of the method and trying to rush the process, one day I decided to place my bowl of developing culture in an oven that had been switched off earlier and was still warm. Upon retrieving it a few hours later expecting to see a light, bubbly mass I was shocked to see a flat, somewhat hardened disc. I scrapped off the top layer, leaving me with a small amount of soft culture. I redid the process from the beginning, prayed to the sourdough gods recognising the error in my ways, vowed never to try and rush the process again and set my bowl aside with a breath of hope. A few hours later I took a peak and was extremely relieved to see the beginnings of small bubbles forming in the base of the mixture which meant that my baby would be alright.
While I’m not an expert on the product at all (as you can tell from the story above J) I have adapted the original recipe and technique to make it into something that I can call my own. I now make it once a week and although it is great to eat a slice with a little butter, G and I love it toasted with any topping we fancy at the time.
sourdough bread (recipe from Yoke Mardewi of Wild Sourdough adapted by Fiona from Food 4 Thought)
makes one 1kg loaf (you will need to begin this recipe the day before*)
Ingredients
600g (1lb 5ozs) bread flour
12g (1 tablespoon) sea salt flakes, crushed
170g (6ozs) developed starter culture*
320g (1½ cups/12ozs) filtered water
Preparation
Line a 22cm x 11cm (8 ½ in x 4¼ in) loaf tin with non-stick baking paper.
Place flour into large bowl of stand mixer. Add sea salt and stir to combine. Make a well in centre, add developed culture then the water. Using a large metal spoon or plastic spatula, mix the water and culture together to loosen the culture, then stir into the flour until most of the flour is incorporated. This can take a little bit of work. Cover and set aside for 20 minutes to allow the water to be absorbed into the dough.
Place bowl into stand mixer and attach the dough hook. Knead for 15 minutes on low speed.
Remove from the bowl and place into loaf tin, pressing mixture gently into shape of the tin. Set aside in warm area for approximately 9 hours or until doubled in size.
Preheat oven to 250°C. Bake bread for 10 minutes then reduce heat to 220°C and bake for further 15 minutes. Remove from oven, remove baking paper and cool on wire rack. To test if cooked, tap the bottom of the loaf, this should sound hollow.
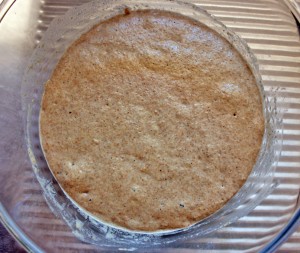 Sourdough starter growing 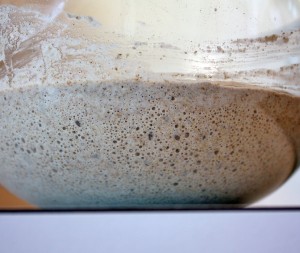 Sourdough starter growing
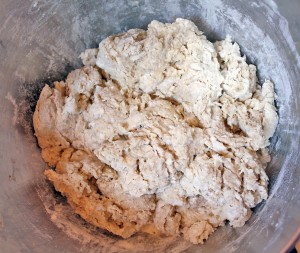 Sourdough bread mixture 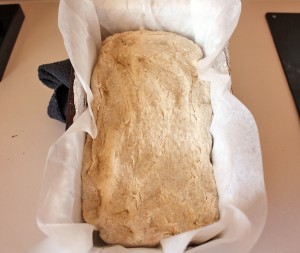 In tin, ready to rise
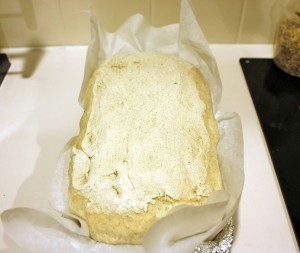 All risen, ready to bake 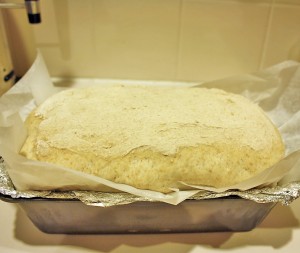 Look Mum, no yeast!
My tips/alterations: *I usually feed my culture at about 6am and allow it to stand for approximately 6-7 hours or until it is almost three times its original size. Then I mix up the bread dough and allow that to stand for 9 hours or so which allows me to cook it just prior to going to bed. That way we have fresh bread for toast the next morning. *The rising time for both the culture and the dough will depend on the warmth in the room. The times I have listed are for the warmer months so you may need to allow more time when the weather it a little cooler. *Placing the starter in the refrigerator in between will make it go dormant until you feed it again. You need to feed it once a week to keep it alive. You can use the starter to make a loaf of bread or you can share it with friends. *The texture of the dough will often depend on the type of flour that you use, the temperature of thee water and the culture and even the air temperature. I usually watch it when it is mixing and will add a little extra flour if I feel the mixture is too wet. The mixture should stick to the sides of the bowl just a little but not be too sticky. *Recently I have altered my recipe to substitute 100g of white flour and replace it with wholemeal flour which gives the bread a nice texture. We have also tested this recipe with rye and all wholemeal flour and found the bread takes on a more sour flavour and has a slightly denser texture. *If you don’t have a stand mixer you can also knead this in a bread maker or even by hand.
If you would like to make your own sourdough starter there are a number of sites that will explain how to do so. I liked “The Fresh Loaf” because it is a traditional version and doesn’t include any yeast.
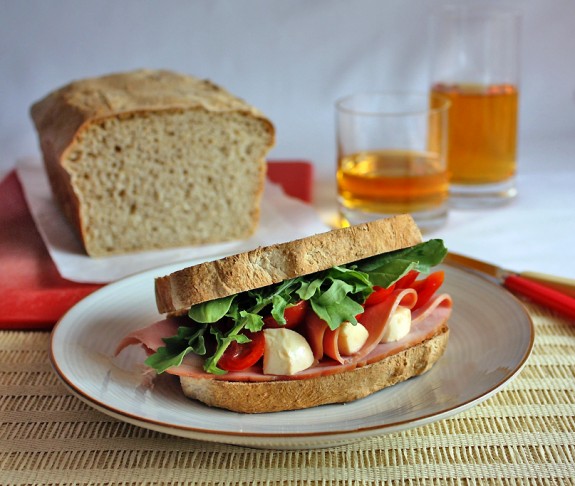
ease: 9/10. This took some trial and error to get right but now that I have worked it out I think this is simple. If you don’t have a stand mixer or bread maker to knead the dough you might find it a little more difficult.
prep time: 40mins including kneading + rising time for culture and dough.
cooking time: 25mins.
total: 1 hour 5 mins + rising time.
taste: 10/10. G has been bugging me to write about this bread for a long time. He tells me that it is the best bread he has ever eaten. It has a slightly sour taste to it and it is definitely denser than normal store bought bread. When you toast it the outside goes crunchy but the inside tends to stay soft which I think is because of its consistency.
would I make it again: I will have – This has become a weekend ritual for me, one that I love. We never buy bread anymore and feel healthier for having our sourdough.
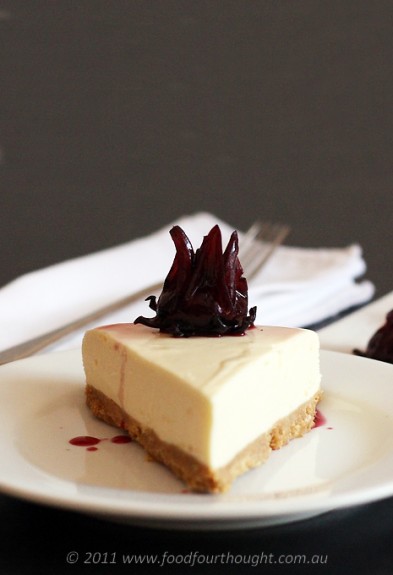
Being a passionate cook often involves giving and receiving food related gifts. I love seeing the look on someone’s face when they try something that I have created and really enjoy it. The gifts I have received over the years have been many and varied.
Items such as Vanilla and Port Chocolate Sauce, Chilli and Lime Mayonnaise and even a bottle of Truffle Oil are all gifts that did not stay on my shelf very long before finding their way into my kitchen. One thing that I do seem to have received several jars of are (edible) Wild Hibiscus Flowers in Syrup. They are a great to add to champagne for that special occasion but I always tend to forget to put them out when we serve champagne to guests. So when I recently cleaned out my pantry and found three jars that needed to be used I knew that a little creativity was required.
We had friends coming for dinner and I knew they loved cheesecake. I decided to use my delicious classic lemon cheesecake recipe and add a little embellishment of my own.
You will need 1 x cheesecake (as per recipe link above) and 1 jar hibiscus flowers in syrup to decorate the cake as you wish.
My tips/alterations: *When using gelatine leaves always check the strength ie how much liquid one leaf will set and to what consistency. This should be listed on the packaging. *When decorating the cake remember that the syrup is quite sweet so use it sparingly. You can always add more!
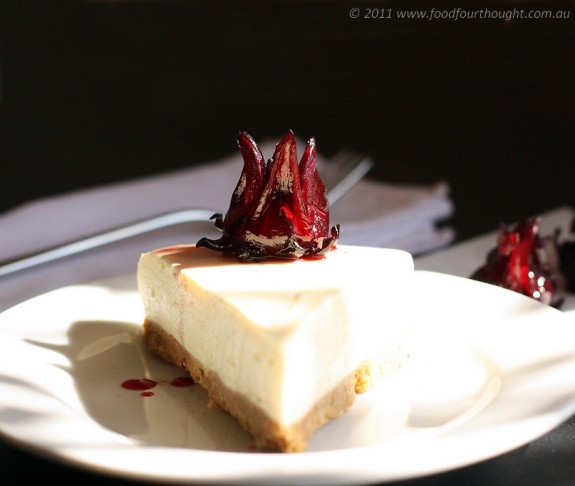 What a gorgeous colour they are.
ease: 8/10. I think the hardest part is to try and get the base even. Gelatine sheet are easy to use, just follow the directions.
prep time: 30mins.
cooking time: No cooking required. Chill for a minimum of 1 1/2 hours.
total: 2 hours.
taste: 10/10. This is the score the original post was given and our guests agreed that the addition of the flowers and syrup was a great twist.
would I make it again: Yes it is an old faithful.
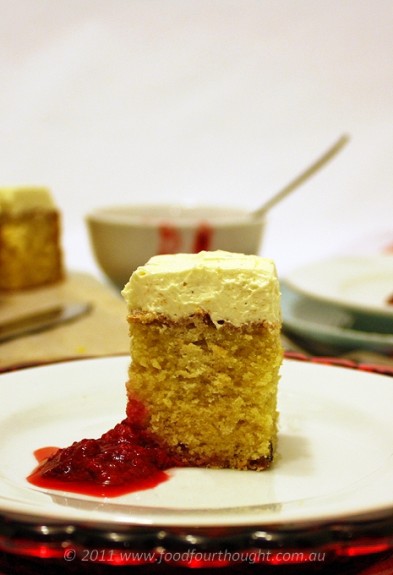
One of the things I love about cooking is being able to bring pleasure to other people’s lives. I know that might sound like a cliché but it is honestly the truth. I guess cooking for others is my tool for showing that I care about them.
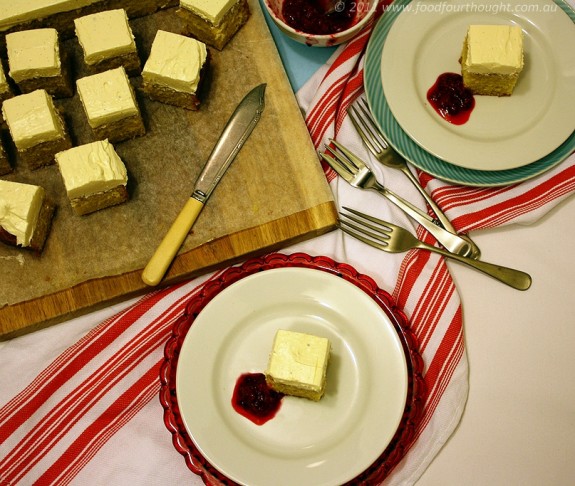
I made this cake for one of the girls I work with. It was her Birthday late in December and I wanted her to have something special because she was working that day. I read this recipe when the magazine came out in October and knew it would be a special cake. I also knew that the frosting would be quite firm so it would keep well and also transport easily. This meant that I could make it a day ahead, and with limited time that is always a handy option.
buttermilk and vanilla cake with raspberries (recipe from Gourmet Traveller adapted by Fiona at Food 4 Thought)
serves many
Ingredients
250g (½lb) softened butter
330g (¾lb/1 ½ cups) caster sugar
3 eggs
scraped seeds of 1 vanilla bean or 1 teaspoon of vanilla paste
finely grated rind of 1 lemon
300g (2 cups) plain (all-purpose) flour, sieved
150g (1 cup) self-raising flour, sieved
½ teaspoon bicarbonate of soda, sieved
350ml (1 ½ cups – US) buttermilk
500g (1lb/about 4 punnets) raspberries, to serve
vanilla frosting
3 eggwhites, at room temperature
pinch of cream of tartar
260g (½lb) caster sugar
scraped seeds of 1 vanilla bean or 1 teaspoon of vanilla paste
300g (2/3lb) softened butter
Preparation
Preheat the oven to 160°C (320°F). Beat butter and sugar in an electric mixer until creamy. Add eggs one at a time, then add vanilla seeds and lemon rind. Meanwhile, sieve flours and bicarbonate of soda into a bowl with a pinch of salt. With mixer on low speed, add half the flour mixture, then half the buttermilk. Repeat, then spoon mixture into a buttered 22cm x 32cm cake tin lined with baking paper. Smooth top, then bake until cake is golden and an inserted skewer withdraws clean (35-45 minutes). Cool in tin for 10 minutes, then invert onto a rack and cool completely.
For vanilla frosting, combine eggwhite and cream of tartar in an electric mixer and whisk until frothy. Meanwhile, bring 240gm caster sugar and 120ml water to the boil in a saucepan over medium heat, stirring to dissolve sugar, then gradually add remaining sugar to eggwhite and whisk on medium speed until soft glossy peaks form. Continue cooking syrup to soft ball stage (115C; 4-8 minutes). Remove from heat, then gradually add hot syrup to whites, whisking continuously on medium-high speed. Add vanilla seeds and whisk until cool and glossy (10-20 minutes). Gradually add butter a little at a time, whisking continuously until incorporated and smooth.
Spread frosting over cake, scatter with raspberries and serve.
My tips/alterations: * Vanilla paste is the seeds from vanilla beans and vanilla extract blended together. If you can’t get fresh vanilla beans you can use this. *I always start and finish with flour when alternating liquid and flour. I find this gives the cake a lighter texture. *For a whiter frosting, use a European-style butter with a pale colour. *It’s important the meringue is completely cooled before the butter is added; otherwise, the butter will melt. If the mixture is too cold, it may look curdled; if this happens, continue beating the mixture until it is smooth. *This vanilla frosting is very stable, so you can ice the cake before you transport it. The frosting will be soft in warm weather and firmer in cool weather. *The cake is best eaten on the day it is made, however it keeps well for 3-4 days in an air-tight container.
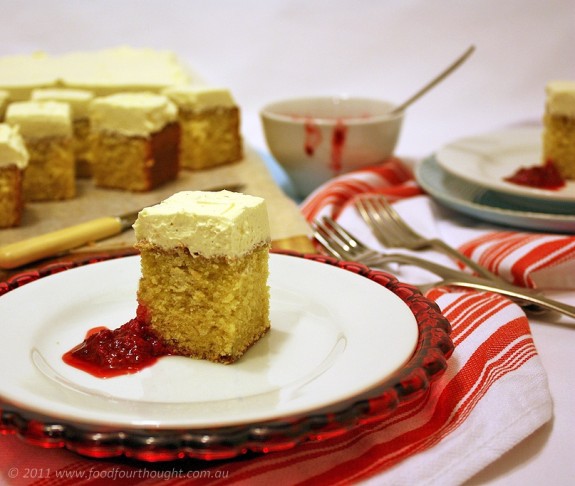
ease: 6.5/10. The cake is quite easy but the frosting was a little more challenging.
prep time: 40mins.
cooking time: 50mins plus cooling time
total: 1 hour 30 mins plus cooling time
taste: 8/10. This cake was delicious. It was very moist and you definitely knew it was vanilla flavoured. G & I agreed that we really enjoyed the cake but not the icing so much. Everyone else who tried it loved the complete package.
would I make it again: Yes if I need a large cake that will transport well.
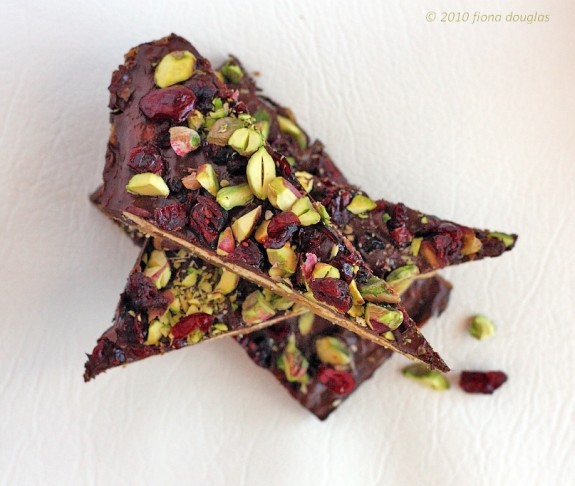
Christmas is widely considered to be a time for giving. Being a “foodie” I am overjoyed by any opportunity to cook for others. Christmas gives me a wonderful excuse to create homemade gifts for friends and loved ones. My staples for the past few years have been White chocolate and pistachio nut fudge and Christmas nougat. There are times that I have considered making other things but invariably I have people requested the old faithfuls. I have always oblidged without question…..until now.
Searching for something to make at this time of year brings its own set of criteria. For me it must be something that has a maximum pay off for minimum effort. Let’s face it, we all get so busy during the holidays and making gifts for others it is still another thing to add to the list of things to do. No matter how much one enjoys giving a handmade gift, buying something generic certainly is much less time consuming.
So you can imagine my excitement when I found something I could create in less than 30 minutes that I knew others would enjoy. Making these is a simple process, no sugar thermometer is required for the caramel, nor a bain-marie for melting chocolate. The recipe almost sounded too good to be true, but it wasn’t.
I think I might even have to adapt this recipe for Valentine’s Day.
Enjoy!
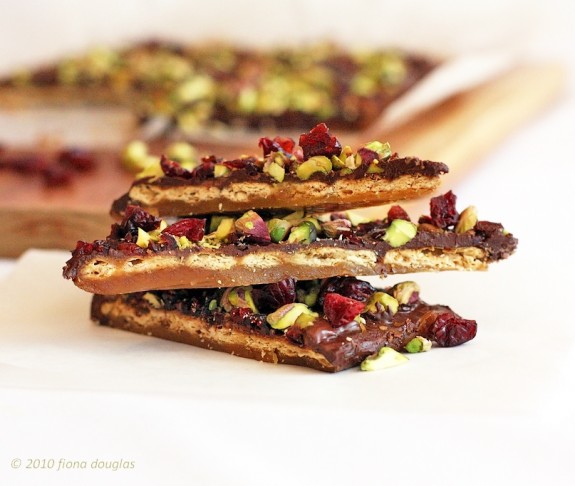
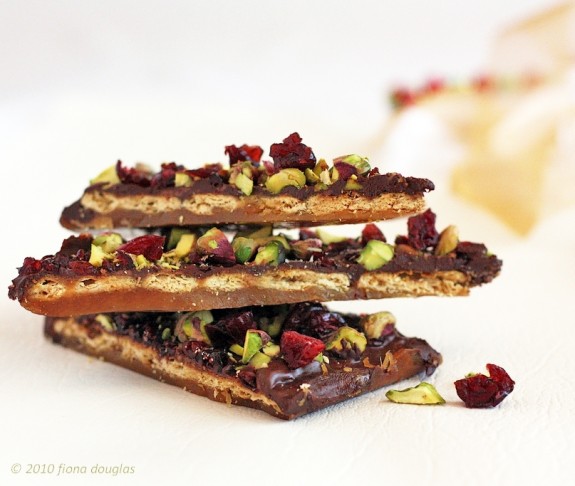
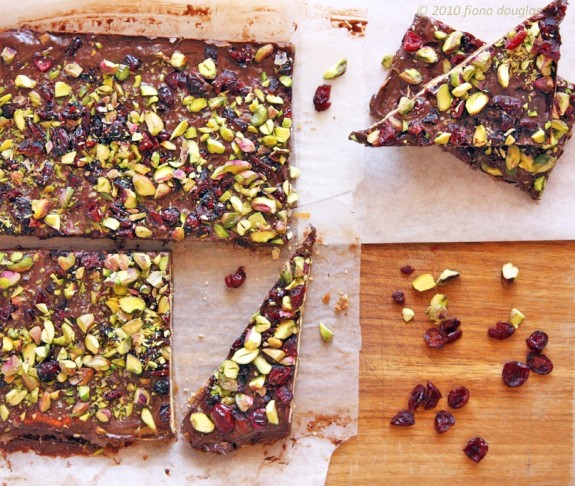
Salty caramel and chocolate christmas crackers (recipe from Dish Magazine – December 2010/January 2011)
Ingredients
100g (3.5 ozs/¼lb) plain salted crackers such as Salada
225g (1 cup/2 sticks) butter
¾ cup (150g/5.3ozs) soft brown sugar
200g (7 ozs/½lb) plain dark chocolate, roughly chopped
½ cup (60g/2 ozs) pistachios, chopped
½ cup (60g/2 ozs) dried cranberries, chopped
Preparation
Preheat the oven to 190°C (375°F/Gas 5). Line a 22cm x 33cm (8 ½ in x 13 in) shallow baking tray with baking paper. Place the crackers in the base of the tray without overlapping, so they cover the base, breaking them to fit if required.
Melt the butter and sugar in a saucepan over medium heat, stirring well, until it bubbles and is combined. Remove from the heat and pour immediately over the crackers as evenly as possible. Place in the preheated oven for 8 – 10 minutes or until bubbling all over and the caramel is starting to darken.
Remove from the heat and sprinkle the chocolate over evenly, then return to the oven for a further minute or until the chocolate has just melted enough to spread. Using a spatula or palette knife spread the chocolate evenly so is smooth on the surface.
Sprinkle over the pistachios and cranberries and leave until the chocolate is just set before cutting into pieces. Store the crackers in an airtight container for up to a week.
My tips/alterations: *I used half dark (70% cocoa) and half milk chocolate for the topping, just because I had some milk chocolate I wanted to use up. It worked well.
ease: 9/10. Very easy
prep time: 20mins.
cooking time: 10mins.
total: 30 mins.
taste: 9/10. The balance of salt and sweetness was excellent and the cranberries added a little bit of sharpness which balanced well with the rich flavour of chocolate. They were crunchy and chewy at the same time.
would I make it again: Absolutely and it won’t just be for Christmas!
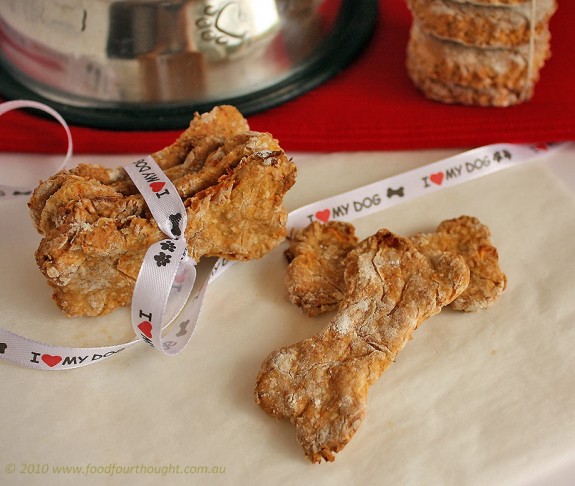
G and I have a little girl in our lives who is very special to us. She makes us laugh, makes us cry (I was a weeping mess when I had to watch her go into surgery recently) and brings immense joy to our home.
It was her (Miss B’s) Birthday recently and I wanted to show her how much we loved her so I decided to make her something special. These recipes came from a book that was given to G by a friend/colleague when he left his last job. She knew what Miss B meant to G and thought it would be a useful gift, and she was right.
I hope you are as lucky as we are and have someone special in your life that you can create these for.
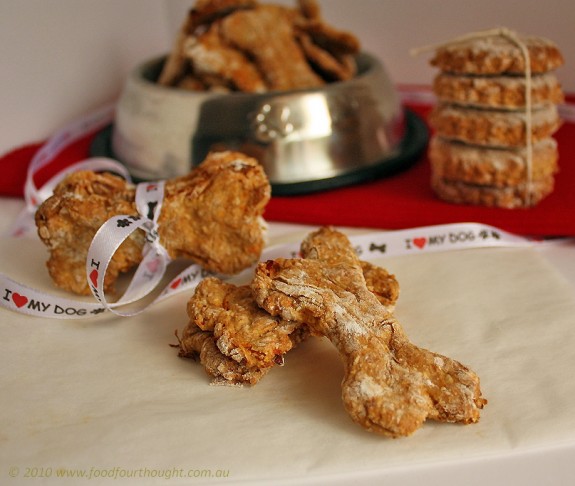
classic dog biscuits (recipe from “Cooking for your dog” by Ingeborg Pils adapted by Fiona at Food 4 Thought)
makes approximately 35 bone shape biscuits
Ingredients
225g (8oz) whole wheat flour
85g (6oz) porridge or rolled oats
20g (¾oz) shortening (pork lard)*
½ tablespoon sunflower oil
20g (¾oz) grated parmesan cheese
200ml (7 fl ozs) unsalted chicken stock
125g (4½ozs) carrot
85g (3ozs) corn kernels
Preparation
Mix flour, oats, shortening*, oil and cheese thoroughly. Add chicken stock and mix to a dough.
Preheat the oven to 160°C (320°F). Finely grate the carrots, add these and the corn kernels into the dough. Roll out the dough on a floured surface to a thickness of about 5mm (¼inch). Cut with a sharp knife to make diamonds, triangles or squares.
Line a baking sheet with non-stick paper and place biscuits on it. Bake in oven for 40-50 minutes. Turn off heat and allow the biscuits to dry out in the oven.
My tips/alterations: *The original recipe included crushed garlic which I omitted. I also substituted the shortening with butter. I added the corn because it is one of Miss B’s favour vegetables. *I found this mixture quite sticky and had to make sure that the bench was well floured when rolling it out to prevent sticking. *I used a 9cm (3½ inch) long bone shaped cookie cutter to cut my biscuits. They were slightly difficult to cut because of the vegetables. I think using a knife would be much simpler.
ease: 8.5/10.
prep time: 30mins.
cooking time: 45mins plus drying out time
total: 1 hour 15 mins plus drying out time
taste: 9/10. These were Miss B’s favourite and given they are safe for human consumption I tried them also. I can’t believe I’m about to describe a dog biscuit but here goes. They were really nice. Great crunch but still chewy the vegetables were quite sweet, everything a puppy could want in a biscuit.
would I make it again: Yes for our puppy of course.

honey dog biscuits (recipe from “Cooking for your dog” by Ingeborg Pils adapted by Fiona at Food 4 Thought)
makes approximately 24 bone shape or round biscuits
Ingredients
200g (7oz) whole wheat flour
150g (5oz) porridge or rolled oats
2 teaspoons baking powder
30g (1oz) butter
2 tablespoons honey
2 eggs
100ml (3 fl ozs) milk
flour for dusting
Preparation
Mix flour, oats, and baking powder together thoroughly. Add the butter in small flakes, plus the honey, eggs and milk. Knead together thoroughly.
Preheat the oven to 200°C (400°F). Line a baking sheet with non-stick paper.
Roll dough out to about 1cm (½ inch) thick on a floured surface. Cut biscuits into desired shapes. Place these on the baking sheet, leaving some space between them, and bake for 15-20 minutes. Turn off the heat and allow the biscuits to dry out in the oven for a further 2 hours.
My tips/alterations: *I found this mixture quite wet when I mixed it up. I added 50 g of flour and have made the adjustment to the recipe above. *I made sure that the bench was well floured when rolling it out to prevent sticking. *I used a 9cm (3½ inch) long bone shaped cookie cutter and a smaller round to cut my biscuits.
ease: 9/10. Reminded me of making scones.
prep time: 20mins.
cooking time: 20mins plus drying out time.
total: 40 mins plus drying out time.
taste: 7.5/10. Miss B wasn’t as keen on these. She ate them but only if you broke them up for her. I think it was because they were thicker and not as crunchy. I must say, I agreed with her. These weren’t as tasty as the others
would I make it again: No although these were much easier to make they didn’t taste as good. Classic is best!
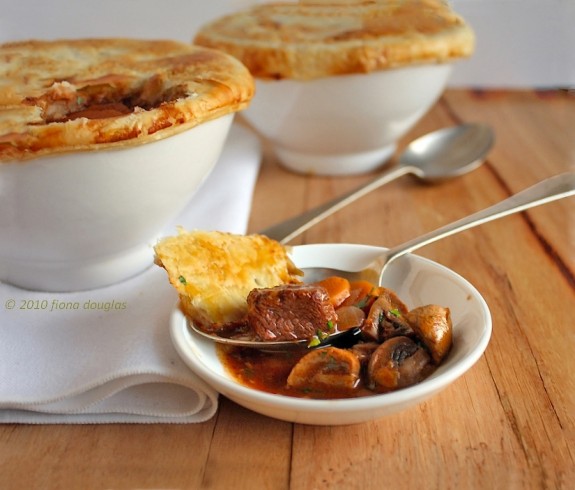
I have mentioned in my recent posts that G and I have been making a very conscious effort to eat healthy and exercise a little more. This includes making sure we consume lots of fruits and vegetables into our daily meals, something that we have always been very good at doing.
Just how much good eating we have been doing of late was highlighted recently when G completed a personal health check questionnaire through his occupational health and safety team at work. One of the questions related to the 2 fruits 5 vegetables a day theory and when we actually added everything that he (we) consume from those food groups in a day, this would be the minimum. After completing the questions, everyone was asked to pass in their form for evaluation and those with the highest scores relating to living a healthy lifestyle were awarded prizes. G was fortunate enough to be placed joint first and was given a bag full of goodies which included a “Healthy Eating” recipe book (yippee!). I flicked through it and found some great ideas including these delicious little pies.
individual beef and red wine pies (recipe adapted from Heart Foundation)
makes 4-6
Ingredients
2 teaspoons olive or vegetable oil
1 large onion, chopped
2 cloves garlic, crushed
1kg beef chuck steak trimmed of all fat and cubed
2 tablespoons plain flour
200g Swiss brown mushrooms, quartered
2 tablespoons fresh thyme chopped
2 tablespoon fresh parsley chopped
2 sheets canola puff pastry defrosted
1 tablespoons reduced fat milk
375ml red wine
375ml reduced salt beef stock
2 carrots thinly sliced
2 tablespoons reduced salt tomato paste
Preparation
Preheat the oven to 200°C. You will need 4-6 x 2 cup capacity ovenproof pie dishes.
Heat the oil in a large pot, add the onion and cook over a medium heat for 5 minutes or until golden. Add the garlic and the beef and cook for 5 minutes until the beef is browned.
Add the flour and tomato paste and cook for a further 2 minutes, stirring constantly. Stir in the red wine and stock and bring to the boil. Add the carrots, mushrooms and chopped thyme. Reduce the heat, cover and simmer for about 1 hour then remove the lid and cook for a further 45 minutes until the beef is tender and the sauce is reduced and thickened. Stir through the parsley, transfer to a bowl and allow the filling to cool completely.
Using the top of a pie dish as a guide, cut 4-6 circles from the pastry, about 2cm larger than the dish. Spoon the cooled filling into the dishes. Brush the edges of each pastry circle with a little water then cover the dishes (damp side down); pressing the pastry to the side of the dish to seal. Cut a small cross in the top of each pie, insert a sprig of thyme and lightly brush with milk.
Bake for 20-25 minutes or until the pastry is crisp and golden and the filling is hot. Serve the pies with mashed potato and steamed beans.
My tips/alterations: *I used reduced fat puff pastry. By the time this was cooked I only had enough mixture for 4 pies even though the original recipe said it would make 6.
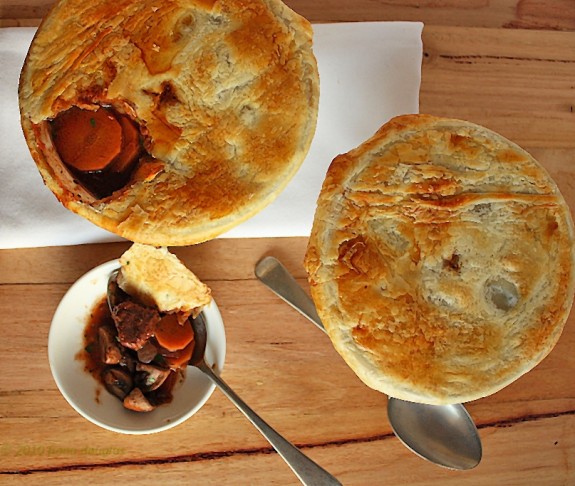
ease: 7/10. These aren’t too difficult; there are just a few elements to making them.
prep time: 30mins.
cooking time: 2 hours 25mins.
total: 2 hours 55mins.
taste: 8.5/10. These were delicious. The flavour that was in the filling was as good as any winter stew and the pastry was the crowning glory.
G had only one complaint. He considered these to be a hotpot rather than a pie. He said if they had of been a proper pie they would have scored 10.
would I make it again: Yes and maybe try and make them into a “proper pie” 🙂
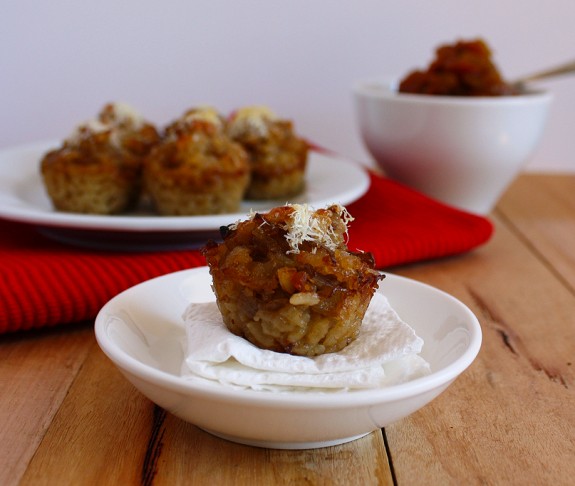
Reading recipes was once just a hobby for me but it has fast become an obsession. So much so, that I have adopted the description that one of my friends used once to describe the copious number of cookbooks she owns, “food porn”. So I guess I should be saying, “Hi, my name is Fiona and I’m addicted to food porn.” Soft (online versions), hard (magazines/cookbooks), all kinds really, I seriously think I might have a problem.
So it should come as no surprise that I recently scooped up a copy of the free Spring magazine from one of our local supermarkets and read it from cover to cover. Some of the recipes looked delicious but most were things that I had made a version of previously so nothing really excited me enough to try, except for this one thing. I have made risotto before and love the flavours, I have also made arancini (small balls of rice filled with cheese or some other delicious surprise before being deep fried). Due to our more health conscious eating habits lately I was excited to read about the baked version of their deep fried cousin and set aside some time to give them a go.
mozzarella & caramelised onion risotto cakes (from the Coles Spring Magazine 2010.)
you’ll need to begin this recipe the day before they are required. makes 24
My tips/alterations: *I stirred the rice mixture a couple of times throughout the cooking process just to make sure it didn’t stick. *I used vegetable stock as this meant they were vegetarian friendly. *I had to cook mine for almost 30 minutes as they weren’t holding together after the allocated time and the cheese on top had not melted or browned.
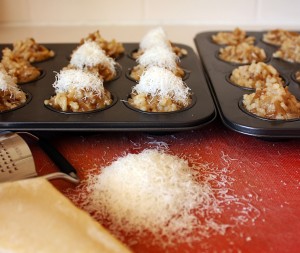 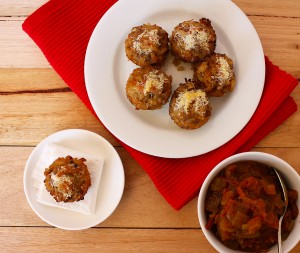
ease: 6/10. The cooking process was simple enough but they were a little fiddly to assemble. My mixture wouldn’t stick together enough to form a ball.
prep time: 30mins + overnight chilling.
cooking time: 40mins.
total: 1 hour 10mins + overnight chilling.
taste: 7/10. The flavour of these was lovely. The caramelised onions were quite prominent but well balanced by the balsamic vinegar, so not too sweet. The texture of the rice was nice to eat but the mixture did not hold together. I tried everything to get them to work (leaving them in the pan longer to cool, putting them in the fridge to firm them up) but to no avail. They were a little better when I chilled them after cooking but generally speaking they seemed to fall apart rather easily.
would I make it again: Maybe. I’d add extra cheese to see if it helped them to stick together. If that didn’t work I’d give up and stick to the fried version. If you have better success I’d love to hear all about how you did it.
Finding new and interesting ways to use overripe bananas seems to be a constant challenge, especially lately. I buy them with the best of intentions to make sure that I eat at least one piece of fruit each day. The only problem being that I am quite fickle when it comes to bananas, I don’t like them too green or too ripe, they have to be just right. Invariably this often means that I have to freeze them or find something to bake that includes bananas. I have already written about the more traditional recipes to use such an ingredient, yoghurt banana cakes with honey icing, banana bread, choc chip banana bread (yum), banana bran muffins, and brown butter banana tart. So this time I wanted to find something completely different.
I looked up several websites and found many different recipes for banana cakes, pancakes, shakes, ice-cream and muffins all of which were too “normal” for what I wanted. Then I stumbled across something titled “Banana cookies” which I had never made before. After reading the recipe and finding I had all the ingredients that I needed, I got stuck into baking them.
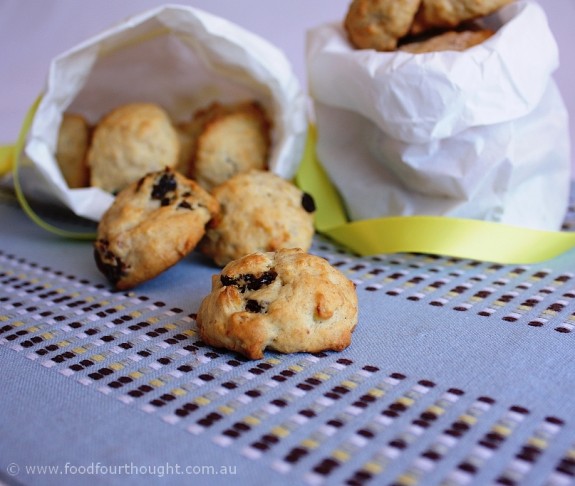
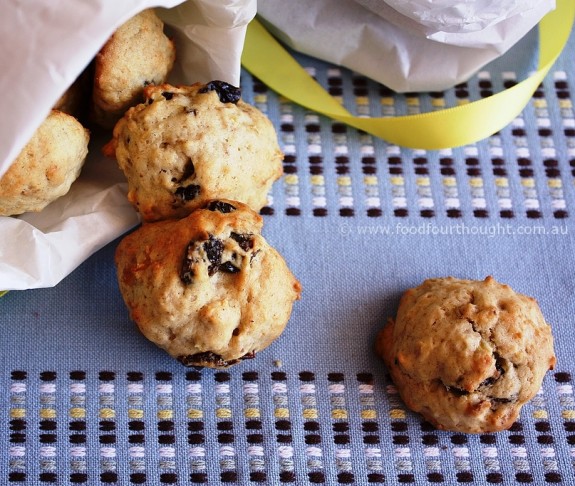
I tweaked the original recipe ever so slightly but am not quite sure what I did wrong as my mixture did not spread anywhere near as much as stated and didn’t really have the consistency of biscuits. In fact, they reminded me of muffin tops and in my book they are always a good thing! So I have called these little creations Banana Bites because that is exactly what they are. If you have over-ripe bananas to use up, you should give these a try.
banana bites (recipe adapted from foodblogga)
makes approximately 35
Ingredients
125g (½ cup) unsalted butter, at room temperature
¾ cup granulated sugar
1 large egg
1 teaspoon vanilla extract
480g (1lb) banana with skin on to yield 350g (¾lb) mashed very ripe bananas (about 3 large)
2 ½ cups plain (all-purpose) flour
1 teaspoon baking powder (soda)
¼ teaspoon salt
½ teaspoon ground cinnamon
1 teaspoon mixed spice
50g (½ cup) rolled oats
60g (½ cup) lightly toasted pecans, finely chopped
80g (½ cup) dark raisins
Preparation
Preheat the oven to 180°C (350°F). Line two baking sheets with non-stick baking paper.
In a large bowl, beat butter and sugar until pale and creamy. Beat in the egg and vanilla. In a separate small bowl, mix flour, baking powder, salt, and spices. Add one third of this mixture to the butter mixture and mix to just combine then one half of the mashed banana and beat again. Repeat this process making sure that you finish with one third of the flour mixture. Gently stir in the oats, pecans, and raisins to distribute throughout the dough.
Drop 1 tablespoon of cookie dough on the lined baking sheets. Bake for 15-20 minutes, or until firm and golden brown. Transfer to a rack and cool for 15 minutes.
My tips/alterations: *The only alterations I made to the original recipe were to the quantity of bananas and flour and I changed a few of the spices. *These didn’t spread much at all but puffed up a little to form more of a cake like shape.
ease: 9/10. This is basically a simple cake/biscuit recipe.
prep time: 20mins.
cooking time: 20mins.
total: 40mins + cooling.
taste: 7.5 8/10. Initially I thought these were OK but after my fourth one I decided that I really liked them. THESE WERE NOT THAT SWEET so you could really taste the banana flavour. They really reminded me of muffin tops, which gave them an extra half a point. 🙂
If you would like them sweeter, add some extra sugar or a little maple syrup into the mixture or top them as suggested below.
would I make it again: Yes and maybe sprinkle them with just a little demarara sugar for a bit of crunch and a touch of extra sweetness. I’d also substitute the raisins with some pecan nuts for something a little different.
Last night we decided to have an early dinner before watching a movie. Wanting to stay close to home to avoid any traffic issues we decided to head to Victoria Park. I had done a little research during the day and settled on a few options. One of our choices was V Burger Bar, a burger place that is situated along the restaurant trail of Albany Highway. Given that we wanted to eat before 6pm this was the perfect place. I had looked at their website earlier and knew that we could both find something on the menu to try. I also really liked the story of how the business started and the fact that they had a Mission Statement and Vision displayed on their pages.
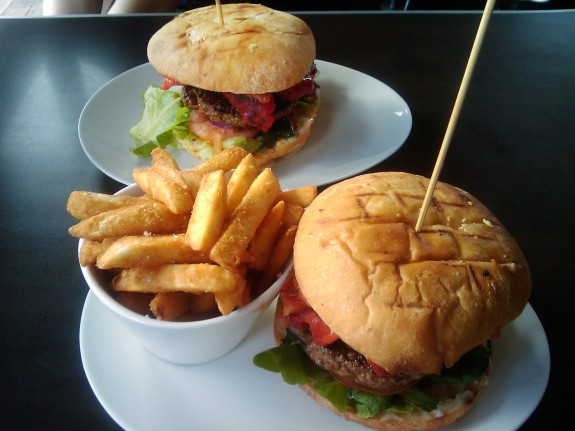
We arrived at around 5.30pm and found V nestled in a group of various eateries opposite the Balmoral Hotel. As we walked in we discovered a small, stylish establishment with a bar and stools along the length of one wall. This had an open window that allowed a little people watching, another something we both love to do. While reading the blackboard one of the young guys behind the counter handed us some menus and gave us a welcoming smile. Upon review the options the choice I thought I would make after reviewing the menu earlier in the day went completely out the window. G decided upon the Pepperizo and while they all sounded delicious I couldn’t go past that one either. Black peppered prime beef, gourmet salad, Spanish chorizo, char-grilled red pepper, sweet tomato relish and aioli all encased in a bun, what could be better. Mind you some of the vegetarian options were extremely tempting. For a mere $5 extra we upgraded one of our meals to include chips and a drink.
We settled into a table at the front window as the breeze blowing across the bar was a little chilly. About 15 minutes later our meals were delivered to our table. The first thing that struck me was the sheer size of them and the second thing was how good they smelt. For once I knew exactly how G felt when I cook something and won’t let him touch it until I have photographed it. He took some shot using his phone and I was about ready to ripe the burger from his frame when he told me he was done. (You’d never believe I was vegetarian for many years of my life!). A quick debate on the skill required to devour such a beast resulted in me cutting mine in half and getting stuck in while G surveyed the plate a little longer before opting for the same method.
The bun was char-grilled until slightly crunchy (a nice touch) with the sweetness from the red peppers and relish balancing out the pepper and beefiness of the burger itself. The salad was crisp and fresh, the chorizo was a welcome surprise. I say surprise because every now and then I would taste the lingering flavour of the Spanish paprika coming from the chorizo, another thing that I love. The only disappointments for me were the aioli, to me it tasted like a standard mayo with none of the garlic punch that I expect from aioli and the fact that I would have liked the burger a little less cooked but that is just a personal preference it wasn’t overcooked at all.
G is much more of a burger aficionado than I am as he has a regular burger night with the boys and he loved everything about it, saying it was better than where they normally go. The chips were also great, or at least the few I was able to snaffle were :). They were definitely twice cooked and I think they may have been lightly coated in polenta or something similar because they also had an extra flavour dimension compared to normal chips. Overall, for $27.00 (after Entertainment Book discount) a great meal.
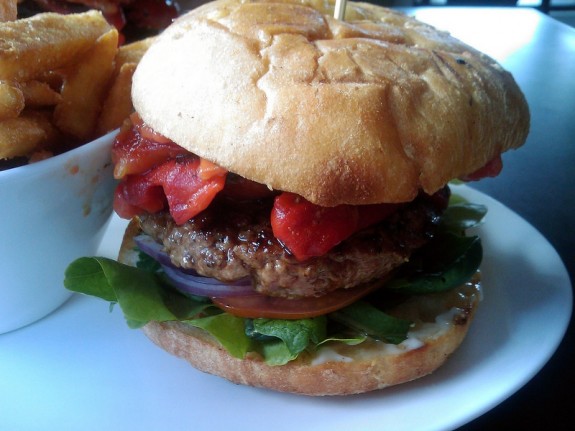
food: 9/10. This came from the burger aficionado. I said 8/10.
service: 9/10. Prompt (although we were the only one’s there initially), friendly and with a smile.
ambiance: 8/10. Decor suited the casual dining experience. Very clean and the chairs were comfortable!
would I eat here again: Yes, and we will bring our friends.
PS – Apologies for the quality of the photos, I didn’t think it was appropriate to strut in with my DSLR so these were taken on our phone.
You can also read this review via

Desserts have always been one of my favourite things to cook and it is only in the more recent years that I have really enjoyed cooking other dishes. I also like being able to create slightly different desserts. Whether it be the shape of certain components or simply the interesting combination of ingredients, I love it when friends and guests “oh” and “ah” as I place one of my creations in front of them.
So when a friend offered me a large punnet of seasonal strawberries freshly picked from a farm just outside of Perth I gratefully accepted. My most recent dessert using these delectable morsels was meringue nests with berries and cream so I knew I wanted to do something a little more elaborate this time. My latest issue of Gourmet Traveller had appeared in my post box earlier in the week and was a wonderful source of inspiration for a creative dessert. I had flicked through the glossy pages when the magazine arrived and immediately noticed the section highlighting chef Matt Stone and one of the newest and most talked about restaurants in Perth, Greenhouse.
The recipe read like a normal parfait with a few extra trimmings. It also had the addition of mastic which is an ingredient that I knew about and had seen before but never actually used. Mastic is the resinous sap that is collected from trees on the Greek island of Chios, and these translucent droplets are charmingly referred to as ‘tears’. It is used for the consistency it gives to ice cream and sweets and it was the original chewing gum and mouth freshener.
All of these things made me quite excited about having the opportunity to attempt this dish.
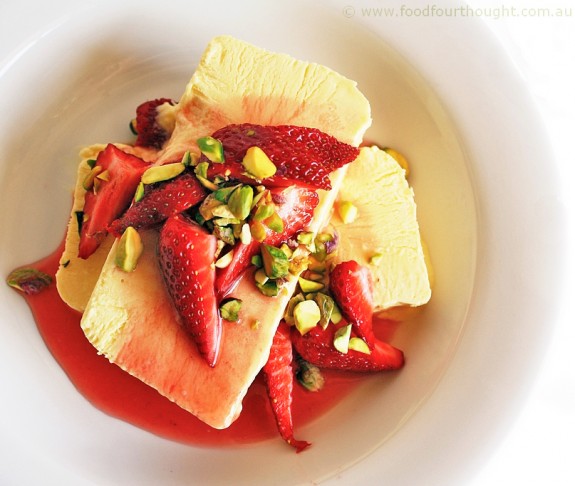
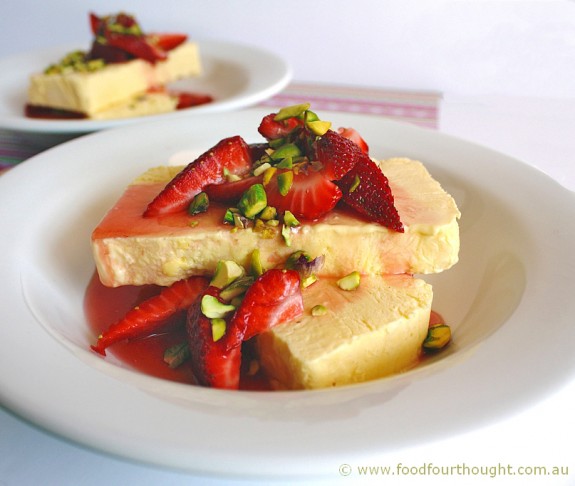
mastic parfait with pistachio, strawberry and rose (recipe from September 2010 issue of Gourmet Traveller magazine)
You’ll need to begin this recipe a day ahead. Serves 8-10
Ingredients
270ml (1 cup plus 1 tablespoon) milk
8g (0.28 ozs) mastic, finely crushed
12 egg yolks
270g (9.5 ozs) caster sugar
660g (1.5 lbs) mascarpone, gently whisked to soften
270ml (1 cup plus 1 tablespoon) pouring cream, whipped to soft peaks
325g (¾ lb) strawberries, trimmed and quartered
to serve, pistachio kernels, coarsely chopped
rose syrup
250g (½ lb) strawberries, trimmed and quartered
150g (5.3 ozs) caster sugar
3 tsp rosewater
Preparation
Combine milk and mastic in a small saucepan over medium heat, bring to just below boil, remove from heat and set aside to infuse (10 minutes).
Whisk egg yolks and sugar in a large heatproof bowl until thick and pale (3-4 minutes). Strain milk mixture over egg mixture then whisk over a saucepan of simmering water until thick and holds a ribbon (8-10 minutes). Remove from heat, transfer to an electric mixer and whisk to room temperature (4-5 minutes). Gently fold through one-third of mascarpone, then remaining mascarpone. Fold though cream, spoon into a 7cm x 20cm loaf tin lined with plastic wrap, smooth top and freeze until firm (6 hours-overnight).
For rose syrup, combine strawberries, sugar and 225ml (almost 1 cup) water in a saucepan over medium heat and stir occasionally until a light syrup forms (10-12 minutes). Remove from heat, stir through rosewater, strain through a fine sieve (discard solids) and set aside.
Dip tin in hot water to loosen parfait, turn out onto a board, remove plastic wrap and thickly slice with a hot knife. Serve immediately with strawberries, pistachios and rose water.
My tips/alterations: *I have never had much luck with cooking custard in a bowl over simmering water. I did try it this time but after 5 minutes of whisking decided to opt for my usual method of making custard which is to cook it in a large heavy based pot over medium heat, whisking until it begins to thicken then using a spatula or wooden spoon stirring until the desired consistency is reached. *I used a 21 x 11 cm (8 1/2 x 4 1/2 inch) loaf tin *The syrup is easy and delicious. I have made this since just to have with fruit and ice-cream. *The timing of some of the elements took a little longer than the recipe suggested but not too much more. *The mastic was easy to use and seemed to thicken the mixture a little, which is what it is supposed to do.
ease: 7/10. This is basically making custard and syrup with a few other elements added in.
prep time: 30mins.
cooking time: 30mins + infusing, freezing and cooling
total: 1 hour 10mins + freezing.
taste: 9/10. This parfait was delicious. The mascarpone gave this a completely different flavour to a normal vanilla custard based ice-cream. The rose syrup was amazing on its own and was only enhanced by the addition of fresh strawberries and pistachios. G felt the parfait was a little icy and compared to an ice-cream that has been whipped I guess it was but I didn’t find it annoying. Our guests loved it (or were being very polite :))
would I make it again: Yes! In fact, I have already made the syrup since and kept the leftover parfait in the freezer for some sneaky snacks.
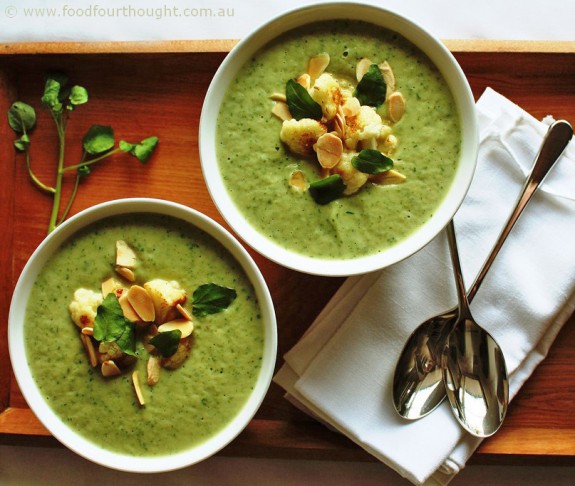
When you are passionate about cooking, read as many recipes as I do and cook as often as I cook you tend to learn rather quickly there are certain ingredients that just seem to belong together. I associate it with any other relationship. Sometimes, two people being together just isn’t good but when you find that right person that are meant to be with, it just seems to work, it’s easy and oh so good. Or at least that is the way it has happened in my life and the same can be said for putting ingredients together.
For me, one of the classic combinations is cauliflower and blue cheese. I don’t profess to know exactly why they go together so well but would welcome a scientific explanation if you have one. My opinion is purely based on the way they taste when I eat them together, especially in a soup. The cauliflower (along with the onion) tends to take on a sweetness that balances with the almost medicinal hit from the blue cheese. I know my words may not have you rushing to the fridge to grab your ingredients, but please believe me when I say; if you like these two things then try them together.
When I read this recipe I knew straight away that I had to make it. I found a beautiful head of cauliflower at my local markets, got my other ingredients ready and began to create.
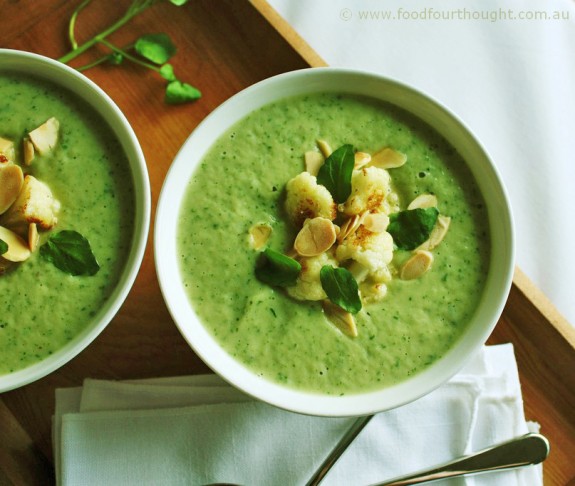
cauliflower, watercress and blue cheese soup (recipe from August/September 2010 issue of dish magazine)
makes about 8 cups. Serves 6
Ingredients
2 tablespoons olive oil
knob of butter (10g/0.30 ozs)
1 onion (200g/7 ozs), thinly sliced
2 cloves garlic, crushed
sea salt
1 medium cauliflower
1 bay leaf
½ cup white wine
5 cups chiken stock
¾ cup milk
100g (3.5 ozs) creamy blue cheese, crumbled
2 cups packed watercress, thick stalks removed, roughly chopped
garnish
2 tablespoons olive oil
knob of butter (10g/ 0.30 ozs)
reserved cauliflower florets
¼ cup sliced almonds
small handful watercress
Preparation
Heat the oil and butter in a large saucepan. Add the onion and garlic with a good pinch of salt, cover and cook until tender.
Break the cauliflower into small florets and set aside 2 cups for the garnish. Thickly slice the stems and add to the onions with the remaining cauliflower and bay leaf. Cook for 10 minutes.
Add the wine and let it bubble up until most of it has evaporated. Add the stock, season and cook until the cauliflower is tender. Add the milk and bring the soup back to the boil. Remove from the heat, add the cheese and stir to melt. Place a quarter of the hot soup in a food processor and add a quarter of the watercress. Process until smooth. Tip into a clean saucepan and repeat with the remaining soup and watercress. Season.
For the garnish, heat the olive oil and butter in a sauté pan. Add the cauliflower and cook over a medium-high heat until golden. Drain on kitchen towels and season. Add the almonds to the pan and cook until golden. Drain on kitchen towels.
To serve, ladle the soup into warm bowls and top with the garnish.
My tips/alterations: *I used more water cress than was recommended because I like the peppery flavour. *When it came to blending the soup I used a hand held whiz rather than dragging my food processor out. The result was that the watercress was slightly finer which makes the colour a little greener (well that and the fact that I added extra watercress) but doesn’t change the flavour at all. *You could substitute rocket for the watercress if you prefer and if you don’t like the flavour of blue cheese I would suggest trying the recipe with dolcelatte gorgonzola (a very mild form of blue) or even feta. *To save time, I prepared my garnish while the soup was cooking.
ease: 9/10. There is nothing difficult about this.
prep time: 20mins.
cooking time: 25mins + blending
total: 50mins.
taste: 9/10. We love, cauliflower, blue cheese and watercress so couldn’t really go wrong with this dish. These flavours go together really well.
The use of milk rather than cream meant that texture was creamy without being heavy. The addition of crunch from the garnish meant that we weren’t hunting for a piece of crusty bread like we normally do when we have a bowl of soup for dinner.
This made me feel like I was eating something healthy and delicious. What more could you ask for?
When I scored this soup I thought, how would I improve it? The only thing I would do differently is add a touch more cheese because I love the flavour.
would I make it again: Yes! I consider this one of my classic recipes now.
When I was a child I was considered one of the ‘weird kids’ for many reasons. I was always on time, I liked my teachers, I loved sports and I ate things that other kids wouldn’t even look at. Things like lambs fry, cabbage and brussels sprouts were often a part of my meals. Mum was very good at incorporating the unusual into our diets and always encouraged us to try things at least once before we said we didn’t like it. We were also very fortunate that our Grandpa grew most of the vegetables for us. He used to tend a large plot of land on a daily basis to keep us all supplied with the freshest food possible. One of my favourite things to do was pick baby carrots from the ground, wash them under his garden tap and chew on them likes bugs bunny while following him around the garden.
Now, as an adult, these are the ingredients that I source when they are in season and at their best. Luckily for me it is time for sprouts. My recent purchase of the August/September issue of dish magazine happened to coincide with the season and is where I found this simple and delicious recipe. You will find the other recipes that I have made from this particular issue in this category.
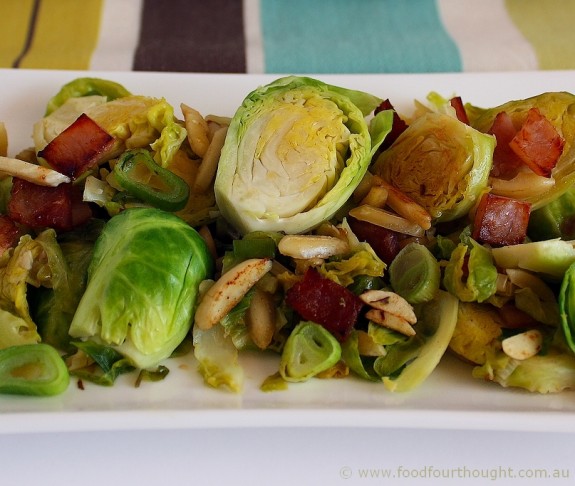
If don’t usually like sprouts I encourage you to try this recipe. G is not a big fan of sprouts but loved this dish and upon giving me his score he reminded me that “everything tastes better with bacon”.
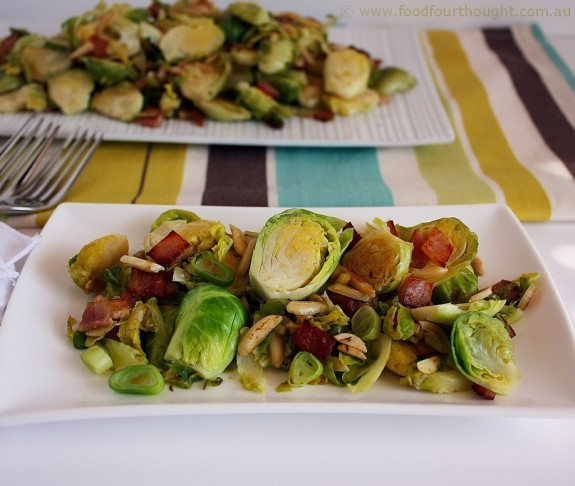
sautéed brussels sprouts with bacon and almonds (recipe from August/September 2010 issue of dish magazine)
serves 4 as a side dish
Ingredients
500g (1 lb) firm Brussels sprouts
small knob of butter
100g (¼ lb) bacon, thinly sliced
2 spring onions, thinly sliced
2 cloves of garlic, crushed
2 tablespoons slivered almonds
sea salt and freshly ground black pepper
Preparation
Trim the edges of the sprouts, remove any tatty leaves and slice ½ cm thick pieces. Blanch in boiling salted water for 2 minutes. Drain well.
Heat the butter in a sauté pan and cook the bacon, spring onions, garlic and almonds until lightly golden. Add the sprouts, season well and cook over a high heat for 3 – 4 minutes, tossing to combine. Transfer to a serving bowl and serve immediately.
My tips/alterations: *I used the same pan to blanch the sprouts and to sauté the ingredients. While preparing the sprouts I boiled the water, then while cutting the other ingredients I melted the butter in the pan. This saves time because the pan is already warm when you want to sauté and washing up because you only use one pan. *Blanching is simply means to plunge foods into boiling water for a few seconds or a few minutes, then remove and place in ice water. This process sets the colour of vegetables, lets you easily peel fruits, and slip the skins off nuts. The food does not cook all the way through, so crisp texture is preserved. This recipe didn’t mention the ice water and I didn’t do that part of the process either. *I cooked all the ingredients together for about 5 – 6 minutes as I felt they were not done enough in the time recommended.
ease: 9/10. This is almost a simple sauté.
prep time: 10mins.
cooking time: 10mins.
total: 20mins.
taste: 9.5/10. Surprise, surprise, this score came from G, the non sprout fan of the family. We both hoovered this from our bowls. The flavours and textures were all well balanced and we just wished for a bigger bowl.
Love them or hate them, try this recipe.
would I make it again: Absolutely! In fact, I have already bought more sprouts this so I can.
Being a self confessed food and cooking addict means that I have several vices such as most pieces of obscure kitchen equipment known to man; too many cookbooks to fit on any bookshelves in existence and a substantial collection of food pornography in the form of several magazine collections. It is for these reasons that I committed to using my cookbooks as my first research point when wanting to find new recipes and to only subscribe to one magazine per year. I have one ‘get out of jail free’ clause in my deal and that is I am allowed to buy an additional magazine if, and only if, I genuinely think that I will cook more than two recipes from it.
My recent purchase of the August/September issue of dish magazine was not taken lightly and I knew I had many things to cook from it. I have mentioned before how much I love this particular publication because I find the recipes are that little bit different but use ingredients that you tend to have on hand or can easily find. You will find the other recipes that I have done from their pages here.
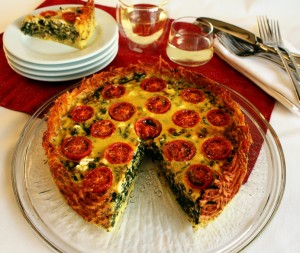
I chose to cook this dish because when I went to the fruit and vegetable markets over the weekend the silverbeet (also known as swiss chard in some parts of the world) was so fresh that I just had to buy some. I have always loved the deep iron flavour of silverbeet, even as a child. So paring it with crunchy potato, smooth feta and sweet cherry tomatoes seemed like a treat to me.
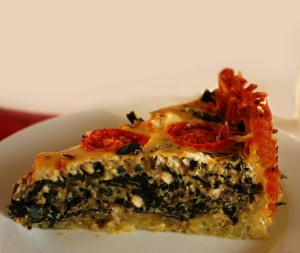
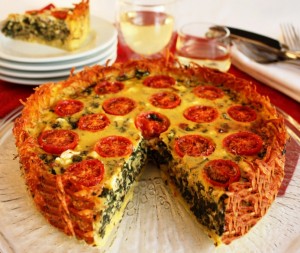
potato crusted silverbeet and feta tart (recipe from August/September 2010 issue of dish magazine)
makes one 26cm (10 inch) tart, serves 6 – 8
Ingredients
Crust
800g (1 ¾ lbs) floury potatoes
1 egg
1 teaspoon cumin seeds, toasted
1 clove garlic, crushed
3 tablespoons melted butter
sea salt and freshly ground black pepper
Filling
2 tablespoons olive oil
1 red onion, thinly sliced
1 clove garlic, crushed
1 tablespoon finely chopped rosemary or thyme
3 cups packed, shredded silverbeet leaves (250g/½ lb)
1 cup sour cream
5 eggs
1 tablespoon wholegrain mustard
150g feta cheese
10 cherry tomatoes, halved
¼ cup freshly grated Parmesan cheese
Preparation
Preheat oven to 180°C (350°F/Gas 4).
Grease a 26 cm x 3.5 – 4 cm deep loose-based tart tin or metal pie tin very well and place on a baking tray.
For the crust, peel and coarsely shred the potatoes. Whisk the eggs, cumin and garlic in a large bowl and toss through the potato. Add the melted butter, season generously and toss well to coat. Press the mixture into the tin, bringing it up the sides as you would with pastry. Bake for 30 minutes. As it cooks, remove it from the oven several times and lightly press the crust with the back of a spoon as the potato softens, pushing it against the sides and base and sealing any holes in the crust, until crisp and golden.
For the filling, heat the olive oil in a large sauté pan and cook the onion, garlic and rosemary or thyme until soft. Add the silverbeet, season and cook until tender. Cool for 10 minutes. In the meantime, whisk the sour cream, eggs and mustard in a large bowl and season.
Set a third of the feta cheese aside and crumble the rest into the silverbeet mixture. Combine, tip into the potato crust and crumble the remaining feta over the top. Dot over the tomatoes and scatter with Parmesan cheese. Bake for 25 minutes or until the filling is golden and firm to the touch. Serve hot or warm with sautéed Brussels sprouts.
My tips/alterations: *I choose to use a slightly smaller tin (24.5 cm) which meant that the tart was slightly deeper. It took the same time to cook. *I used some of the melted butter to grease the tin then combined the remaining butter with the potato crust. *I sprinkled the parmesan cheese over before dotting the tomatoes on top, this means that you could see the brightness of the cherry tomatoes better. *After cooking this for 5 minutes less than recommended I let this stand, removed the edge of the tin then, when we were ready to eat, place it back in the oven to reheat it. This meant that the crust browned a little more because when I removed it from the case initially I found that it hadn’t browned as much as I would have liked. You could also get this effect by removing the sides of the tin for the last 5 minutes in the cooking process, just make sure that the centre is slightly set first.
ease: 8/10. The potato crust is a little different than pastry and requires a gently touch.
prep time: 20mins + 10 minutes cooling time.
cooking time: 25-30mins.
total: 60mins.
taste: 9.5/10. The famous words – “Please Sir, can I have some more?” – spring to mind when I think of this dish. The flavours were delicious and the textures excited our palates. Crunchy potato, soft, iron rich filling with the occasional burst of sweetness from cherry tomatoes, our mouths felt like this was one big party.
Even my little carnivore G kept coming back for more! He said the only reason he didn’t rate it 10 was because there was no meat in it :).
would I make it again: Absolutely. I would make it ahead and reheat it to crisp the shell even more.
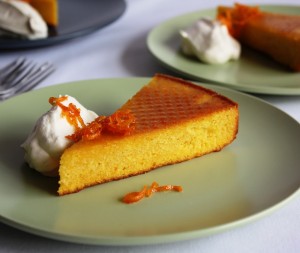
Recently I wrote about the generosity of a friend who gave me some mandarins from his orchard and that I decided to make mandarin muffins to take to the office and share with others. On the day I chose to make them I needed a recipe that was quick and easy because I was extremely short on time. However, I had discovered a delicious recipe for a cake that also showcased this fabulous fruit and knew that I would have to make it one day.
This particular recipe meant boiling the fruit for two hours so I knew that the weekend would be the time to make it as I planned to have a substantial amount of time in my kitchen so I could keep an eye on them. After that task was done, I think this could possibly be the easiest cake I have ever made.
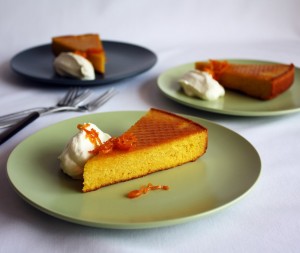
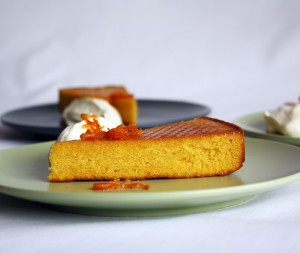
mandarin almond cake (recipe from “bills food” by Bill Granger)
makes one 24 cm cake, serves 10 – 12
Ingredients
3 mandarins
250g (1 cup) caster sugar
6 eggs
230g (2 cups) ground almonds
to serve
60g (¼ cup) caster sugar
zest of 2 oranges
Preparation
Put the mandarins in a medium saucepan and cover with water. Bring to the boil and simmer for 2 hours, adding water when necessary to keep the mandarins covered at all times.
Preheat the oven to 160°C (325°F/Gas 3). Grease a 24 cm (9 inch) springform cake tin well.
Drain the mandarins and cool to room temperature. Once cooled, split them open with your hands and remove any seeds. Puree the mandarins, including the skins, in a food processor. Add the sugar and eggs and mix together until combined. Add the ground almonds to the mandarin purée and stir thoroughly.
Pour the mixture into prepared tin and bake for 1 hour 10 minutes, or until the cake looks set in the middle, springs back when touched and comes away from the edges. Remove from the oven and allow to cool in the tin.
While the cake is cooling, put the extra sugar in a saucepan with 60 ml (¼ cup) of water over a low heat and stir until the sugar dissolves. Add the orange zest and boil the mixture until it just starts to caramelise. Lift the zest out with a fork and cool it on a plate.
Serve the cake with caramelised citrus zest and a sprinkling of icing sugar.
My tips/alterations: *If you have a food processor or blender this is one of the simplest cake recipes that you can make. *The limited ingredients mean that this cake is gluten-free, wheat-free and diary-free so great for those with allergies to those ingredients. You can make this in a smaller or larger pan it will just affect the height of the cake and possibly the cooking time. *I used a fan-forced oven and found that the cake browned a lot more than was shown in the picture in the cookbook. Use whatever temperature you think will suit your oven and cover the cake with foil in the latter stages of cooking to avoid over browning.
ease: 9.5/10. This is one of the simplest cake methods you will find.
prep time: 10mins.
cooking time: 120mins for fruit + 70mins for cake.
total: 3 hours 20mins, most of which is unattended.
taste: 9/10. This was definitely a hit. It was a very moist cake and the flavour of the almonds came through beautifully. The bitterness of the mandarins was balanced by the sweetness of the cake and the syrup from the oranges that I decided to pour over the cake when serving.
When I took this to work, my friend who was kind enough to provide me with the mandarins rated it 9.5/10 and told me that the only reason it didn’t get a 10 was because he didn’t have any double cream or orange zest to put on top.
would I make it again: I already have! I just substituted the mandarins with oranges.
A little while ago I realised that my obsession for food magazines and cookbooks was completely out of control. My bookshelves were almost bursting out of the shelves, my spare room looked more like a library as each day passed and the spare piles of magazines were becoming high enough that I could use them as a coffee table. So I made a commitment to only subscribe to one magazine for the year and buy others only if I knew that I would cook more than two recipes from it. This also meant that I could start and consult my vast number of cookbooks more often rather than just letting them gather dust.
With these best intentions in mind while visiting the newsagent recently I found myself standing in front of the food magazines. Remembering my rules for purchasing such items I flicked through one of my favourite reads called dish from New Zealand. My gorgeous (brilliant cook) friend Karina showed me this once and I was in awe. The issue I held in my hand was yet another fabulous one with great stories, some unusual recipes and a sealed meat section for carnivores only. I knew there were at least three things that I would create from this magazine so I tucked it under my arm and made my way to the register.
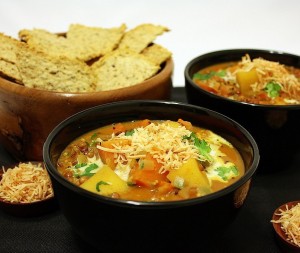
On the evening that I cooked this dish I was looking for something simple, tasty and healthy for a mid-week dinner. Soup is one of those things that I love to cook and to eat. It is normally a one pot dish filled with any number of delicious ingredients that can become a meal in itself. This particular soup was vegetarian and had slightly unusual ingredients. Not that you wouldn’t have most of the things you need in the pantry it is just that they may not be something that you would normally include in a pot of soup. That is one of the things that made me want to try this dish.
red lentil, kumara and coconut soup (recipe from August/September 2010 issue of dish magazine)
makes 8 cups of soup, serves 6 – 8
Ingredients
3 tablespoons olive oil
1 onion, finely chopped
1 carrot, finely chopped
2 cloves garlic, crushed
sea salt
1 tablespoon grated fresh ginger
1 tablespoon black or yellow mustard seeds
2 teaspoons Madras curry powder
1 x 400g (14ozs) tin crushed Italian tomatoes
400g (14ozs) kumara, peeled and diced into 2cm (1 inch) pieces
2 apples, peeled, cored and diced into 2cm (1 inch) pieces
½ cup (125ml) coconut cream
4 cups (1 litre) chicken or vegetable stock
¾ cup (150g/5.3ozs) red lentils
to serve
¼ cup chopped coriander plus extra for garnish
½ cup long thread coconut, toasted
extra coconut cream
Preparation
Heat the olive oil in a large saucepan. Add the onion, carrot and garlic with a good pinch of salt, cover and cook gently until the vegetables are tender.
Add the ginger, mustard seeds and curry powder and cook for 2 minutes. (Add a splash of water if the pan is dry). Add the remaining ingredients, season and simmer, partially covered, for 20 – 25 minutes until the kumara is tender.
To serve, stir the chopped coriander into the soup and ladle into warm bowls. Top with a drizzle of coconut cream, toasted coconut and coriander
My tips/alterations: *This is a relatively simple meal to create. The only thing that I would say is to be careful that you do not burn the spices when you add them as they will become bitter. *Also use a curry powder that you like as this will change the overall flavour of the dish. *For a vegertarian version use vegetable stock.
 
ease: 9/10. Chop a few ingredients and throw them into a pot, what could be simpler.
prep time: 10mins.
cooking time: 40mins.
total: 50mins.
taste: 9.5/10. I loved this meal. The colours and smell were absolutely gorgeous and both made us want to dive straight in. It was hearty yet light and had so many different flavours that danced over the palate in the most harmonious way. It made us feel like we were being very healthy. Even my little carnivore loved it and only deducted half a point because it didn’t have any meat. 🙂
would I make it again: I already have!

In some of my previous posts I have mentioned the generosity of friends and colleagues when it comes to serving my passion for cooking. Several of them grow their own fruit and vegetables and often I am the fortunate recipient of any excess goods that they may have.
One of my friends from the office, Greg S, is lucky enough to have a small orchard on his property and he works hard to cultivate wonderful produce. His generosity is appreciated by many people within the office and especially by me. His latest donation to my cause was some gorgeous mandarins picked from the tree the evening before I received them.
I must confess that I have not used this particular citrus fruit many times in my cooking adventures so a little research was necessary. During the search I honoured my commitment to try and use cookbooks before turning to the internet but there was nothing that suited my purpose. Given the source of the key ingredient I wanted to make something that I could share with others in the office, to show my gratitude and highlight Greg’s skill in tending his wares. I also didn’t want to have to boil fruit for several hours or use too many complicated processes. So after trawling the wealth of information known as the world wide web I finally settled on a recipe that used the fresh fruit segments in a simple way. It came from a website that I had never heard of which is something that I love about finding new things to bake. The Mountain Mandarin Growers are located in California and have been growing this variety of fruit for over 50 years. Their website provides some unusual recipes such as ‘Cucumber and Mandarin Orange Salad’, ‘Honey Ham with Mandarin Oranges’ and my personal favourite, ‘Mandarin Madness Milkshake.’ I chose something a little simpler and more mainstream, I hope you enjoy it.

mandarin muffins (recipe from Mountain Mandarin Growers Association adapted by Fiona at Food 4 Thought)
makes 12
Ingredients
300g (11 ozs) fresh mandarins to yield 250g (8.8 ozs) segments
1 ½ cups plain (all-purpose) flour
1 ¾ teaspoon baking powder
½ teaspoon salt
¼ teaspoon ground nutmeg
¼ teaspoon allspice
½ cup castor sugar
85g (3 ozs) unsalted butter, melted and cooled slightly
1 egg, slightly beaten
½ cup (125 ml) milk
Topping
2 tablespoons butter, melted
2 tablespoons castor sugar with ½ teaspoon cinnamon added
Preparation
Preheat oven to 180°C (350°F/Gas 4).
Peel mandarins, remove any pith and threads then gently remove seeds. Place segments in a bowl and set aside. In a separate large bowl, mix flour, baking powder, salt, spices and sugar. Add mandarin segments and mix lightly.
Combine the melted and cooled butter, lightly beaten egg and milk in a jug and whisk to combine. Add to flour mixture and stir until all ingredients are just combined. Spoon into greased muffin pan to about 3/4 depth and bake for 20 to 25 minutes or until a skewer comes out clean.
Remove from pan and while still a little warm brush with melted butter, then sprinkle generously with cinnamon sugar mixture.
My tips/alterations: *I choose to change the recipe slightly to try and lighten the mixture as I thought the original might be too heavy. The changes I made seemed to work well. *Don’t overmix the batter as this can make the mixture become tough once it is cooked. You should stir it until all the ingredients are just combined. Lumpy batter is okay. *The mandarins have a slight bitterness when they are cooked but the cinnamon sugar balances that out. It also gave the top a nice crunch.
 
ease: 9/10. Simple melt and mix method. The hardest part was peeling the mandarins.
prep time: 30mins + 5mins to decorate.
cooking time: 25mins.
total: 60mins.
taste: 8/10. These weren’t as light as I would have liked, however they were extremely tasty. The recipe highlighted the mandarin flavour and the sugar topping balanced it perfectly.
would I make it again: Maybe. But only if I had excess mandarins.
|


