A sample text widget
Etiam pulvinar consectetur dolor sed malesuada. Ut convallis
euismod dolor nec pretium. Nunc ut tristique massa.
Nam sodales mi vitae dolor ullamcorper et vulputate enim accumsan.
Morbi orci magna, tincidunt vitae molestie nec, molestie at mi. Nulla nulla lorem,
suscipit in posuere in, interdum non magna.
|
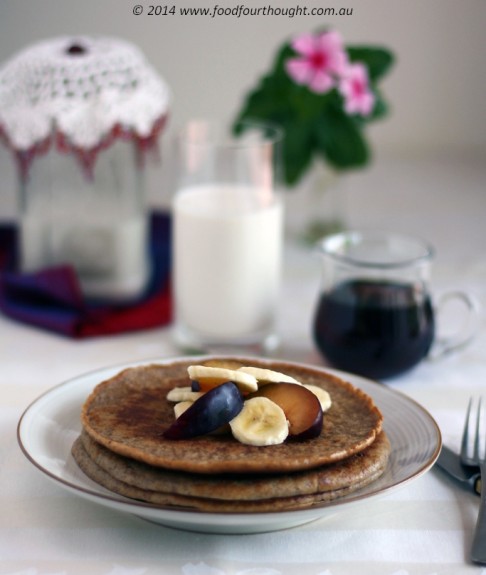
Mother’s Day is the one day of the year where most of us stop, even if only briefly, to recognise the AMAZING job that Mothers do in this world. I’m sure the word “job” should actually be in flashing lights because it is a 24/7, all consuming lifetime commitment.
I am extremely blessed to have an incredible Mum. One who has always been there to guide and support me while also letting me learn from my own mistakes. She taught me that I can do anything I set my mind on, to strive for my goals and dreams and, to this day she makes sure I know how proud she is of me.
When I was a child she would put up with my individualism and stubborn, strong will which included constant demands for different fashion items that (she made herself and) were a one of that no-one else would ever have.
She also had the patience of a saint when it came to my cooking. I remember her teaching me many recipes as a young child, allowing me to make the typical childhood mess. And as a teenager, me taking over the kitchen and putting my own twist on what I’d learnt to cook it for her and my family. Mostly successful, although I’m sure she was more than pleasantly surprised sometimes at how well things actually turned out.
Unfortunately we live in different states now. So although my spirit will be with her on Mother’s Day I won’t be making her a delicious breakfast like I may have done in years past. If I was with her I would make sure that she didn’t lift a finger and had the best breakfast in bed. Freshly brewed coffee and healthy pancakes. What could be better! I wonder in my fur child can make these for me on Mother’s Day, LOL.
What are you making your Mum for Mother’s Day breakfast??
(paleo) pancakes – makes 12 x 20cm pancakes (recipe by Fiona at Food 4 Thought).
Ingredients
200g whole almonds (skin on)
1 – 2 tablespoons honey (depending how sweet you like it)
2 tablespoons coconut oil
200g tapioca (arrowroot) flour
250g homemade almond milk
8 eggs
1 1/2 teaspoons bicarb soda
3 teaspoons apple cider vinegar
2 teaspoons ground cinnamon
pinch of salt
Preparation
Preheat a small pan over a medium heat.
Place almonds into TM bowl and chop for 12 seconds on speed 8. Remove and set aside.
Add coconut oil and honey to TM bowl and heat on 70°C for 2 minutes at speed 2 or until completely melted. Add all remaining ingredients along with reserved ground almonds. Mix for 20 seconds on speed 4. Scrape around sides of bowl, and mix for further 20 seconds on speed 4, or until well combined.* Place a small amount of butter into the pan. Pour enough mixture into the pan to cover the base and cook until you see bubbles starting to form on the surface of the pancake. Flip over and cook on the other side until golden brown. Remove each pancake from the pan and keep warm until ready to serve.
Serve with fresh fruit and maple syrup.
My tips: *This is quite a wet mixture, not thick like some pancake batters. This makes it easier to pour and to cover the base of the pan. *Don’t be tempted to turn the heat up too high and cook them quickly. They will burn and not cook all the way through. Leave them on a medium heat and wait until you see the bubbles forming. *I found these really filling and only needed two for my breakfast. *Use any spice that you like in place of cinnamon. *These will keep in the fridge really well once cooked. They can also be frozen.
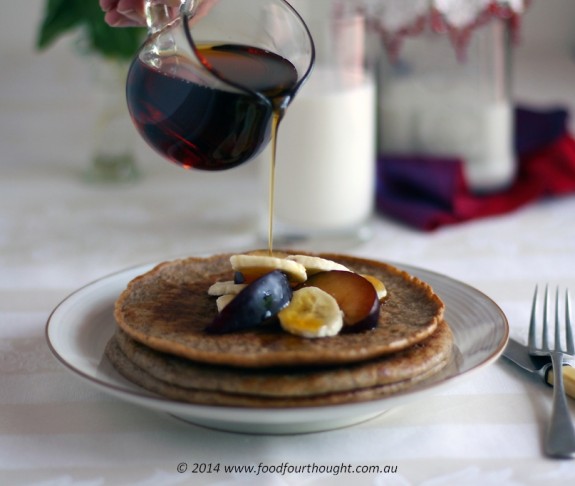
ease: 8.5/10. Easy enough to do on Mother’s Day!
prep time: 10 minutes.
cooking time: 20 minutes
total: 30 minutes.
taste: 8/10 From G, given he isn’t strict paleo and loves traditional flour pancakes that is a really good score! Personally I would say 9/10 from me. I loved these. I felt they had so much more flavour than other pancakes I’ve eaten.
would I make it again: Every weekend, if I had time 🙂
I recently wrote about how special it is to share recipes. Sharing tips and tricks that help us all get the most out of our Thermomix is also a wonderful thing to do. I asked you all to tell me what your best Thermomix tip was via my FB page. Thanks to everyone who shared their ideas, there were some great ones!
-
Thermomagician – Making Magic in my Kitchen – Don’t throw liquid gold down the sink. When you make stock – use the water you use to self rinse the bowl as the next liquid stock you use.
-
Ali – My tip is: don’t worry about peeling veggies or coring fruit (e.g. Apples, pears) when making any recipes that will blitz them up anyway (soups, smoothies, dips). The skins hold additional nutrients (after being washed well!) and it avoids unnecessary waste. We’re too quick to throw away the good stuff!
-
Hillary – Remember to use the self-clean function. Especially after making dough, I like to put 1 litre of water a drop of dish washing liquid 3min/50 C/spd 4, when that’s done, turbo pulse 2-3 times. No sticky dough under the blades, no gummy TM brush or dish cloth, love it !
-
Rachael – The little bottle brush that you get to clean baby bottles teats make cleaning under the blades very easy work.
-
Maria – My tip for everybody would be to use the machine and accessories at the same time and you’ll not only save electricity but you can make a three course meal in about 25/30 minutes. Use the Thermomix glass to make a cream of carrot, the lower varoma tray can be filled with frozen beans, carrots, artichokes… and the top varoma tray with some chicken breast, salmon… Now, that is some healthy meal and best of all, while your machine works, you can just sit down and relax!
-
Minnie – When measuring, place a bowl on top of thermo and place items in that when correct, tip in. I weigh my flour, butter etc this way saves having to tip out.
-
Debbie – Not cooking related but I have sat my thermo on a bamboo place mat, this helps when needing to move it, which is every time I use it as I have limited bench space. I just slide it out saves having to lift it every time.
- Thermomagician – Making Magic in my Kitchen – When you self rinse turn the blades on reverse and it swirls the water a little higher and gives the lid a good wash at the same time..
- Yasmin – When using the Varoma to make an omelette or steamed veggies and meat (or anything really) I measure the water and turn the machine on to Varoma with the MC in place THEN start chopping/preparing the food. Takes roughly 6-8 minutes for it to get up temperature anyway so it means no time is wasted and saves 5 or so minutes in cooking time. Every minute counts when you are a full time working mum of two kids two and under!!!!
-
Nerissa – Pre plan what u r going to do when u do a big batch cook up so that u aren’t standing around doing nothing when your machine is cooking for you. ie make dough for your scrolls and biscuits and set aside until u have a hot meal cooking and then do the rolling out and cooking.
-
Bron – Place the butterfly to the left of the stamped blade (with TM symbol) when looking at it pointing ‘north’ – that way the butterfly has a high point of the blade on front of it, less chance of the butterfly flying off.
-
Helen – When milling/grinding powdery products such as sugar or flours, place a sheet of glad wrap over the mixing bowl before putting on the lid. This stops the dust getting all over the lid and also stops powder coming out. You can then continue next steps without dusty powder dropping from the lid of thermi, saves a lot of mess.
Thanks so much for sharing everyone. As mentioned on my FB page, there would be some prizes for contributing. These were chosen using Random.org today 🙂
Congratulations to:
– Ali
– Debbie
– Minnie
Please contact me to claim your prize.
Fiona xx
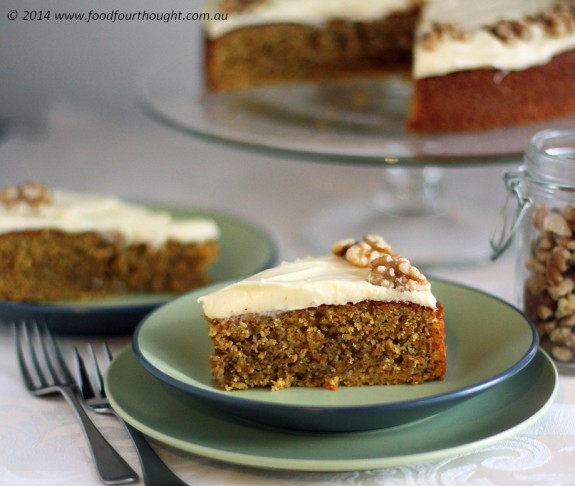
Sharing recipes of any kind is a very special thing. Some of them involve family traditions and secret ingredients; many are not even written down and only learnt through teaching the next generation. This is something that I have always loved about cooking and one of the things that drives me to continue teaching people how to make delicious and healthy food. I also love the fact that cooking and eating are often about sharing. Not only the food but also knowledge, stories, love and laughter.
Easter is one of those times of year that we connect with those special to us and sharing some good food is often on the agenda. This recipe was very generously given to me by a dear friend, who I happened to meet through Thermomix. Liz is a fabulous cook with many hidden (German) family secrets. She is also an amazing lady who inspires me in so many ways, one of which just happens to be in the kitchen with my “Hermie”.
I love this recipe because I have NEVER liked sultanas in my carrot cake (sorry if you do – you can just add them) and it is also VERY simple with no added fat. What could be better?
I hope you enjoy some time with you family and friends throughout the Easter period. Blessings to you all 🙂
(too easy) carrot cake – (original recipe by Elisabeth Higgins, tweaked a little by Fiona at Food 4 Thought).
cake – makes 1 x 26cm round cake
Ingredients
300g whole almonds (skin on)
200g raw sugar
zest of 1 lemon (peeled)
300g carrot, chopped in chunks
4 eggs
80g of flour (wholemeal/spelt/plain/gluten free)
20g/1 heaped tablespoon cornflour
20g baking powder
2 teaspoons sweet spice mix (below)
pinch of salt
Preparation
Preheat the oven to 180°C (170°C fan-forced). Line a 26cm round spring-form cake time with baking paper.
Place almonds into TM bowl and chop for 12 seconds on speed 8. Remove and set aside.
Place sugar and lemon peel into TM bowl and mill for 20 seconds on speed 10. Scrape around sides of bowl, add carrots and chop for 4 seconds on speed 5. Add all remaining ingredients and mix for 15 seconds on speed 6. Scrape around sides of bowl, and pour into prepared tin and bake for 40 – 50 minutes. Test that the cake is cooked in the centre by inserting a wooden skewer or toothpick. If it comes out clean, your cake is ready.
Cool in tin for 5 minutes then cool on wire rack.
My tips: *You can halve this mixture and bake it in a smaller cake tin and bake it for 30 – 40 minutes. *If you would like to add some sultanas and nuts just add a small handful of each after the final mix. Then mix it on reverse, speed 3 for 10 seconds to combine. *The spice is subtle and different to just cinnamon. *Don’t over bake this cake or it will go slightly dry.
Sweet spice mix – makes approximately 1 cup
Ingredients
12 cardamom pods or ½ teaspoon cardamom seeds
40g/2 tablespoons light brown sugar
25g/5 cinnamon sticks
1 tablespoon ground ginger
1 small or ½ large nutmeg
½ teaspoon/20 cloves
Preparation
If using whole cardamom, place pods into TM bowl and mix for 2 seconds on reverse speed 6. This will crack the pods so you can remove the seeds easily. Pour broken pods into a bowl and remove shells. Return seeds to TM bowl.
Add remaining ingredients and mill for 1 minute on speed 10.
Scrape around the sides of the bowl and pour mixture into an air tight jar and seal until needed.
My tips: *This mixture is best used within 3 months. * You can use it to make a sweet spice butter to add to pancakes, or brush over scrolls instead of cinnamon. *Mix it with a little icing sugar and sprinkle it over any cake.
Topping
I used this Cream cheese icing. For a dairy free version you can just sprinkle with icing sugar if you prefer.
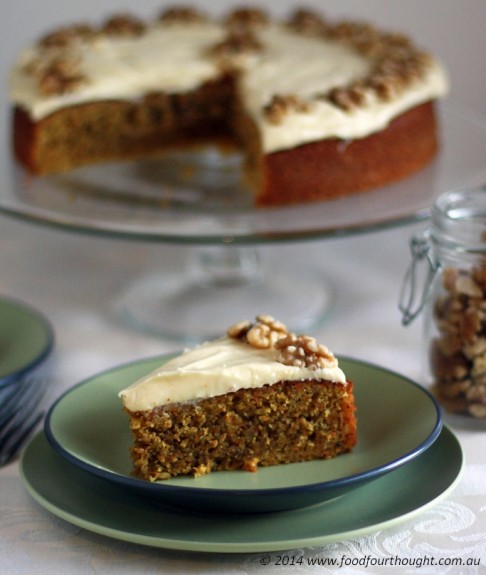
ease: 8.5/10. Individually these are easy, and the whole thing isn’t too difficult
prep time: 20 minutes. For all three.
cooking time: 50 minutes
total: 1 hour 10 minutes.
taste: 8/10 From G. Personally I would say 8/10 from me. For a healthy cake I loved it. This had a great flavour and the spice was balanced really well. The cream cheese frosting is also delicious  . .
would I make it again: Yes, this is too easy not to want to make it again. I might even try a different vegetable 🙂
I know the title of this recipe is almost an oxymoron, but it’s true. I designed this recipe because G & I have been (attempting) a Paleo diet of late. The concept is really interesting and (I think) we are starting to see some results. I’ll elaborate a little more in the future.
For now I can tell you this month bring about many celebrations in the Food 4 Thought (my) world. To begin with, Thermomix in Australia officially announced (to our staff) that for 2013 out of over 2500 Thermomix Consultants, I was the NUMBER 1 Consultant in WA, AND the NUMBER 2 in Australia. Part of that was in capitals because I am really proud! This HUGE achievement will be celebrated in Sun City 🙂
THANK YOU TO EVERYONE who supports my business, who passes on my number to their friends and believes that I will give you the best service that I possibly can. You all allow me to do what I love. I am eternally grateful.
The second cause for celebration is that I am going to Sun City in South Africa! We are off to Thermofest soon and will be staying in the Palace of the Lost City. I’ve never seen anything like this and seriously can’t wait!!! If past years are anything to go by this will be an amazing “business” trip. Wonderful speakers, lots of fun, catching up with other consultants from all over Australia and even a safari. What more could we ask for? Oh, did I mention it is all paid for by Thermomix! If you want to know how you can come with me on the next one let me know 🙂
And lastly, the other celebration this month is Valentine’s Day of course. Although I’ve never been one to celebrate the day itself I respect those who do. There are so many lovely gestures, gifts and wonderful meals that you can make for that special someone.
So, given all of the celebration this month I thought I’d design something that was worthy of celebrating with. It is not only delicious but really healthy. I must say I don’t feel guilty eating this at all. Enjoy!
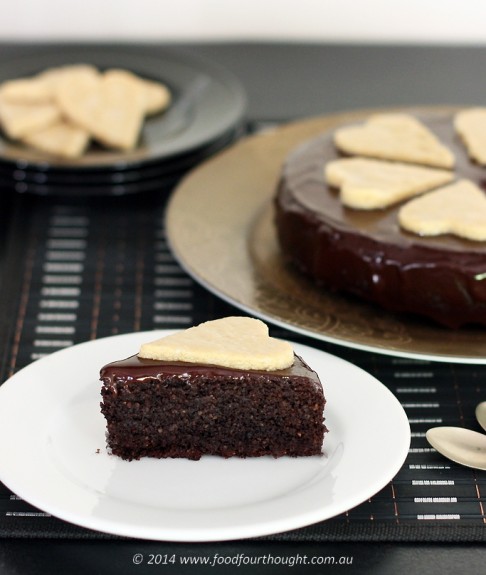
healthy chocolate cake – (recipes created by Fiona at Food 4 Thought).
cake – makes 1 x 20cm cake
Ingredients
120g whole almonds (skin on)
50g hazelnuts
20g unsweetened shredded coconut
40g coconut sugar
1 teaspoon baking powder
Pinch ground salt
40g raw cacao powder
100g coconut cream
50g coconut oil (melted)
1 teaspoon vanilla extract
30g raw honey
2 eggs
Preparation
Preheat the oven to 180°C (170°C fan-forced). Line a 20cm round cake time with baking paper.
Place almonds, hazelnuts and coconut into TM bowl and chop for 10 seconds on speed 7. Scrape around sides of bowl, and add coconut sugar, bicarb soda, salt and cacao powder. Mix for 5 seconds on speed 4. Add remaining ingredients and mix for 5 seconds on speed 4. Scrape around sides of bowl, and pour into prepared tin and bake for 20 – 25 minutes. Test that the cake is cooked in the centre by inserting a wooden skewer or toothpick. If it comes out clean, your cake is ready.
Cool in tin for 5 minutes then cool on wire rack.
My tips: *Don’t over bake this cake or it will go slightly dry. *Once you have iced and decorated the cake, it is best kept in the fridge and will keep for up to a week. *You can switch the nuts for whatever you have or prefer. If you don’t want to use coconut milk, you can substitute almond milk.
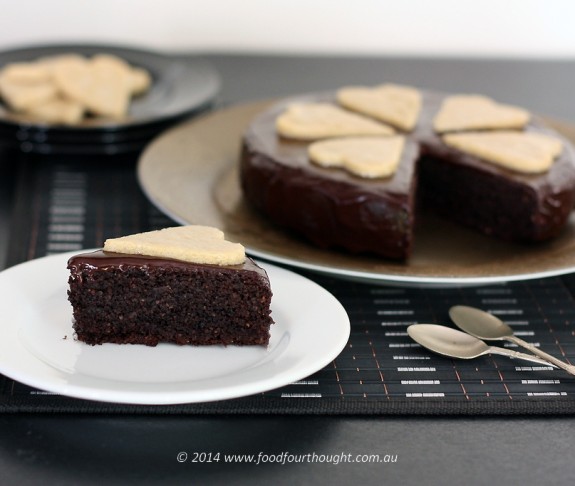
“ganache” icing – makes approximately ½ cup
Ingredients
100g unsweetened chocolate (you can use non-dairy), broken into small pieces
100g coconut cream
30g raw honey or maple syrup
Preparation
Place all ingredients into TM bowl and cook at 70°C for 3 minutes on speed 2. Remove from bowl and set aside to cool for 10 – 15 minutes until thickens slightly.
Pour approximately half icing over the top of the cake and use a spatula to gently push over edges. If icing doesn’t stick to the sides of the cake place it (the icing) in the fridge for 5 minutes to thicken a little more then try again. You should be able to cover the top and the sides of the cake completely.
My tips: *If you have any “ganache” left over you can put it into mini chocolate moulds. Then when you need a chocolate hit you can have some healthy chocolate :).
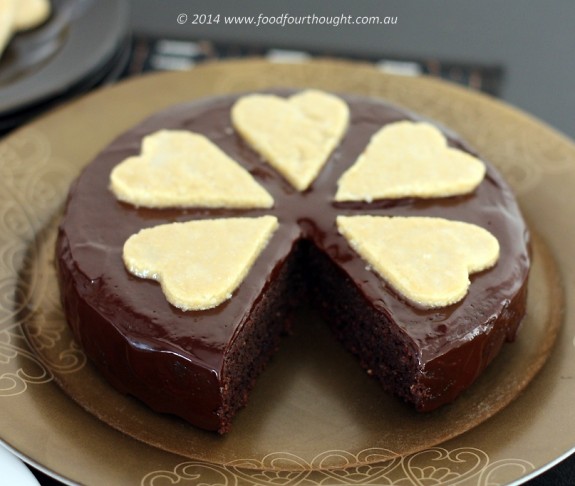
raw coconut cashew hearts – makes approximately 20 hearts
Ingredients
200g unsweetened shredded coconut
50g cashew nuts
60 – 100g raw honey (depending on hoy sweet you like them)
Preparation
Line a 22cm square cake tin with baking paper. Place all ingredients into TM bowl and blend for 30 seconds on speed 8. Scrape around sides of bowl, and pour into prepared tin. Moisten hands slightly and press into an even layer. This will be quite thin. You can also use a solid based glass to create a smooth top. Place in fridge to set (about 20 minutes) then remove from tray and cut into desired shapes.
You can use these as decorations or to eat on their own as a “sweet treat”. Store in an air tight container in the fridge for several weeks.
My tips: *You can roll these into balls if you prefer. *These will keep for ages, unless you eat them as quick as we do 🙂 *Change the nuts to your preference, although if I was using a harder nut (such as almonds) I would grind them on their own for 8 – 10 seconds then add everything else and continue as per recipe.

ease: 8.5/10. Individually these are easy, and the whole thing isn’t too difficult
prep time: 30 minutes. For all three.
cooking time: 30 minutes
total: 60 minutes.
taste: 8/10 (on average) From G and other friends who tested it for me. Personally I would say 9/10 from me. For a healthy cake I loved it. The “ganache” was silky and delicious, just sweet enough to balance the dark rich flavour of the cake. The hearts are sweet and have a distinct honey flavour. When used as a decoration they are the perfect balance for the dark chocolate flavour of the cake. The good thing is that you only need a small piece to be satisfied :).
would I make it again: Yes, I think I will use it as a base and try a few different things. Let me know if you do the same.
Recipe inspiration:
Paleo chocolate cake
Chocolate ganache
Coconut cashew delights – Rawlicious cookbook by Thermomix in Australia
The start of a new year seems to be the time that many of us make resolutions to change something in our life for the better. While I’m not one to do so because I feel like I am setting myself up to fail, it is a time that I reflect on my achievements and challenges.
Last year bought about some minor health challenges for me that saw me changing my diet and having a new eating plan. I’ve been sugar free for quite a while now and at times I might try something that has sugar in it, generally I steer well clear. It has been interesting to see how my body has reacted to the dietary changes. As to be expected everything tastes much sweeter than ever before and to be honest I don’t like things that are sweetened with “white” sugar.
I’ve always been one for testing things on myself just to see what happens, at least when it comes to food and exercise. I’ve tried many different lifestyles including Ayurvedic principles, vegetarianism (for a long time), gluten-free and dairy-free. Recently I’ve been reading about (and dabbling in) the Paleo lifestyle. What an interesting concept, especially for an ex-vegetarian :).
So part of the reason I developed these recipes was because they fitted the plan and also because I needed to feel “healthy” after the Christmas indulgences. So if you want some New Year zeal then try these.
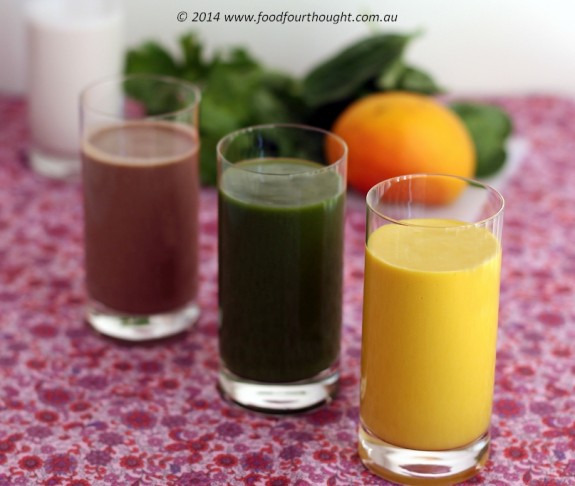
trio of paleo smoothies – mango and coconut, (yummy) green smoothie, chocana almond, (recipes created by Fiona at Food 4 Thought).
mango and coconut – makes approximately 1 ½ cups
Ingredients
200g fresh mango flesh (cut into cubes)
100g coconut milk (slightly chilled)
50g ice cubes
100g almond milk (see tips for nut free options)
Preparation
Place all ingredients into TM bowl and mix for 1 minute on speed 10. Scrape around sides of bowl, and pour into glass.
Serve immediately.
My tips: *If you don’t want to use coconut milk, you can just add more almond milk. If you prefer a nut free option you could substitute coconut water or just chilled water.
taste: 6.5/10 From G and 8.5/10 from me. This had an intense mango flavour. I liked this chilled a little after making it.
“green” smoothie – makes approximately 1 ½ cups
Ingredients
50g celery, chopped into 3cm pieces
50g spinach, washed and dried
150g nectarine or peach flesh (approx. 3 – 4 small nectarines and 2 – 3 peaches with stone removed)
50g ice cubes
100g chilled water
10g raw honey
squeeze lemon juice (approx. 2 teaspoon)
Preparation
Place all ingredients into TM bowl and mix for 1 minute on speed 10. Scrape around sides of bowl, and pour into glass.
Serve immediately.
My tips: *You can use whatever “greens” you prefer. Try cucumber, a little mint and even some basil or coriander. *If you like it a little thinner in texture add a little bit more water. *Chill this before you drink it, it makes it much nicer and taste a little less “green”.
taste: 9/10 From G for healthiness and as a choice of drink 5/10 and 8/10 from me. Given that I’m not into “green” smoothies at all, I thought this was really good  . .
chocana almond– makes approximately 1 ½ cups
Ingredients
1 frozen banana (approx. 120g)
150g almond milk
2 teaspoons agave nectar or honey
1 teaspoon raw cacao or cocoa powder
small handful of spinach (optional)
Preparation
Place all ingredients into TM bowl and mix for 1 ½ minute on speed 10. Scrape around sides of bowl, and pour into glass.
Serve immediately.
My tips: *You could make this nut free by adding your favourite milk, however some options may not be paleo. *I would suggest a mixture of coconut milk and coconut water as a great paleo nut free option.
taste: 9/10 From G and 9/10 from me. We both love this shake. Quick, easy and delicious! The end.
My overall tips: *For nutritional reasons, smoothies are always best consumed soon after they are made. However, if time dictates, you could make these and store them for use in the morning. *Make these for breakfast to give you a morning full of energy or as a healthy snack.
ease: 9.5/10. Healthy is easy.
prep time: 15 minutes. For all three.
cooking time: 0 minutes
total: 15 minutes.
taste: 7.4/10 (on average) From G and 8.5/10 from me. A great healthy start to the day.
would I make it again: Yes, yes and yes.

Christmas is a time for giving. A time for helping those less fortunate than ourselves, for showing our appreciation by passing on gifts of thanks. It is also a time that many of us use to spend with our families and loved ones because we realise how important they really are.
For me this year has meant that I am extremely grateful to all those who have supported me in my Thermomix business.
When I started working with Thermomix in Australia almost 3 years ago it was because I saw an amazing product that I wanted to be able to show as many people as I possibly could. Of course journeys evolve on a natural and maybe somewhat directed path with many trials and tribulations along the way. I can honestly say that my tribulations have far outweighed my trials, for which I have immense gratitude.
For many years I have always made an edible gift for family, friends and work colleagues. In the past it has been pistachio, white chocolate and cranberry nougat, white chocolate and pistachio fudge, passionfruit curd, panforte, shortbread, tomato relish and many more.
This year I decided to make to make something a little more traditional, that had a little more meaning and also gave back. So I purchased the Devil of a Cookbook by Fiona Hoskin. This gorgeous book has some delicious (and simple) recipes and the all the proceeds from the book go to a great cause – the Devil Island Project that is trying to save the Tasmanian Devil.
These yummy biscuits are a Dutch creation traditionally made for St Nicholas. Make them for those you love and cherish!
St Nicholas Speculaas – recipes from “Devil of a Cookbook” by Fiona Hoskin. Buy it here.)
Makes LOTS!
Ingredients
2 teaspoons ground cinnamon
1 teaspoon ground nutmeg
½ teaspoon ground ginger
½ teaspoon ground cloves
½ teaspoon ground cardamom
550g plain flour
1 teaspoon baking powder
Zest of 1 orange
Zest of 1 lemon
300g sugar
200g butter, softened
2 eggs
Preparation
Pre-heat the oven to 180°C. Line a baking tray with baking paper and set aside.
Places spices, flour and baking powder into mixing bowl and mix for 5 seconds on speed 5. Remove from bowl and set aside.
Place zests, sugar and 2 tablespoons of reserved flour mixture into mixing bowl and mill for 10 seconds on speed 9.
Add butter and heat for 1 minute on 60°C at speed 4.
Add eggs and beat for 10 seconds on speed 5.
Add remaining flour mixture and mix for 40 seconds on speed 4. Scrape down the sides of the bowl if required and mix for a further 7 seconds on speed 4.
Roll out onto a lightly floured surface and cut into the shape of St Nicholas or other shapes of your choice. Place onto prepared tray and bake for 10 – 15 minutes or until golden brown.
My tips/alterations: *I cooled these on a wire rack. *When “zest” is used in a Thermomix recipe as above I use a vegetable peeler to remove the zest from the fruit. By mixing it with the sugar the Thermomix will create the fine zest that is needed. *This recipe makes a lot of biscuits (depending on how thin you roll them) and could easily be halved. *Not sure what I may have done wrong but I found this dough quite stiff when combining it all in the Thermomix. I decided to mix it in two batches and it worked well. *I rolled these quite thin because that is what I have seen Dutch biscuits look like but you can roll them thicker if you like. *I put mine into little cellophane bags and tied them with ribbon to give as gifts. *Get the kids involved in making the shapes, they will have loads of fun!

ease: 9/10. The hardest part is the shapes.
prep time: 30 minutes. Once again the cutting out is what takes the time.
cooking time: 15 minutes (I did several batches)
total: 45 minutes. (depending on how many you make)
taste: 9/10. These are delicious!!
would I make it again: YES!! My first batch has all been given away so I am making another batch tomorrow 🙂
It never ceases to amaze me how popular the Thermomix has become. It seems to be the “BBQ conversation” for both men and women. Many more husbands are buying the Thermomix as a Christmas gift and lots more Mums want them before Christmas to help with the festive food. Mmmmm Christmas cocktails 🙂 In future posts I’ll tell you about some great ideas for Christmas gifts made in this amazing little machine.
Personally, one of the things that I love most about using the Thermomix is that it makes it VERY easy to eat healthy food. I’ve been on a low – no sugar eating plan for quite a while now which has meant that I have needed to find new ways of cooking certain things and using different ingredients to get a similar result. I’m happy enough to go without something sweet but not everyone in our house feels the same 🙂
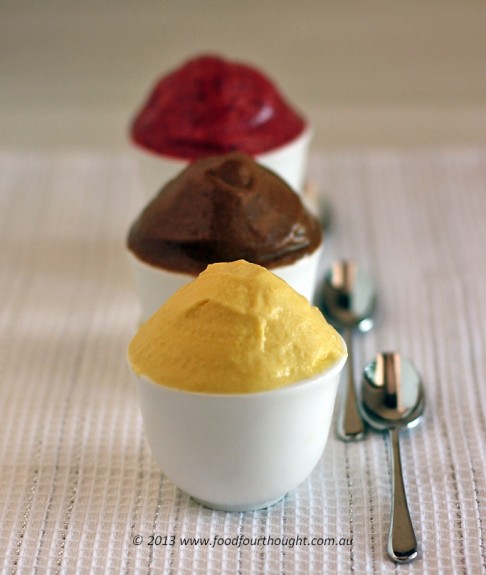
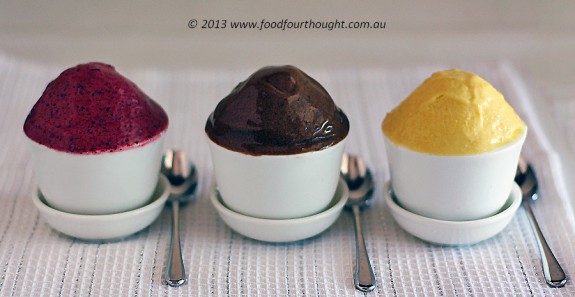
So when the temperature hit 33°C over the weekend I decided to make some ice cream. But of course it needed to be healthy and most of all it had to taste good. These are what I came up with. While these may not be exactly the same as the store bought version (which is a GOOD thing) they turned out pretty good.
So when you need something healthy to cool down this summer true one of the three healthy ice cream recipes.
And if you need to convince your husband to buy you a Thermomix (before Christmas or) as a Christmas present, maybe promise that you’ll make him a mean cocktail once it is on the kitchen bench 🙂
(healthy) trio of ice cream – mango coconut and lime, choc banana, fruity berry soft serve (recipes adapted or created by Fiona at Food 4 Thought).
mango, coconut and lime ice cream – makes approximately 1 ½ cups
Ingredients
250g frozen mango (cut into 2cm cubes)
100g frozen coconut milk (frozen in ice cube trays)
1 teaspoon fresh lime juice
Preparation
Place all ingredients into TM bowl and mix for 10 seconds on speed 9. Scrape around sides of bowl, and mix for 30 seconds on speed 5, or until creamy texture is achieved.
Serve immediately.
My tips: *You could add toasted coconut on top of this if you like. *This will freeze quite well. You will just need to sit it on the bench for 10 – 20 minutes before you want to scoop into it. *If you don’t have frozen coconut milk then just use it as a liquid. If the ice cream isn’t thick enough then add a couple of ice cubes or a little extra mango.
taste: 7/10 From G and 8.5/10 from me. I thought it was fresh and delicious.
choc banana ice cream – makes approximately 2 cups
Ingredients
300g frozen banana
1 tablespoon raw cacao (or less if you prefer)
30g (1 tablespoon) raw honey
Preparation
Place all ingredients into TM bowl and mix for 20 seconds on speed 9. Scrape around sides of bowl, and mix for 30 seconds on speed 6, or until creamy texture is achieved.
Serve immediately.
My tips: *You could add nuts and/or shredded coconut and mix on reverse, speed 3 or 4 for a few seconds to combine. *This will freeze well. It seems to freeze more like ice cream which means that you could make this a few hours ahead of time if you wanted to. *You could also use organic cocoa as a substitute for the cacao if you prefer.
taste: 7.5/10 From G and 9/10 from me. I love this ice cream. I could taste all three ingredients and could have eaten the 2 cups myself!
fruity berry soft serve – makes approximately 4 cups (this is adapted from the Everyday Cookbook from Thermomix in Australia)
Ingredients
400g mixed frozen berries (or your favourite frozen berry)
50g raw honey
1 egg white
Preparation
Place the berries into TM bowl and mix for 10 seconds on speed 8. Scrape around sides of bowl, add honey and mix for 30 seconds on speed 5. Insert butterfly, add egg white and mix for 45 seconds on speed 4, or until a soft and fluffy consistency is achieved.
Serve immediately.
My tips: *You can use mango or peaches if you prefer. *This will freeze, however it does become solid and more “icy” than the other two recipes. Leaving it on the bench before you want to eat it will allow it to soften slightly and some of the icy texture will disappear. *If you don’t like the seeds of raspberries then use other berries.
taste: 7.5/10 From G and 7.5/10 from me. This was nice but next time I’d use berries with no seeds :).
My overall tips: *I made these in the order of the recipes, which meant that I actually never rinsed the bowl. I just made sure that I got everything out of the bowl by putting the speed dial onto closed lid position then pressing and holding the turbo button for a few seconds. This will spray everything off the blade and onto the sides of the bowl so that you can scrape them away. *Make these as a healthy kids snack.
ease: 9.5/10. Ice cream has never been so easy and healthy.
prep time: 20 minutes. From walking into the kitchen to walking out again.
cooking time: 0 minutes
total: 20 minutes.
taste: 7.5/10 From G and 8.5/10 from me. A great summer snack.
would I make it again: Absolutely. Whenever we need that ice cream hit. Bring on the sunshine so I can make these more often!
As those who own a Thermomix know, there are many advantages in doing so. One of the things that I never actually considered when I was purchasing the machine was just how much money I could save on the very basic things that many of us buy pre-packaged. Items such as stock, yoghurt, butter, juice and peanut butter are things that we can all make in a very short space of time and they will also save our hip pocket.
I know it might be fairly obvious, but here are some benefits of making your own “basics” and everything we eat I guess.
- You know what is in everything,
- Allergies are easily controlled
- It saves lots of money
- (which means) The Thermomix is paid for with the money you’re saving
- You can make it taste the way you like it
- You can make it whenever you want to
I’m sure there are many more. Leave me a comment and tell me what your biggest benefit is.
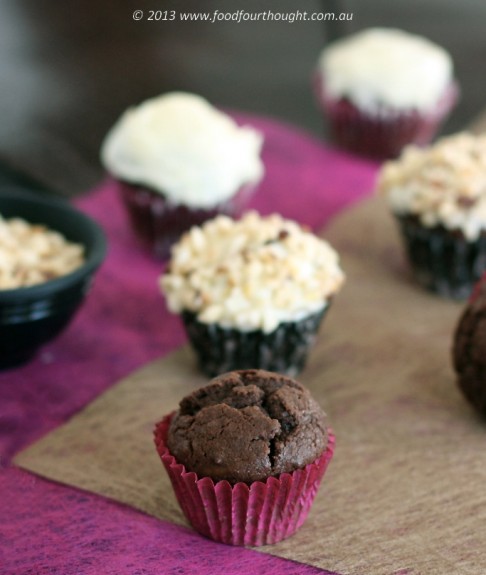
I’m sure you’ve seen this recipe going around. It is the one that uses Nutella with eggs and flour to make a brownie style mini cupcake. When I first read it I couldn’t believe that it would work so (of course) I had to try it, my way. So after making the chocolate hazelnut spread myself I used it in the mixture. I’ve never been a Nutella fan until I made it myself, I always found it too sweet but this version is delicious.
These little bites are an absolute treat. Do yourself a favour and make them as soon as possible.
3 ingredient cupcakes – (recipe adapted by Fiona at Food 4 Thought after reviewing many recipes)
makes 10 – 12 mini cupcakes
Ingredients
150g chocolate hazelnut spread (at room temperature)
1 large egg
30g SR flour
Preparation
Preheat the oven to 170°C (fan-forced). Line mini muffin/cupcake tray with cupcake liners.
Add all ingredients to TM bowl and mix for 15 seconds on speed 3. Scrap around sides of bowl. Repeat if necessary until mixture is combined. Divide mixture evenly into cupcake liners.
Bake 10 minutes, until slightly risen and just set in centre. Allow to cool on wire rack. Decorate as you like (see tips).
My tips/alterations: *I used SR flour because I wanted these to be light and fluffy rather than like a brownie. If you’d like a brownie consistency just use plain flour and cook these for 2 minutes more. *To divide the mixture evenly I used a mini ice cream scoop but teaspoons will work just as well. *To get as much mixture as possible out of the bowl, put the dial on closed lid position then hold the Turbo button in for about 4 – 5 seconds. *Before rinsing the bowl with water, you can add about a cup of milk mix it up and you have a glass of choc milk. *The chocolate hazelnut spread that I used is not sweet, so I iced my cupcakes with cream cheese frosting and hazelnut granules (that I bought already chopped). You can just sprinkle them with icing sugar if you prefer. *If you’re spread isn’t at room temperature just whip it for a few 5 – 10 seconds on speed 3 then add the egg and flour.

ease: 10/10. Couldn’t be simpler.
prep time: 5 minutes if the spread is pre-prepared.
cooking time: 10 minutes + cooling time and decorating time.
total: 15 minutes + cooling time.
taste: 9.5/10. These are a mini bite wonder, especially when you use the icing and crushed nuts on top. I love that they are not too sweet and have a deep rich chocolate flavour. Just what I need to make my afternoon run smoothly.
would I make it again: YES. Now and forever 🙂
The last few weeks have been a little nutty (pun intended!), in more ways than one. I am very grateful to say that the world of Thermomix has been crazy busy thanks to many of you wanting this amazing tool in your own kitchen. Unfortunately that has meant less time for recipe development and trying new things. I have soooo many ideas to share with you all but that illusive little thing called “time” keeps running away from me.
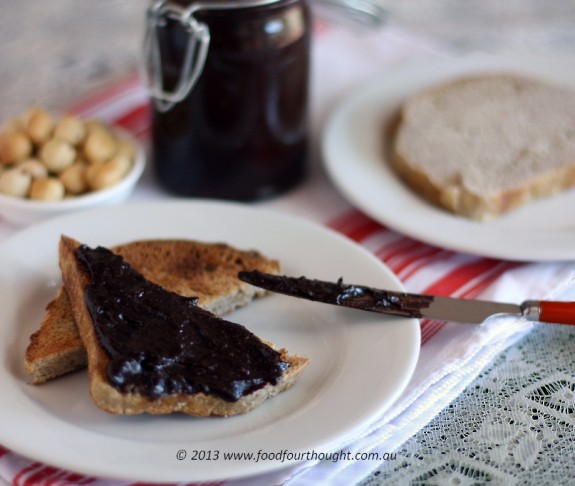
The latest thing in the Food 4 Thought kitchen is that for some reason I seem to have been slightly addicted to recipes with hazelnuts. Maybe it is because I am starting to explore the world of Paleo in the Thermomix. While this recipe doesn’t comply with the Paleo philosophy it is a great option for families that want to be able to make something that would normally have a LOT of sugar, preservatives and other things you may not want to eat.
This is my “adult version” because I use good quality dark chocolate, Dutch cocoa and very little sugar. You can adjust it to suit your palate. I really encourage you to make it rather than buy it, because this is delicious.
chocolate hazelnut spread – (recipe developed by Fiona at Food 4 Thought after reviewing many recipes)
makes approx.
Ingredients
60g raw sugar
120g hazelnuts (toasted and skins removed)
100g dark chocolate (70% cocoa)
40g cocoa
50g butter
100g milk (or milk alternative)
Preparation
Place raw sugar into TM bowl and mill for 10 seconds on speed 9. Add hazelnuts and chocolate and mill for 20 seconds on speed 8. Scrape around the sides of the bowl. Add cocoa, butter and milk, heat on 50°C for 3 minutes on speed 3.
Mix for 10 – 15 seconds on speed 9 until desired consistency is reached. Store in sterilised jars. Keep refrigerated.
My tips/alterations: *If you would like this less “adult” you can leave the cocoa out and use 50% cocoa chocolate. It won’t be quite as thick but will set well in the fridge. *You can purchase hazelnuts that have the skins removed already. Get these from health food stores or bulk food stores. *If you would like to roast your own, place them on an oven tray and in a pre-heated oven at 170°C for 10 – 12 minutes. The skins should look like they are falling off. Remove them from the oven and pour them into a tea towel. Rub them firmly, the skins should come off and you can remove the hazelnuts. *Before you clean out the bowl, add 1 cup of milk, mix on speed 4, then turbo for 5 seconds. This will clean the machine and make a chocolate milk at the same time. If you want it warm just heat it for a few minutes. *Use this on toast, in crepes or stirred into hot milk. You can even make these great muffins.
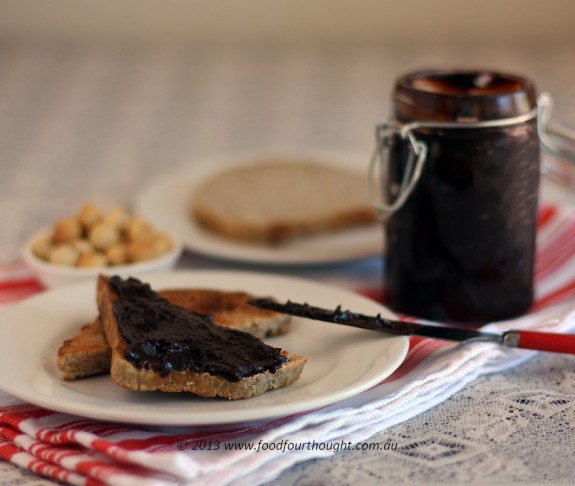
ease: 9/10. It is easier if you purchase the hazelnuts pre-roasted with the skins removed.
prep time: 5 mins.
cooking time: 3 mins.
total: 10 minutes + cooling time.
taste: 9/10. This is a delicious and healthier than store bought.
would I make it again: Absolutely. I have been caught with “my hand in the cookie jar” or rather a spoon in the hazelnut chocolate spread jar. Needless to say this doesn’t last too long in our house. 🙂
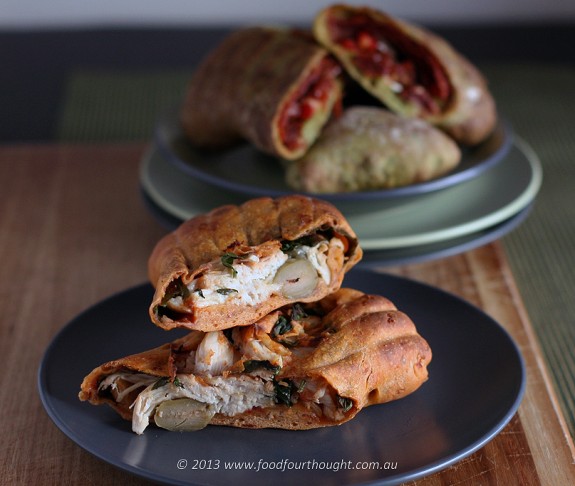
Making dough using the Thermomix is one of the simplest and most enjoyable things to do. This is mainly because the effort is minimal in comparison to the delicious results.
You can let your imagination run wild to create any flavour, shape and texture that you like. In the past I have made chocolate banana bread, sourdough loaf, burger rolls and yeast free crackers.
My inspiration for this recipe comes from the lovely Miss Meagan. One of my gorgeous Thermomix team mates. She is not only an amazing Mum to two adorable boys, she is a (born again) fitness guru and fabulous buddy. She is also affectionately referred to (at least by me) in Thermomix circles as the “bread queen of Vic Park”. I’m so lucky to be surrounded by talented people that I can call my friends 🙂
This is something similar to a dish that she demonstrated at our last cooking class. I loved the idea so much that I played with it a little and made it my own.
Lunches are one of those things that are usually leftovers or something really quick to grab in the morning. So you can imagine G’s excitement when he discovered a pizza pocket in his lunch bag one day. Even better that it had a filling that he loved and there were more for the rest of the week. I think I was number one in the house that day 🙂
You could fill these with whatever you like. What have you used in the past and what is the next thing you’ll try. I’d love to hear your ideas, so please leave me a comment.
Pizza pockets (recipe adapted by Fiona at Food 4 Thought. Original recipe by Meagan Quantock)
makes 6 – 12 packets, depending on what size you want them to be.
dough
Ingredients
290g warm water
1 sachet or 2 teaspoons dried yeast
510g Bakers flour
2 teaspoons fine rock/sea salt
15 – 20g olive oil
additions
25g parmesan, chopped into 1.5cm cubes
50g tasty cheese, chopped into 1.5cm cubes
15g fresh spinach
20g sundried tomatoes
Preparation
Place the parmesan and tasty cheese into the TM bowl and grate for 10 seconds on speed 8. Remove from bowl and set aside. Add all the ingredients for the dough into the TM bowl in the order they are listed. Turn the dial slowly from speed 1 to 6, then mix for a further 10 seconds on speed 6, until the dough is well combined. Set the dial to closed lid position, then knead the dough for 1 minute on interval. Remove dough from the bowl by tipping it upside down and gently shaking. Place the dough onto your Thermomat, then divide it into three equal portions (I used my TM scales to weigh each batch – I had 3 x 280g portions).
This is where you can add your variation.
For green, add spinach to TM bowl and chop for 5 seconds on speed 6. Scrape around the sides of the bowl and add one portion of the dough (I also added and good pinch of extra flour to prevent the dough from being sticky) and mix for 10 seconds on speed 6. Then set the dial to closed lid position, then knead the dough for 20 seconds on interval.
For red, add sundried tomatoes to TM bowl and chop for 5 seconds on speed 6. Scrape around the sides of the bowl and add one portion of the dough (I also added and good pinch of extra flour to prevent the dough from being sticky) and mix for 10 seconds on speed 6. Then set the dial to closed lid position, then knead the dough for 20 seconds on interval.
For white, leave the dough plain. Place each portion in separate bowl and cover with cling wrap. Set aside in a warm place for 20 – 30 minutes until they have doubled in size.
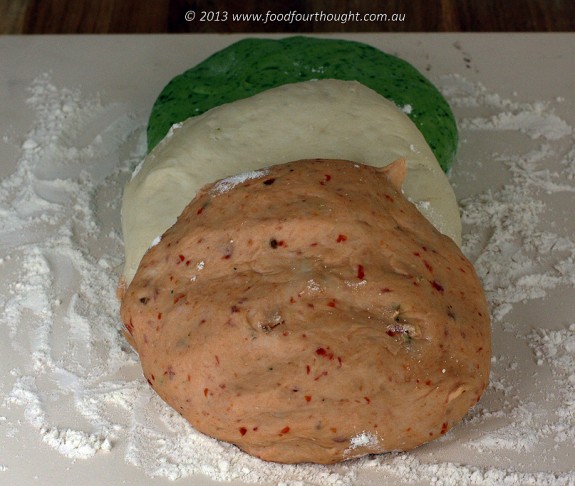
Once they have doubled in size it is time to roll them out.
Divide each colour of dough into 2 – 4 even portions (depending on the size you would like to end up with).
Roll each portion into whatever shape you like (my circles are never perfect – hence the “whatever shape”) until they are approximately ½ cm thick. I do mine long, like an oval shape.
Place your choice of filling (see below) into the middle of the dough and stretch it along the length leaving an even border around the whole edge. Be careful not to overfill them.
Gently tease the edges over the top of the filling and gently press them together. Sometimes a little water around the edge first will help. Make sure there are no holes.
Turn the pockets over so that the seam is at the bottom when baking.
I used tomato paste mixed with a little homemade tomato sauce for the base then sprinkled them with the grated cheese. Then the filling.
For green, I used sliced chilli salami, chopped red capsicum, chopped sundried tomatoes and a small amount of feta cheese.
For red, I used some leftover cooked chicken, chilli and garlic green olives and spinach.
For white, I actually decided to make salami, anchovy and olive mini pizza.
You can do whatever you like.
Heat the oven to 200°C (190°C fan-forced). While the oven is coming up to temperature. Set the pizza pockets aside and let them rise again. Once the oven has reached the desired temperature, place the pizza pockets onto a baking tray lined with baking paper or onto a pizza stone and bake for 15 – 20 minutes until golden brown and crunchy. Cool on a wire rack, then serve hot or cold, or wrap and freeze until required.
My tips/alterations: *If you’d like to use these for lunches, you can freeze them, take them out on the day you want them and by lunchtime they are ready to eat. *Use these doughs for pizza, scrolls even as a flat bread base. *When you add ingredients to the dough you will have to adjust the flour, most likely you will need to add more. I usually like to watch through the hole in the lid to see if it looks like it is sticking to the blade. If it is I will add a pinch of flour then more until it comes away from the blade. *The Thermomat is a great product that makes life a lot easier to roll and rise the dough. *When you are rolling these up, try not to overlap the dough too much but make sure they are well tucked in so that they don’t come open while cooking.
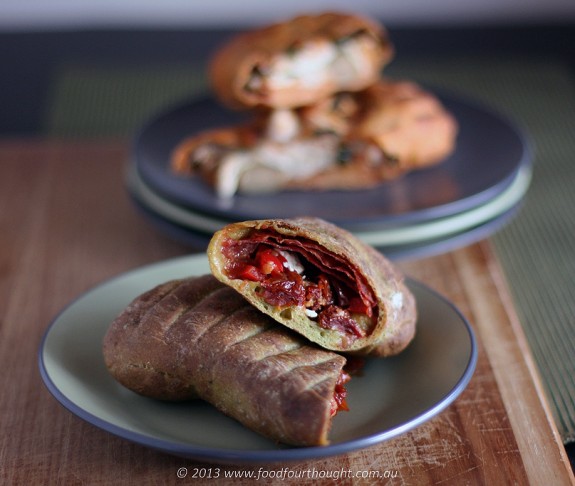
ease: 7.5 – 8/10. Not too difficult, just a few steps.
prep time: 5 minutes for the dough plus rising time plus 15 minutes for the rolling and folding.
cooking time: 20 minutes.
total: 40 minutes + rising time.
taste: 7.5 -8/10. The score depends on whether they are fresh from the oven or not. Of course when freshly baked they have a great crunch but this is slightly lost in the lunchbox. However the flavour is still really good.
would I make it again: Yes. Anything that is a make ahead, tasty, freezeable, healthy lunch is a winner in my eyes.
Several times I have mentioned that the inspiration to create a new recipe can come from many and varied places. Although this recipe was developed more out of necessity than inspiration.
Most places I’ve lived I have been fortunate enough to have two fridge/freezers or at the least a large fridge and a chest freezer. This meant that I have always been used to having enough food to feed a small army at any given moment. It has also translated into a particular way of shopping for ingredients.
Growing up in a farming household, I was always taught to “save the pennies and the pounds would come”. We used to buy things when they were cheap/in season and store them where we could. To this day I still live by the same mantra. If something is on special at the supermarket, I have been known to buy five of the same thing and store them until I need to use them (taking into consideration use by and expiry dates of course).
So it should come as no surprise that as of last count I had no less than 11 boxes of frozen berries in the freezer section of our second fridge. This was never a problem until recently when the thermostat on the fridge section decided to give up the ghost. I’ve been able to empty the fridge and am slowly working my way through the freezer so that we can have it repaired. My main problem has been what to do with 11 boxes of berries. In summer we have shakes and smoothies, even berry ice-cream but in winter it is a little more challenging.
I wanted to use them for something a little different, so I designed this recipe. I hope you like it.
What is your favourite thing to do with frozen berries? Leave me a comment and let me know.
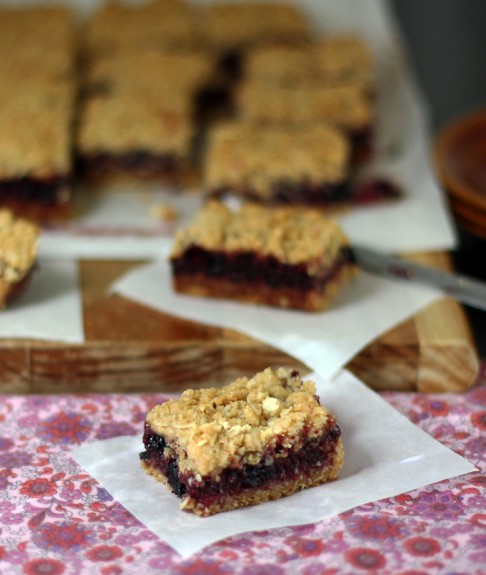
berry crumble slice – (recipe developed by Fiona at Food 4 Thought after reviewing many recipes)
makes 22cm x 22cm slice
crumble
Ingredients
220g butter
250g plain flour
140g oats
100g sugar
100g light brown sugar
1 teaspoon baking powder
1/2 teaspoon salt
Preparation
Do the first step of the berry filling#.
Preheat the oven to 180°C (170°C fan-forced). Line 22cm x 22cm cake tin with baking paper.
Add butter to TM bowl and melt on 70°C for 3 minutes at speed 1.
Add remaining ingredients and mix for 30 seconds on reverse, speed 3. Scrap around sides of bowl and repeat for another 30 seconds until well combined.
Remove from bowl and press half the mixture into prepared tray and set the remainder aside.
Bake base for 15 minutes, until slightly risen and lightly golden in colour. Once baked, remove from oven and cool for 10 minutes before pouring over berry mixture and sprinkling crumble topping.
My tips/alterations: *Press the base down firmly before baking. It will seem like you don’t have enough but it rises a little. *When I halved the mixture, I used the scales to weigh it out. *This base/crumble mixture would make a great crumble topping for a pudding. I would pile it high for a great crunch. *You could top the base with anything you like, a custard topping or other fruit.
filling
Ingredients
250g frozen berries, thawed
100g raw sugar, milled for 3 seconds
1 tablespoon/20g lemon juice
Preparation
#Place berries into sieve and set aside to defrost. Once defrosted, drain as much juice as possible.
Add sugar to TM bowl and mill for 3 seconds on speed 9. Add lemon juice and well drained berries into TM bowl and cook at 100°C for 12 minutes on reverse, speed 1 with MC off. If mixture starts to splatter, place simmering basket on top of lid.
Pour berry mixture over base and sprinkle remaining crumble over the top. Bake for an additional 30 – 35 minutes until crunchy and golden. Cool in tin for 10 minutes then remove from tray. Cut into squares and serve warm or cold.
My tips/alterations: *This filling can also be used as a jam. Just pour it into a sterilised jar and allow to cool before storing in fridge. *Use any berries you like, adjust the sugar slightly depending on what berries you use.
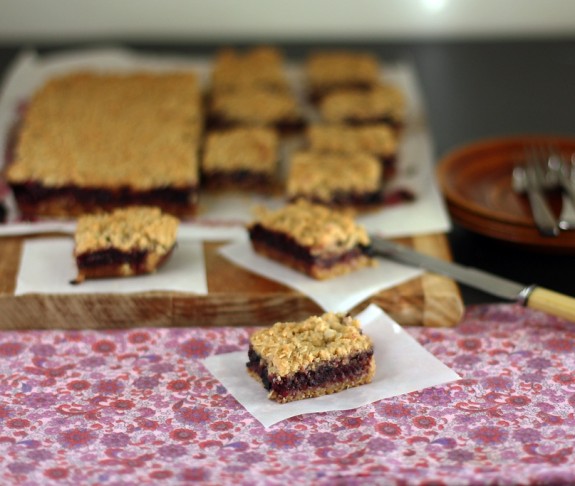
ease: 8/10. Not too difficult, just a few steps.
prep time: 5 minutes for the crumble plus 5 minutes for the berry filling.
cooking time: 45 minutes in total + cooling time.
total: 55 minutes + cooling time.
taste: 9/10. This is a yummy slice, especially if you are a berry lover. So easy for a great result. The sweet crumble and slightly sharp berries worked really well together. Everyone who was lucky enough to get a piece loved it.
would I make it again: Absolutely. In fact I have made it twice since developing it, need to use up more berries 🙂
Inspiration to create a new recipe can come from many and varied places. Tasting something that someone else has made, pictures of food, someone else’s recipe or even a Birthday card.
I had a Birthday recently and was fortunate enough to receive many warm wishes in the form of cards and gifts. One of which came from Thermomix in Australia. The best part, it included a recipe that I had NEVER considered making.
Red Velvet Cake. The reason I’d never considered it before now is the red food colouring or cochineal (which is actually made from insects!). Pre-Thermomix I may not have worried so much but now that I know I can create delicious food without ANY additives, preservatives or colours I am quite determined to do so.
So I designed my own recipe. I shared the results and I must say they were greatly appreciated. 🙂 So a big thank you to the Thermomix team for inspiring me to create such a delicious cake.
One of the things I love about being in the Thermomix business is my team mates. We always have a laugh and help each other out when we need to. I remember when I started I thought “I’ll give it a go and see what happens”. Two and a half years later I love it and have fabulous clients, some of whom are now good friends. I went from a sceptic to a passionate consultant overnight.
Do you ever think you might want to try something a bit different? Do you love your Thermomix? Then why not have your own business? If you’d like to know more, just let me know. Also tell me what you think of my Red Velvet Cake (colour free) 🙂

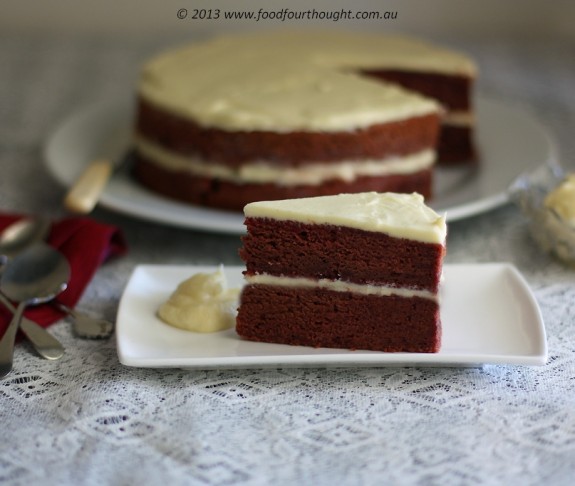
red velvet cake – (recipe developed by Fiona at Food 4 Thought after reviewing many recipes)
makes 2 x 20 – 22cm cakes for layering
Ingredients
200g raw beetroot peeled and roughly chopped to yield 170g
50g frozen or fresh raspberries
35g lemon juice
1 tablespoon apple cider vinegar
320g raw sugar
1 ½ tablespoons cocoa powder (not dutch)
250g butter, softened
1 teaspoon vanilla extract
300g self-raising flour
2 eggs
1 teaspoon baking powder
Preparation
Preheat the oven to 180°C (170°C fan-forced).
Place raw beetroot, raspberries, lemon juice and vinegar into TM bowl. Puree for 1 minute on speed 9. Remove mixture from bowl and set aside. Rinse and dry the bowl or use a second bowl if you have one.
Place raw sugar into TM bowl and mill for 5 seconds on speed 9. Insert the butterfly and add cocoa powder, butter and vanilla. Mix for 30 seconds on speed 4. Add 100g of SR flour and approximately half of the reserved beetroot mixture then mix for 15 seconds on speed 4. Add another 100g of SR flour and remaining beetroot mixture and mix for 15 seconds on speed 4. Then reduce to speed 3 and add eggs through hole in the lid, continue to mix for 20-30 seconds. Remove the butterfly, add the remaining flour and baking powder and mix for 10 – 15 seconds on speed 6.
Divide mixture evenly between two lined baking tins of the size you want and bake for 25 – 30 minutes or until a skewer testing the middle of the cake comes out clean. Cool in tin for 5 minutes before turning onto a wire rack to cool completely. In the meantime, make the frosting.
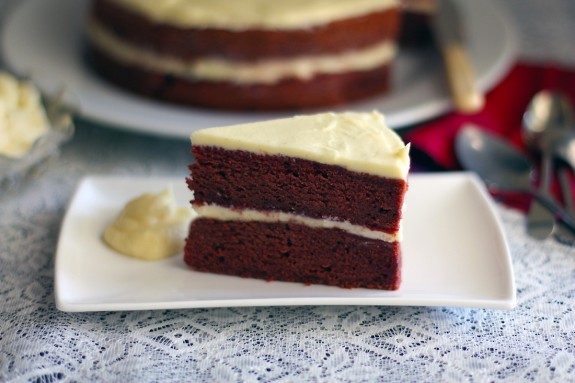
My tips/alterations: *The acidic ingredients are important for the tangy taste but also to maintain the red colour of the beetroot and raspberries. *I used two thin layers for the cakes in the photos. You could also use a 26cm square cake tin and then cut the cake in half to make the layers. The baking time may vary slightly. *This would make a great Birthday cake. It kept really well in the fridge and (I think) actually got better as the days went by.
cream cheese frosting – (recipe adapted from Thermomix in Australia Birthday Card by Fiona at Food 4 Thought)
makes almost 1 litre
Ingredients
300g raw sugar
250g cream cheese
180g butter, softened
1 teaspoon vanilla extract
Preparation
Place raw sugar into TM bowl and mill for 45 seconds on speed 9. Scrape around the sides of the bowl, add all other ingredients and mix for 20 seconds on speed 5.
Place one layer of cake onto stand and spread frosting on top. Then add another layer and top it with frosting.
Decorate as you wish.
My tips/alterations: *If you would like to make the frosting even lighter add the butterfly. However do be careful not to over whip it as it may split. *I used raw sugar and milled it to icing sugar. Doing this will give you an off white colour for the icing. So if you want a more pure white result you will need to mill white sugar *You could use anything to decorate the cake. This frosting was enough to have thick layers on the cake but I chose to serve it on the side in addition to frosting it because I found this quite sweet. *This will keep in your fridge really well.
ease: 7.5 – 8/10. Not too difficult, just a few steps.
prep time: 25mins for the cake plus 5mins for the frosting.
cooking time: 25ins + cooling time.
total: 55minutes + cooling time.
taste: 9/10. This is a delicious cake. Everyone who was lucky enough to get a piece loved it. It had the perfect texture and balance of tang and sweetness. I added less cocoa that other recipes because I didn’t want it to overpower the other ingredients. The icing is sensational. There was a little leftover and I could eat that on anything, even on its own.
would I make it again: Absolutely. As a special make ahead dessert this would be perfect. I also think it would transport well. I’ll let you know when I try it 🙂
One of the reasons that many people don’t consider buying a Thermomix is due to the cost. And while many of us don’t have the $1939 to outlay upfront there are different payment options available for different circumstances. We explain these during our in-home demonstrations or on an individual basis. One of the things I like to mention to my customers is to consider it an investment because you will get a return on it for the lifetime of the Thermomix. In other words, it will pay for itself over and over and over again once you have it on your bench.
The table below is something that I included in my April Newsletter to show people how to save money on a weekly basis.
| Item |
Qty |
Shop Cost |
TM Made Cost |
Difference |
| Takeaway Pizza |
x2 |
$20.00 |
$10.00 |
$10.00 |
| Loaf Bread – Bakery |
x3 |
$9.00 |
$3.00 |
$6.00 |
| Yoghurt 1kg |
x1 |
$5.00 |
$1.50 |
$3.50 |
| Juice 2 L |
x2 |
$9.00 |
$3.00 |
$6.00 |
| Sauce in a Jar – Stroganoff |
x1 |
$3.50 |
$2.00 |
$1.50 |
| Cakes/Biscuits/Slices |
x3 |
$12.00 |
$5.00 |
$7.00 |
| Jams/Spreads |
x1 |
$4.00 |
$2.00 |
$2.00 |
| Hommus dip |
x1 |
$3.50 |
$1.50 |
$2.00 |
| Vegetable Stock 1 Litre |
x2 |
$7.00 |
$1.00 |
$6.00 |
|
|
$73.00 |
$29.00 |
$44.00 |
NB: Costs are approximate and may vary in individual circumstances.
This is just some examples. Think of what you buy and how you can make it. Especially when it comes to saving on Gluten Free and other anti-allergy items.
And, you can continue to save money even after the Thermomix is paid for. Imagine what you could do with an extra $40 per week or approx $2000 per year.
I’d be taking a holiday!
Some interesting reading on the subject can also be found at the links below:
Super Kitchen Machine
Little lush cooks Blog
Retro Mummy
The information mentioned about is what my customers advise me they save money on each week and is not an official statement from Thermomix in Australia.
If someone had of told me a few years ago that I would be a Thermomix consultant I would have laughed until I fell off my chair. At the time, I was never going to own a kitchen appliance that cost $2000 “because there was no way any appliance could be worth that much”.
However, as I mentioned in my last post there are many things that I love about Thermomix and about having my own business as a whole.
I love the fact that my business can help people change their lives, giving them more time, money and looking after their health. I love nothing more than when one of my clients emails me to tell me that they love their Thermomix and couldn’t live without it!
While a lot of what I do is motivated by wanting to help others, there are also some great rewards that I am sincerely grateful for. My absolute favourite part is the free holidays. So far I have been fortunate enough to travel to Hawaii and Hong Kong (all expenses paid) and my Husband has even been able to come along too! Part of the time away is spent attending a conference for a few days which has also been excellent for my business and personal growth. The rest of the time I get to know my fellow consultants, do some shopping and actually have a holiday!
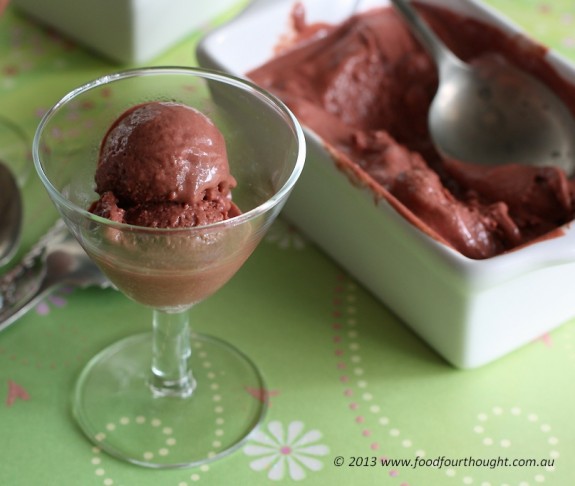
As a consultant we receive a specific monthly Newsletter and along with lots of great information each one has a feature ingredient that we can use to inspire us to create a recipe. Last month is was Beetroot. I’ve never entered before because I usually don’t have time to think about it but I’ve always loved Beetroot so thought, why not! And guess what, I won! Crazy, I know. I wanted to do something a bit unusual and had seen this once before. I had seen Hugh Fearnley-Whittingstall’s recipe for something similar on the River Cottage series. Hugh is a British celebrity chef, television personality, journalist, food writer and “real food” campaigner, known for his back-to-basics philosophy (and he has a Thermomix). So, like so many of my other recipes, a little tweaking and adaptation to the Thermomix and voilà, my Beetroot Chocolate Ice-cream.
beetroot chocolate ice-cream – (recipe adapted by Fiona at Food 4 Thought from here).
makes approximately 1 litre
Ingredients
400 grams raw beetroot peeled and roughly chopped to yield 300g
500 grams water for steaming
100 grams raw sugar
150 grams full cream milk
250 grams cream
100 grams dark chocolate (70%) broken into pieces 150 grams full cream milk
4 whole eggs
Preparation
Place peeled and chopped raw beetroot into simmering basket. Add water to TM bowl and put simmering basket and beetroot in place. Steam on Varoma temperature for 25 – 30 minutes on speed 1. Once cooked, remove basket and set aside. Empty water from TM bowl then rinse and dry the bowl.
Place chocolate into TM bowl and heat at 60°C for 2 1/2 minutes on soft speed. Once melted, remove from bowl and set aside.
Place sugar into TM Bowl and mill for 10 seconds on speed 9. Scrape around the sides of the bowl then add the beetroot and milk and puree for 45 seconds on speed 9 until smooth. Add cream and whisk for 30 seconds on speed 3. With the blade still running add the eggs one at a time through the hole in the TM lid. Continue to whisk for another 30 seconds.
Cook at 100°C for 7 minutes on speed 4. Add melted chocolate and mix for 10 seconds on speed 4.
Pour into airtight container and freeze for 2-4 hours. When partially frozen, place into TM bowl and remix for 1 minute on speed 5 to give a creamier consistency. Return to airtight container and freeze for a minimum of 8 hours or overnight.
Remove from freezer 15-20 minutes before serving.
My tips/alterations: *Use thick cream if you can, otherwise whipping cream will work. If you find the mixture looks like it has curdled after it is cooked, add an ice cube or a dash of extra cream and blitz it by slowly turning the speed from 1 to 9 then blitz on speed 9 for 30 seconds. It should be silky smooth. *If you would like this to be more of a beetroot colour you can roast the beetroot in some foil until soft. That is the traditional way to do this, but I wanted to do everything in the TM. If you would like this recipe to taste of a little more beetroot then try adding 75 grams of chocolate rather than 100 grams. *If you find it a little icy when you remove it from the freezer just let it sit for 20 – 30 minutes before serving it. You could also top it with some cold coconut milk/cream for a healthy topping. *The longer this stays in the freezer the more icy it seemed to become, so I just left it out before servicing but you could also re-churn it prior to serving.
ease: 7.5 – 8/10. Not too difficult, just a few components.
prep time: 35mins for the beetroot.
cooking time: 15mins for the ice-cream + cooling time.
total: 50 minutes + cooling time.
taste: 9/10. This is a delicious and healthier chocolate ice cream that has a beetroot finish to it. It was really surprising and the more you eat the better it tastes. I think it just takes a minute for your mind to forget you’re eating beetroot in ice-cream!
would I make it again: Yes. I think for something different to share with friends I’d like to make this. Also it is a make ahead dessert, which I always good.
Thermomix. Two years ago I would never have believed how big an impact this one kitchen appliance could have on my life.
After vowing that I would never buy one because “no kitchen appliance could be worth that money” I went to a friend’s demonstration with an open mind to “have a look”. Halfway through I was sold. It took me two weeks of “justifying” before I decided and took the plunge.
Now, my only regret is that I didn’t have one sooner. Not only has it changed the way I cook, made me even more creative in the kitchen, saved me time and money but it has introduced me to so many people I never knew. I am so grateful to say that I have 228 special clients and I really enjoy showing people just what this amazing little machine can do. Just this week I did a home demonstration for a lovely group of people and some of their faces were gorgeous. The surprise of milling raw sugar to icing sugar in just 9 seconds; the fact that it will chop one clove of garlic into tiny pieces; and being able to make soup while steaming ribbon vegetables and chicken then turning part of the soup into a sauce to pour over the chicken. The pièce de résistance, chocolate custard made in the Thermomix in 7 minutes, no packet mix or stirring required. 🙂
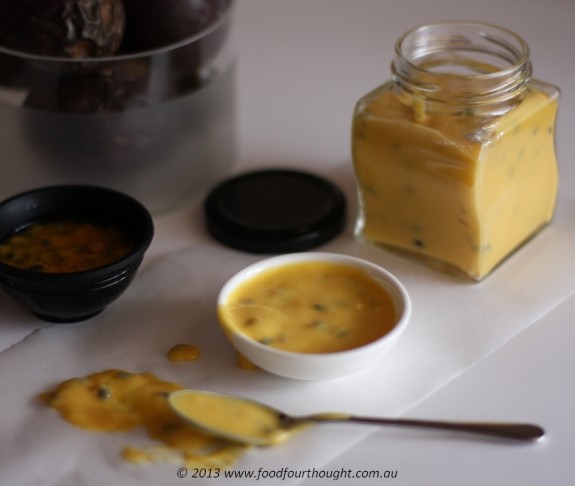
I have always loved being able to make my own preserves and relishes from scratch. An extension of that is being able to give jars of them to friends as gifts. This recipe is perfect to make and give as a gift. It is also fabulous for those times when friends “pop in” unexpectedly. If you have some mini tart cases, meringues or even some phyllo pastry available, you can create an amazing treat.
I recently wrote about my joy at being given a bag of passionfruit and what I had decided to do with them all. Part of that was making this delicious passionfruit curd for my Passionfruit Cupcakes.
My favourite way to eat this curd is simply stirred through greek yoghurt but I thought I’d be a little fancy in case you want to be able to serve it as a dessert also. This is also something that I love to make for friends as gifts. So when you wonder what you can make in your Thermomix for a Christmas gift, why not try this recipe.
passionfruit curd – (recipe adapted by Fiona at Food 4 Thought from here).
makes approximately 1 litre
Ingredients
200g raw sugar
180g butter, cubed or softened
30g lemon juice
6 eggs, lightly beaten
200g passionfruit pulp (15 – 20 passionfruit – depending on size)
Preparation
Add sugar to TM bowl and mill for 3 seconds on speed 9.
Scrape around sides of bowl, insert butterfly and add remaining ingredients. Cook at 90°C for 11 minutes on reverse, speed 4. Use steamer basket on top of lid instead of the measuring cup as it will allow more steam to be released and give a thicker curd.
Pour into sterilised jars and refrigerate until needed.
sweet shortcrust pastry – (recipe adapted from original by Michelle Cranston from “Marie Claire – Hot”).
makes 2 small tart cases (10cm x 2cm)
Ingredients
10g raw sugar
50g butter
100g plain (all-purpose) flour
1 tablespoon cold water
Preparation
Add sugar to TM bowl and mill for 10 seconds on speed 9.
Scrape down sides of bowl, add butter and flour. Set dial to closed lid position and knead for 30 seconds on Interval speed.
Scrape down bowl, add cold water, set dial to closed lid position and knead for 30 seconds on Interval speed.
Remove mixture from bowl and form into a disc. Wrap in plastic and refrigerate for 15 minutes. Once slightly firm, remove plastic and divide into 2. Using a rolling pin and thermomat, roll out each portion to approximately 2mm thickness and line each tart case. Place back into refrigerator for further 15 minutes, and heat oven to 170°C with the fan on (or 180°C for non-fan forced oven). Remove cases from refrigerator and prick the base with a fork, line with greaseproof/non-stick paper and fill with rice/baking weights. Place the cases on a baking tray and in the oven. Cook for 15 minutes, remove paper and weights and return cases to the oven for 2 – 3 minutes until they look cooked and dry. Remove and allow to cool.
Fill the tart cases with passionfruit curd and top with cream or yoghurt and passionfruit pulp.
My tips/alterations: PASSIONFRUIT CURD – *Once the curd is cooked, taste it. If you feel you can still taste the eggs, cook it for an additional minute at 100°C. Use this curd for anything, filling a meringue layer cake, inside cupcakes, or my favourite, stirred through some Greek style yoghurt. *If you store this curd in sterilised jars it will keep (in the refrigerator) for several months. *I found the easiest way to remove the pulp from the passionfruit was with a dessert spoon. I did them all before starting the recipe. TART CASES – *You can make these cases then store them in the freezer for several weeks. If you have a filling you would like to cook in them, simply add it to the tart case and put them in a preheated oven straight from the freezer, there’s no need to thaw them out. If you would like to use them with the Passionfruit curd, remove them from the freezer and allow them to defrost on the kitchen bench before filling them with curd. *The amount of cold water required may vary from time to time (due to flour differences, etc), adjust it as you need to. *I have made these with cold and room temperature butter and each works as well as the other. Just be careful not to overwork (over mix) the pastry. *When you remove them from the refrigerator to roll it out, work quickly as the pastry becomes slightly sticky as it comes to room temperature.

ease: 7.5 – 8/10. The curd couldn’t be simpler and the pastry is easy once you’ve done it a couple of times.
prep time: 15-20mins for the curd (the passionfruit take the time).
cooking time: 15mins for the tart cases in the oven + cooling time.
total: 35 minutes + cooling time.
taste: 9/10. This pastry has the snap that you want as your spoon goes through it. The passionfruit curd is delicious with the perfect amount of sweetness to compliment (and not overpower) the passionfruit.
would I make it again: Yes, yes, yes. This is going to be a staple in our house, especially when anyone is willing to pass with a large bag of passionfruit. 🙂
So what about the whole conversion thing. I’ve listed the recipes side by side and given you some explanation.
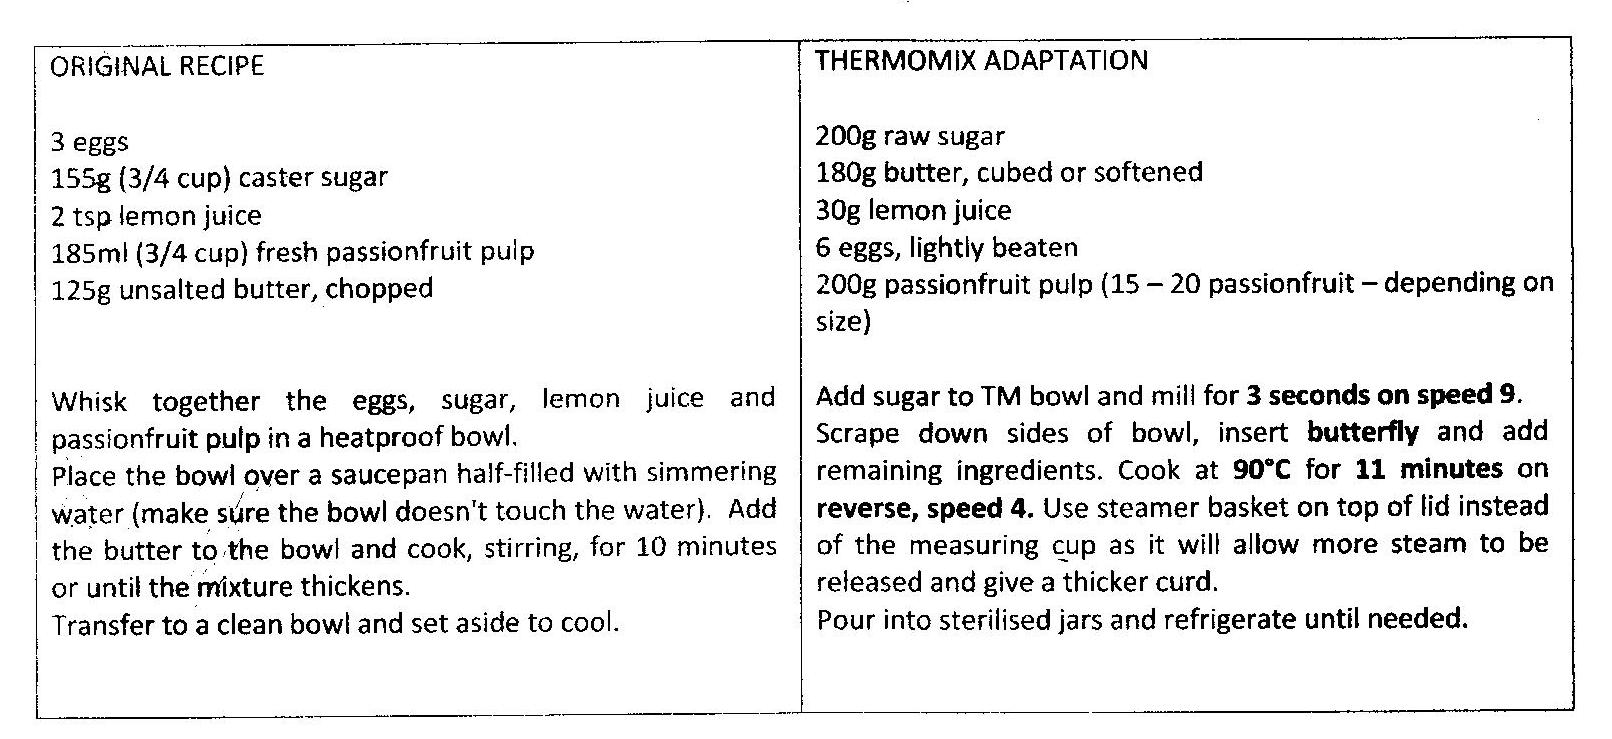
1. We make our caster sugar from raw sugar.
2. Because we can control the temperature, instead of using over a pot of simmering water we can just use the TM bowl. To work out the temperature and the speed I just looked at what we do for the lemon curd and custard and did something similar.
3. To get the mixture to thicken on the stove there is no lid on it. To create the same effect with the TM I just remove the MC and use the simmering basket on the TM lid.
4. Converting recipes can be a little bit of trial and error at first but persist with it and you will have your favourite recipes done the Thermomix way in no time.
I hope this helps you to convert your recipes 🙂
Two other posts that might help with recipe conversion –
– Jo Whitton does some amazing things with the Thermomix and these are some of her tips.
– Forum Thermomix is a place where many questions can be answered and this thread might be useful.
I remember my first few weeks of owning a Thermomix. Like many people, I was unsure about how it really worked or what I had to do. My feelings were a mixture of fear and excitement all rolled into one. I was so pleased to have this amazing machine on my kitchen bench but also wondered what I was supposed to do with it?
I’m so pleased that after a little trial and no real error I got the hang of it. Now I love that I can just look at a recipe and know that I can adapt it to the Thermomix easily.
There are also so many other things that are (still surprising to me and) fabulous about this little machine.
I still love several things that the Thermomix can do so easily:
– Chop 1 (small) clove of garlic (my food processor NEVER did this);
– Make 1 litre of chicken stock in 30 minutes (without me even checking it);
– Clean my vegetable drawer out and make Vegetable stock concentrate that will then keep for 3 months in the fridge;
– Homemade butter in 2 minutes THEN make it spreadable or flavoured;
– Being able to steam while cooking soup, and all in one machine (pot);
– Salad in 2 seconds (literally);
– Chop onions in 2 seconds, which means I NEVER have to chop an onion again;
– Custard (like Nanna used to make) in 7 minutes.
What’s your favourite thing that the Thermomix does so easily?
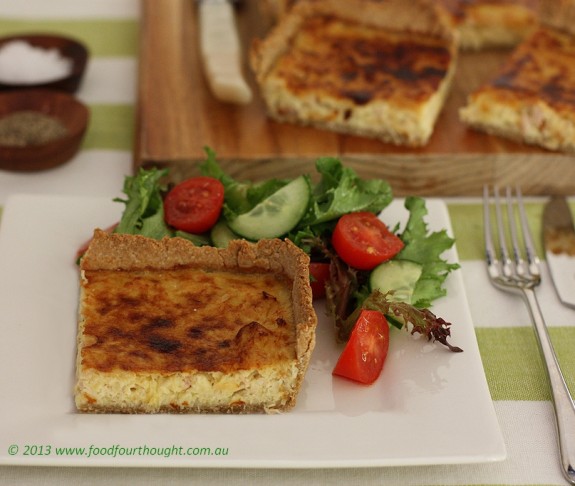
This recipe was one that I made up after looking at a couple on the internet. In the near future I’ll talk about how to adapt recipes because I know a few people want to know how to do it. For now, I hope you enjoy this recipe.
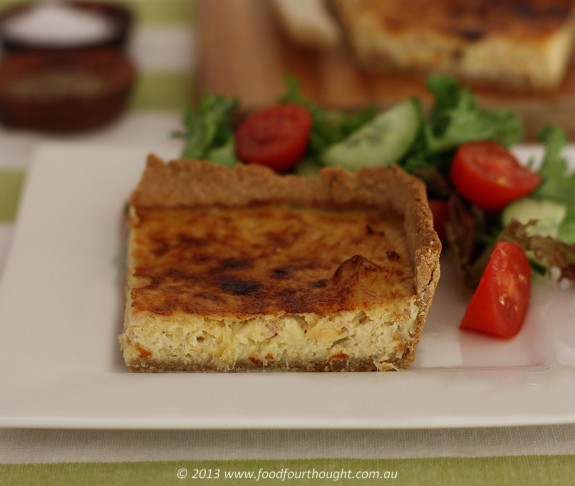
leek and bacon tart (recipes by Fiona at Food 4 Thought).
makes 20x30cm tart (enough for 4 adult as a meal with salad)
pastry (adapted from a recipe in Rainbow Recipes by Aileen Sforcina)
Ingredients
200g whole wheat grain
50g mixed seeds
70g water
10g olive oil
½ teaspoon sea salt or to taste
Preparation
You will need a tart tin, rolling pin, Thermomat and/or non-stick baking paper.
Place grain into TM bowl and mill for 50 seconds on speed 9. Add seeds and chop for further 10 seconds on speed 7.
Add remaining ingredients and mix for 5 seconds on speed 5 to combine. Remove from TM bowl, roll out and line tart tin. Prick base with fork and set aside while making filling.
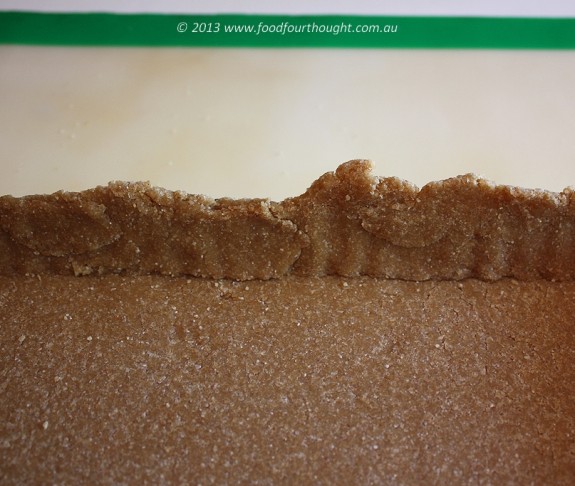
My tips: *When you roll this out make sure it isn’t too thick. If you get any holes just tear of a piece of pastry and patch it (as shown in my photos). When I roll my pastry out I use my Thermomat on the base and a piece of baking paper on top. This means that I don’t need any flour and it won’t stick. *You can make the pastry cases ahead of time and store them in the freezer for several weeks. When you want to use them, simply put them into a pre-heated oven straight from the freezer.
ease: 9/10. This is the easiest (and healthiest) pastry I’ve ever made.
prep time: 5 minutes
cooking time: 0 minutes in oven (no prebaking required)
total: 5 minutes
filling
Ingredients
50g Parmesan cheese, cubed
450g leeks, washed and roughly chopped
120g bacon, roughly chopped
1 tablespoon olive oil
100g white wine
Sea salt & pepper, to taste
120g whipping cream
3 eggs
Preparation
Preheat the oven to 200°C (190°C fan-forced). Place cheese into TM bowl and mill for 10 seconds on speed 9. Remove and set aside.
Add leeks to TM bowl and chop for 5 seconds on speed 5. Remove from bowl and set aside. Add bacon to TM bowl, chop for 2 seconds on speed 5. Add oil and cook at 100°C for 3 minutes on reverse, soft speed with MC off.
Add leeks to TM bowl, along with white wine, salt & pepper. Cook at 100°C for 15 minutes on reverse, soft speed with MC on.
Once cooked, add cream, then eggs and approximately two-thirds of cheese. Mix for 30 seconds on reverse, speed 3 or until well combined. Pour mixture into prepared pastry, sprinkle with remaining cheese and bake for 30 – 35 minutes until filling is just set. Remove from oven and allow to sit for 5 minutes before removing from tin.
Serve warm or cold with salad. Use extra seasoning if necessary.
ease: 9/10. Nothing too hard.
prep time: 15 minutes
cooking time: 35 minutes in oven
total: 50 minutes
My tips: *You can use pancetta pieces instead of bacon for a richer flavour and substitute the wine with stock if you prefer. *I always use full fat cream when baking otherwise you might find that it separates a little. Make sure you add the cream THEN the eggs or you will cook the eggs with the heat from the leeks and bacon. *If you don’t want cheese on top just add it all into the filling mixture. *You might find that the tart browns quickly on top because of the cheese. If you prefer it less coloured you have two choices. 1. add the cheese to the top halfway through the cooking time in the oven.; or 2. follow the recipe as is and just put a piece of foil over the top if it gets too brown for your liking. *This keeps for several days in the fridge.
taste: 9/10. This pastry was delicious. It almost had a nutty flavour because of the grain and seeds. Really crunchy, even after being in the fridge for several days. The flavour of the filling was quite intense given the small amount of ingredients that went into it. We were also fortunate enough to have this for lunch for several days as we had leftovers. G doesn’t like quiche of any description but he loved this tart.
would I make it again: Yes. Easy, healthy, delicious and cheap to make! Does it get any better?
I love showing people the amazing features of the Thermomix. Watching their faces light up when we create icing sugar from raw sugar in just 9 second and 2 litres of fresh fruit sorbet in 2 minutes with no artificial colours, flavours or preservatives. The smallest, smartest kitchen machine as it is known is certainly just that. It is very different to any other kitchen appliances. I can say that because I used to own many of them.
In actual fact, I’m sure I used to own every kitchen appliance known to man! Our kitchen has minimal bench space but that didn’t stop me having a large food processer, juicer, rice cooker, bread maker, ice cream machine, yoghurt maker, electric steamer, stick blender, coffee grinder, electric scales and many other smaller gadgets for chopping, grinding and mixing.
Probably the most precious piece in my “collection” was my black and stainless steel KitchenAid. It always had pride of place on my bench. When I decided to purchase the Thermomix it was because of the incredible features that were so different to any of the other machines that I owned. Being able to make things that I had never tried before was very appealing but one of the main things was that I could cook dinner without having to stand in the kitchen for hours on end. I was slightly nervous when I first started using the machine but found it so simple that it actually became exciting. The more I used it the more I loved it. At the beginning I kept all of my other appliances for the first 3 months, just in case. I must say, with my hand on my heart, that I didn’t use any of them at all. Bitterly disappointing, given the money I spent on them but after selling them half the cost of my Thermomix disappeared along with them :).
During our demonstrations there are always some common questions. One that I seem to have been asked a lot lately is about using the Thermomix for cakes, especially given that the KitchenAid is so good at it. In my opinion the Thermomix is just as good, if not better. This question inspired me to make this recipe because it is one that I used to make the filling for in the beautiful mixer and now make (MUCH EASIER) in the Thermomix.
If you have a favourite cake recipe for the Thermomix I’d love to know about it.
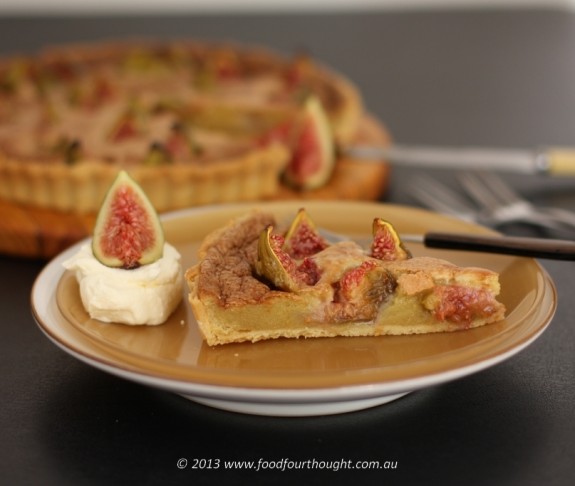
fig and brown butter tart (recipes adapted from Marie Claire “hot” by Fiona at Food 4 Thought).
makes 1 x 22-24cm tart or 4 x 10cm tarts
pastry
Ingredients
30g raw sugar
200g plain (all purpose) flour
100g cold unsalted butter
2 tablespoons of ice cold water
Preparation
Place sugar into TM bowl and mill for 3 seconds on speed 9. Scrape around sides of bowl, add flour and butter. Chop for 10 seconds on speed 5 until the mixture resembles breadcrumbs. Add cold water then place dial on closed lid position and knead for 1 minute on interval speed/dough mode or until the mixture comes together. Wrap the dough in plastic wrap and place in freezer for 10 – 15 minutes. Roll the pastry out as thinly as possible (the easiest way to do this is on a Thermomat with a piece of baking paper on top of the pastry). Line a 22 – 24cm tart tin (with a removable base). Chill for a further 10 – 15 minutes in the freezer.
Preheat the oven to a 180°C. Remove base from freezer, prick with a fork, line with baking paper and pour weights (rice, dried beans, pie weights, etc) on top of the paper and bake in the oven for 10 minutes. Remove the paper and the weights, return base to oven and cook for further 10 minutes until just slightly golden. Remove from oven and allow to cool.
ease: 8/10. This isn’t really difficult, just a little fiddly with the blind baking
prep time: 15 minutes + chilling time
cooking time: 15 minutes in oven (can be done ahead)
total: 30 minutes + chilling time.
filling
Ingredients
190g unsalted butter, cubed
8 – 12 fresh figs, depending on size
150g raw sugar
3 eggs
30g plain (all purpose) flour
Preparation
Preheat the oven to a 180°C. Place butter into small pan and cook over medium heat until it become a nutty colour. This will take between 5 – 10 minutes. In the meantime, place the figs on the chopping board with the steam facing up. Cut in half, stopping two-thirds of the way down, then repeat so that the figs look like they are quartered but are joined at the bottom. Open them up slightly and arrange in the pastry base.
Place sugar into TM bowl and mill for 3 seconds on speed 9. Scrape around sides of bowl, insert butterfly and add egg and flour. Whip for 1 minute on Speed 4. Pour the hot (warm) butter into the egg mixture and continue to beat for 30 seconds on speed 4. Pour the filling over the figs and bake for 25 minutes or until the filling is cooked and golden brown.
Allow to cool completely before serving with a dollop of cream.
My tips: *You can make the pastry cases ahead of time and store them in the freezer (before blind baking them) for several weeks. When you want to use them, simple put them into a pre-heated oven straight from the freezer. This pastry was divine. Really crunchy, even after being in the fridge for several days. *I would have used the TM to melt the butter but it needs to become nutty brown. I don’t find the TM gets hot enough to do so hence I used a small pot.
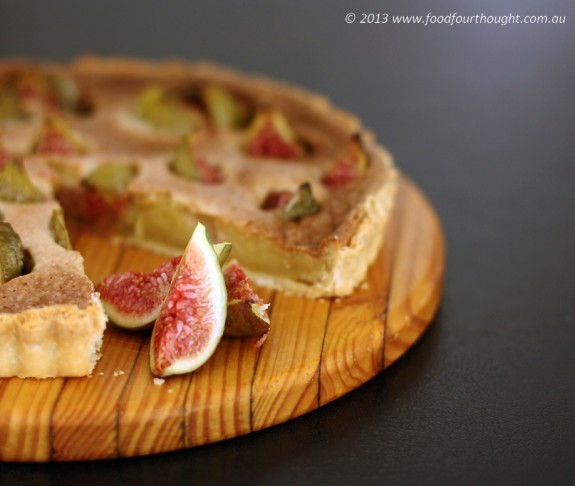
ease: 7.5/10. There are a few components to this dish but believe me, they are worth it.
prep time: 15 minutes
cooking time: 25 minutes in oven
total: 40 minutes + cooling time.
taste: 9/10. We loved this tart as did many others who tried some for us. The pastry was crunchy, the filling soft and buttery and the figs….sublime.
would I make it again: Yes. It is delicious!
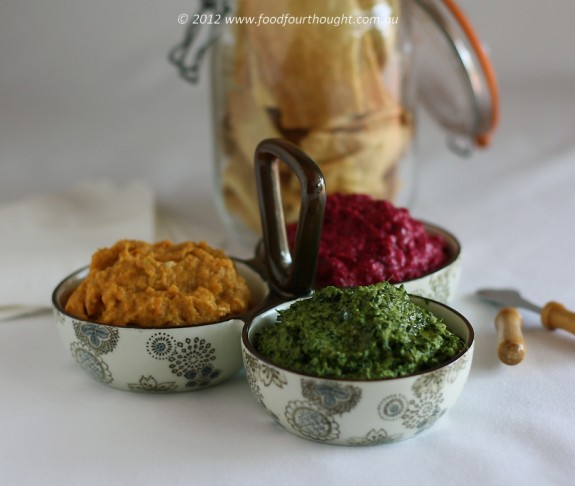
I’m sure, like many other people, I find the beginning of a new year a time for reflection over the year(s) past. I like to recap on lessons learnt, think about how I want the next year to be and sometimes even have a loose plan of action.
I used to have a New Year’s resolution for the start of each year, usually involving losing weight, becoming fitter, eating better or some other promise to myself. However, I gave up making these resolutions sometime ago because I felt like I was setting myself up for failure. I’d be diligent for the first couple of weeks and then be really mad with myself when I didn’t carry through.
So this year there are no false promises. I know we will be eating better because I’m making things from scratch. It might sound like cliché but I know we feel healthier for doing so. I spoke to one of my wonderful clients a few days ago and she told me that her family feels exactly the same. That by simply not having preservatives and additives in their diet anymore they are feeling healthier. I love it when I hear this from others because I always tell people that but it is difficult for me to actually prove it to them.
All this talk of healthy eating and the New Year inspired me to want to share some of my healthy dip options and my favourite cracker recipe with you. Use these for your New Year’s Eve party or simply when you have guest for a BBQ in the summer months.
To help out I thought I’d list the specific dietary benefits for the dips below. Of course you can adjust these to suit your particular diet. Remember to check out all of the tips**, find out how I make these one after the other without washing the bowl :).
Dairy-free – healthy green dip and roast pumpkin hummus
Nut-free – roast pumpkin hummus and beetroot dip
Low-fat – healthy green dip, beetroot dip and roast pumpkin hummus
Gluten-free – healthy green dip, beetroot dip and roast pumpkin hummus
Vegetarian – healthy green dip, beetroot dip and roast pumpkin hummus
Vegan – healthy green dip and roast pumpkin hummus
What is your favourite dip to make in your Thermomix?
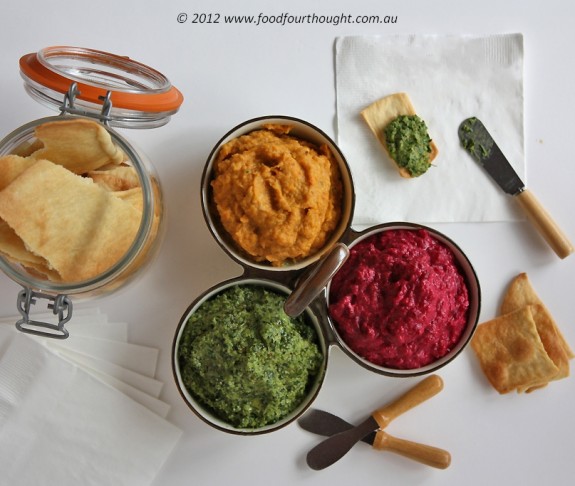
trio of dips – green goddess dip, roast pumpkin hummus, beetroot dip with homemade crackers (recipes by Fiona at Food 4 Thought).
green goddess dip – makes approximately 1 cup
Ingredients
1 clove garlic
50g lightly toasted (and cooled) pumpkin seeds
50g toasted (and cooled) almonds
80 – 100g greens (I used a combination of spinach, rocket, basil and coriander)
30g apple cider or white wine vinegar
30g extra virgin olive oil
½ teaspoon sea salt or to taste
Preparation
Place garlic into TM bowl and chop for 2 seconds on speed 7. Scrape down sides of bowl, add pumpkin seeds and almonds. Chop for 3 seconds on speed 6. Scrape down sides of bowl, add remaining ingredients and chop for 10 seconds on speed 5. Scrape down sides of bowl and repeat if necessary.
Serve with crackers or vegetable pieces.
My tips: *I like this dip quite sharp, however you can adjust the vinegar/olive oil ratio to make it a little more subtle if you prefer. *Use whatever greens you have and/or like the flavour of. Softer herbs are best. I often use the softer parts of the herb stalks in these dips rather than throwing them away. *If you would like this to be nut free use more pumpkin seeds in place of the almonds. You may need to use a little more olive oil if you do so. *To save power I roast the nuts and seeds in a 180°C oven at the same time along with the pumpkin for the roast pumpkin hummus. *If you don’t have a Thermomix, use a food processor to make this dip. *In this case the pumpkin seeds act as a cheese substitute and binds the dip together.
ease: 9/10.
prep time: 5 minutes.
cooking time: 15 minutes in oven (can be done ahead)
total: 5 minutes.
taste: 9/10. We loved this dip. It’s zingy, fresh, tastes great and is healthy.
would I make it again: Yes. I like to make this when I have greens and herbs leftover at the end of the week that I want to use up. Friday night drinks and dip was never better.
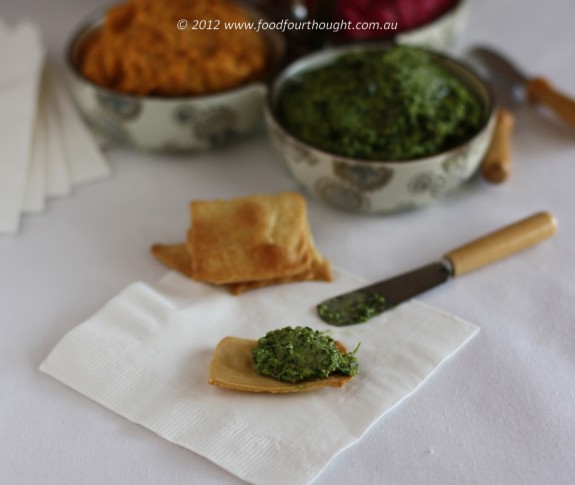
roast pumpkin hummus – makes approximately 1 cup
Ingredients
1 clove garlic
500g cold roasted butternut pumpkin (see tips below)
1 tablespoon tahini
20g lemon juice
10g extra virgin olive oil
½ teaspoon sea salt or to taste
Preparation
Place garlic into TM bowl and chop for 2 seconds on speed 7. Scrape down sides of bowl, add remaining ingredients and mix for 20 seconds on speed 4. Scrape down sides of bowl and repeat if necessary.
Serve with crackers or vegetable pieces.
My tips: *I started with 600 – 700g butternut pumpkin, peeled it and removed the seeds. Chopped it into approximately 4 – 5cm pieces, lightly coated with olive oil and sprinkled with salt, then cooked it in a 180°C oven for 20 minutes until softened. *Normally hummus utilises chickpeas but I wanted this to be purely pumpkin. *If you don’t have a Thermomix, use a food processor to make this dip.
ease: 9.5/10.
prep time: 5 minutes.
cooking time: 20 minutes in oven (can be done ahead)
total: 5 minutes.
taste: 9/10. This is deliciously different. It’s lighter and sweeter than normal hummus.
would I make it again: Yes. I think this would be great to serve to friends as something a little different.
beetroot dip – makes approximately 1½ cups
Ingredients
2 cloves garlic
10g olive oil
420g baby beetroot. drained (should end up with 300g beetroot)
100g greek style yoghurt
pinch ground cumin
½ teaspoon sea salt or to taste
Preparation
Place garlic into TM bowl and chop for 2 seconds on speed 7. Scrape down sides of bowl, add olive oil and sauté at 100°C for 3 minutes on speed 2. Remove the bowl from the base and allow to stand on the bench to cool, this will take approximately 3 – 5 minutes. Add remaining ingredients. Set dial to closed lid position and pulse on Turbo mix for 1 second, repeat. Check consistency and repeat if necessary.
Serve with crackers or vegetable pieces.
My tips: *Make sure that the bowl is cool before adding the remaining ingredients. *Be careful not to over process this as it can become sloppy. *You can substitute the yoghurt with sour cream if you prefer. *If you don’t have a Thermomix, use a food processor to make this dip. *If you want to make this a litte different, add a little bit of fresh dill or coriander.
ease: 9.5/10.
prep time: 7 minutes.
cooking time: 3 minutes
total: 10 minutes.
taste: 9/10. This is sweet yet a little earthy. A great summer snack.
would I make it again: Yes. The colour alone it quite impressive and it is good for us.
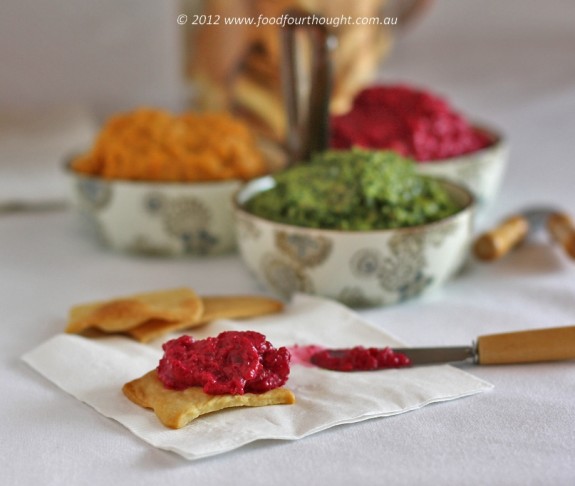
**If you would like to make these dips one after the other here’s how I do so.
– Chop all of the garlic at the beginning and set it aside. Add the amount that you need for each dip when required.
– Make the dips in the order of the recipes ie healthy green dip, roast pumpkin hummus then beetroot dip (lightest to darkest).
– Scrap out the bowl well using the spatula or a silicone spoon.
– To get the most dip of the blades and out of the bowl before moving to e next one, place the dial on closed lid position, Turbo for 2 – 3 seconds. Scrape out mixture then repeat if necessary.
yeast-free crackers (lavosh)
Ingredients
100g milk
220g strong bread flour
20g olive oil
70g softened butter
1 ½ teaspoon sea salt flakes or to taste
Preparation
Preheat the oven to 180°C (170°C fan-forced). You will need a baking tray, rolling pin and non-stick baking paper. Place all ingredients into TM bowl. Set dial to closed lid position and knead for 1 minute on Interval. Remove dough and place on Thermomat.
Divide dough into four. Place one piece in centre of Thermomat, place a piece of baking paper over the top. Roll dough out to approximately 3mm thick. Once rolled out, flip the whole thing over so that the baking paper is on the bottom with the Thermomat on the top. Then gently peel the Thermomat off and place the baking paper with the dough onto a baking tray. Place in a preheated oven and bake for 12 – 15 minutes, until golden brown. Repeat with the remaining dough.
Cool, break into pieces and serve.
My tips: *I sometimes use my Thermomix spatula to cut these into shapes before baking them. *You can sprinkle these with seeds, or grated Parmesan cheese. *Store in an airtight container for 1 – 2 weeks. *If you want these to be dairy free, you can try a non-dairy milk. I haven’t tried it personally but it should work.
ease: 9/10.
prep time: 20 minutes.
cooking time: 15 minutes in oven
total: 35 minutes.
taste: 9/10. These are better than the packets I used to buy from the supermarket. I can make these whenever I like and they cost me a quarter of the price!
would I make it again: All the time. These are now a staple in our house.
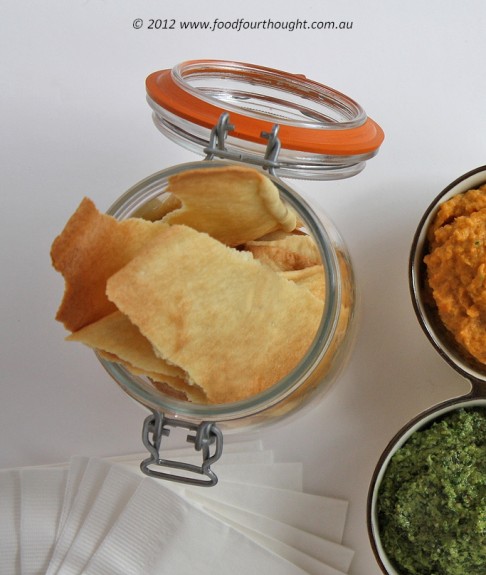
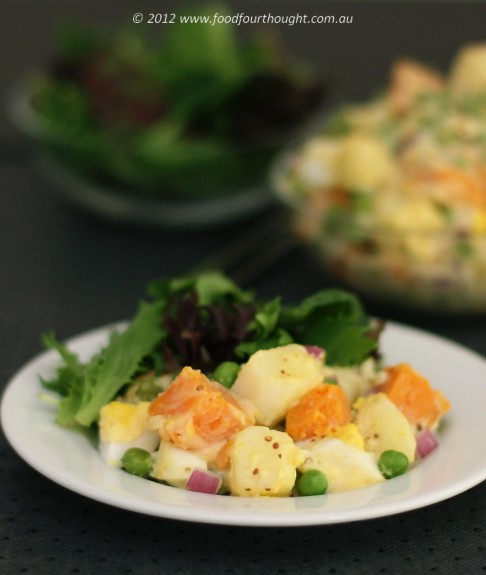
I was flicking through my recipes recently and noticed that everything I have posted in the past few months has been something sweet, a slice, cake or dessert. And as much as I LOVE all of these things I thought it was time for something a little different.
One of the things that I use my Thermomix for quite often is steaming. I know that some people don’t even use their Varoma dish (steamer), so hopefully this will inspire a few of you.
The Varoma name comes from Vorwerk (the company that design and manufacture this amazing product) and is a made up work combining the two things that occur when steaming. Vapour comes from the bowl through the steamer and Aroma is emitted, hence Varoma :). The dish itself has two layers and has (up to) a 2 L capacity.
So what can you create using your Varoma? How about these few things:
– Prosciutto rolled chicken breast in cream sauce
– Turkey wrapped in bacon with cranberry gravy
– Brown rice salad (one of my favourites!)
– Meatloaf with red sauce (Yes it is delicious)
– Sticky date puddings
– Chilli mussels
– Ricotta dumplings with Napoli sauce (from the new 2013 calendar)
There is so much more. I hope you enjoy this recipe and adapt it to suit your household.
potato salad with seeded mustard mayonnaise (recipe by Fiona at Food 4 Thought).
serves 4-6
seeded mustard mayonnaise (makes just over 2 cups)
Ingredients
2eggs
1 tsp dijon mustard
2 good pinches fine salt
50g white wine or apple cider vinegar
35g seeded mustard
450g grapeseed or rice bran oil (pre-weighed)
Preparation
Pour eggs into TM bowl, add dijon mustard and salt. If the eggs are from the refrigerator, heat on 37°C for 1 minute, speed 3, otherwise mix for the same without the heat.
Ensure the MC is on the lid with the opening facing up and the lid is secured in position. Set scales to zero and pour (and weigh) the vinegar into the MC. Turn the dial to speed 4. Pour the oil onto the lid (being careful that it doesn’t overflow) and allow it to drip into the bowl until it is all gone. Without stopping the blade, remove the MC and pour the vinegar into the bowl. Mix for a further 10 seconds. Stop the blade, add the seeded vinegar and mix for 5 seconds on speed 3. Check for seasoning and adjust as necessary.
Pour mayonnaise into airtight container and store in refrigerator until required.
My tips: *I always make this mayonnaise at least a day ahead as the flavour develops with time. *This recipe makes quite a bit. I think it depends on how much dressing you like on your salad as to whether you halve it or not. I think I like a little bit more than a half batch. If there is anything left over I’m more than happy to use it for something. *I know it is a little controversial not to use the butterfly but it works really well. Particularly if you weigh the vinegar into the MC. It has a dual purpose. With the TM 31 the MC always “floats” when you pour oil on the lid. Weighing the vinegar into the MC prevents that and also means that it is already organise for you to just pour straight in when needed. *You may find this a little sharp but the salad needs the flavour. *This will store in the refrigerator for at least a month. Just make sure you store it towards the back as it is usually colder and when you use it be careful not to cross-contaminate it. *You can use apple cider vinegar if you like. *I don’t use olive oil in my mayonnaise as it can be bitter and very strong. For a basic mayonnaise recipe go here
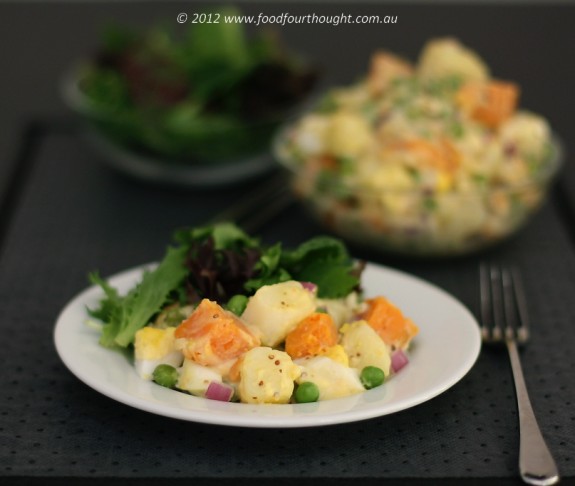
potato salad
Ingredients
1 litre water
6 eggs
600g sweet potato, peeled and chopped into 1½cm cubes
600g potato (ruby lou or royal blue), peeled and chopped into 1½cm cubes
250g fresh or frozen peas
75g red onion, finely diced or sliced thinly
250-300g mayonnaise
sea salt for seasoning
Preparation
Place water into TM bowl. Add simmering basket with eggs. Add mixed potatoes into the Varoma dish, leaving the top layer out. Cook at Varoma temperature for 15 minutes on speed 3. When finished, remove Varoma dish, set aside. Use the spatula to remove the basket and run the eggs under cold water before peeling.
Stir the potatoes to encourage even cooking, add the top layer into the Varoma dish and add the peas. Place the dish back in place and cook at Varoma temperature for 10 minutes on speed 1.
In the meantime, chop the onion, peel the eggs and chop into pieces the same size as the potatoes. Add to a large salad bowl. Once completed, check the peas are cooked and the potatoes are soft when pricked with a fork or knife. They should not be falling apart but just soft. Add the potatoes and peas to the salad bowl. Pour over the mayonnaise and stir gently to combine. Taste for seasoning and adjust as desired.
Allow to cool slightly and serve.
My tips: *I always use ruby lou or royal blue potatoes as I find they hold their shape better and do not break apart. *You can substitute beans and spring onions if you prefer and even add some crispy bacon for something different. *If you find the mixture too thick when the mayonnaise is added or you would like to add a little less mayonnaise, simply add a tablespoon of the cooking water. This will loosen it slightly but still keep it creamy due to the starch content. *I prefer to dice my onion in this case than use the Thermomix because I want it to be uniform in shape.
ease: 9/10.
prep time: 15mins.
cooking time: 25mins + 5minutes for mayonnaise
total: 45 minutes.
taste: 9/10. We loved this salad. Everything just worked so well together.
would I make it again: Yes. Summer is here! (I did this recipe at our Festive Flavours Cooking Class in South Perth.)
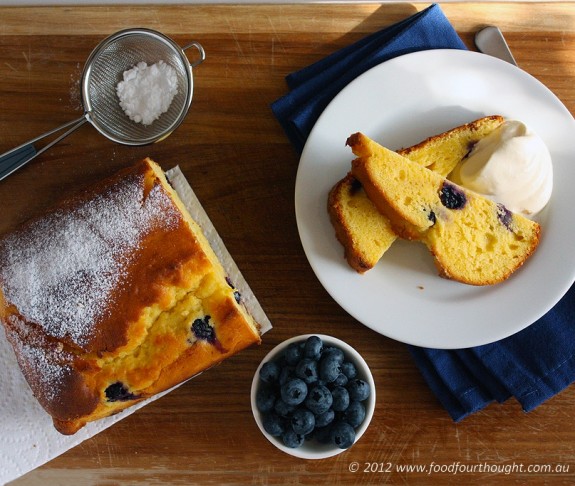
In a recent post I mentioned my effort to cook with ingredients that were in season.
I think a big part of what drives me to do so is shopping for fresh fruit and vegetables at local markets. When the new season produce is on the shelf I am like a kid in a candy store. The “ooh’s and aahs” flow freely from my lips. Often I am so excited that we end up with a glut of whichever ingredients happens to catch my eye.
This month it was blueberries. As you may know they are considered to be a “superfood”. This is taken from About.com – “They are very high in vitamin content, fibre and most importantly, antioxidants. In recent studies blueberries were found to be at the top of the list of fruits in their ability to destroy free radicals. Many consider this an important factor in preventing various types of cancer. Red wine has been touted for its antioxidant benefits, but blueberries have almost 40% more antioxidants than red wine.” So maybe a blueberry shake should be replacing that glass of red wine. 🙂
I decided to make something that used up lots of things that I had in my fridge that I wanted to finish off. So out came the yoghurt, the lemon curd and I grabbed one of the many lemons in my citrus bowl. While the best way to enjoy blueberries may be raw, they’re great used in all kinds of recipes and given my other ingredients I decided on a cake.
I found several recipes that I liked bits and pieces of and combined them into this. I was trying to sneak some gin in there (because lemon, blueberry and gin is a great combination) but alas, I think that would have been one step too far 🙂
blueberry, lemon, yoghurt cake – (recipe by Fiona at Food 4 Thought).
makes 1 loaf cake
Ingredients
160g sugar
Rind on 1 lemon, peeled
80g butter, softened
2 eggs
300g self-raising flour
60g lemon juice
150g greek style (thick) yoghurt
100g lemon curd
150g fresh blueberries
Preparation
Preheat the oven to 170°C with the fan on (or 180°C for non fan-forced oven). Line and/or spray a x x x loaf pan.
Add sugar and lemon rind to TM bowl and mill for 20 seconds on speed 10.
Scrape down sides of bowl, add butter and mix for 15 seconds on speed 4. Add butterfly, mix for 1 minute on speed 3.
With blade running on speed 3, add eggs one at a time then beat for 30 seconds.
Add flour and lemon juice, mix for 10 seconds on speed 1. Add yoghurt and mix for 10 seconds on speed 2.
Add lemon curd and blueberries, mix for 10 seconds on reverse, speed 1.
Pour into prepared loaf tin and bake for 40 – 45 mins at 170C fan-forced oven. Check if cooked by testing middle of cake with a toothpick. If it comes out clean it is cooked.
My tips: It is important not to overmix this batter and that is why I decided to do it in stages. This means that the ingredients are combined well without being overworked. *This cake is extremely moist due to the yoghurt, lemon curd and blueberries. Ensure it is cooked in the centre and cool in the tin slightly before unveiling, cooling completely on a wire rack and serving with whipped cream. *You can use yoghurt and lemon curd that you make in the Thermomix. *Make sure you don’t overmix the cake. It is nice to have (kind 0f) ribbons of lemon curd throughout the mixture.
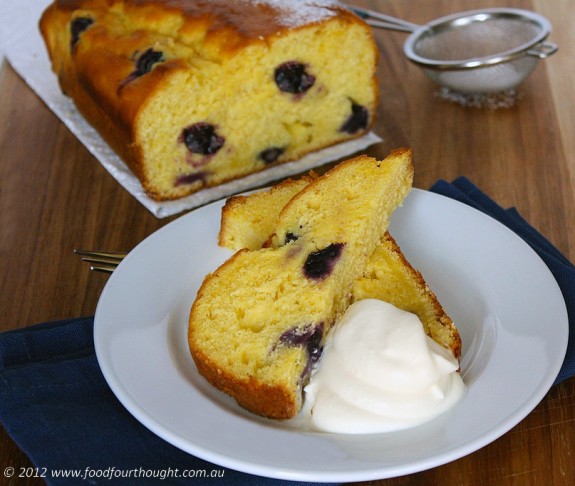
ease: 8.5/10.
prep time: 5mins.
cooking time: 45mins in the oven + cooling time.
total: 50 minutes + cooling time.
taste: 8.5/10. The lemon curd is like a soft ripple throughout the cake and the yoghurt gives it a tartness that I really like.
would I make it again: Yes. Because I can use up things that I would otherwise throw out! And it happened to taste really good.
|


